Tired of board games tumbling off shelves, pieces scattering everywhere, and boxes getting crushed under each other’s weight? You’re not alone. Board game collections have a sneaky way of taking over an entire room — but storing them vertically is the game-changer you’ve been waiting for.
Vertical storage isn’t just a space-saver — it makes your collection look organized, accessible, and honestly, really cool. Here’s exactly how to do it right.
Why Vertical Storage Works So Well
Stacking board games flat is the default, but it’s also the enemy of organized storage. Every time you want the game at the bottom, you’re lifting a tower of boxes and hoping nothing falls.
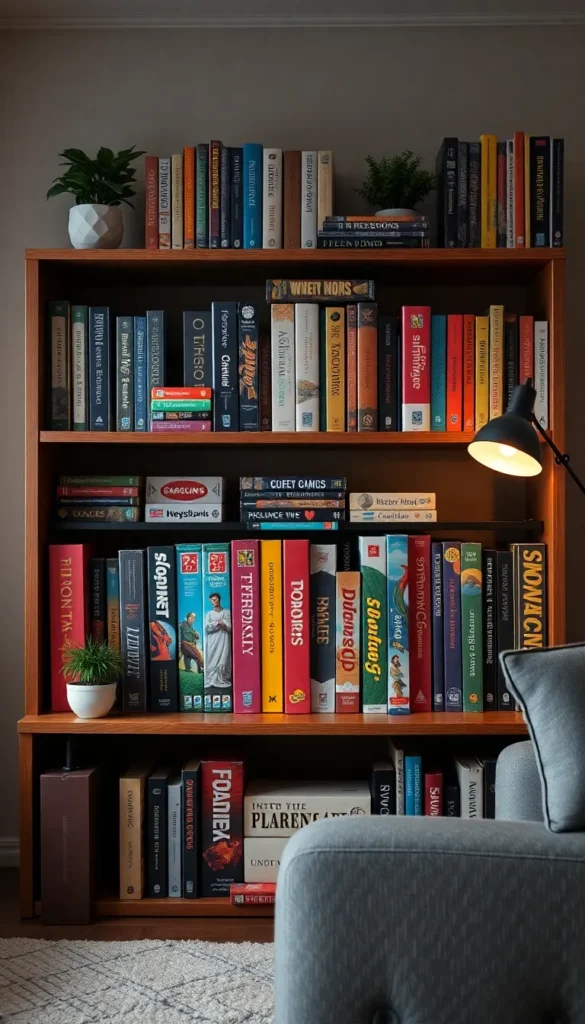
Storing games vertically — spine out, just like books — solves all of that:
- Easier to grab any game without disturbing the others
- Less crushing of box corners and lids
- More shelf space freed up since boxes stack tighter side by side
- Better visibility so you can actually see what you own
The only trick? Keeping them upright without toppling. That’s what the rest of this guide is about.
Step 1: Sort Your Games by Box Size First
Before anything goes on a shelf, group your games by box size. Tall, large boxes go together. Small card-game boxes go together. This prevents the leaning-tower effect and makes the shelf look intentional.
- Standard-sized games (think Catan, Ticket to Ride) store beautifully side by side
- Large, oversized boxes (Gloomhaven, anyone?) may need their own dedicated shelf section
- Tiny boxes and card games can go in a bin or basket together
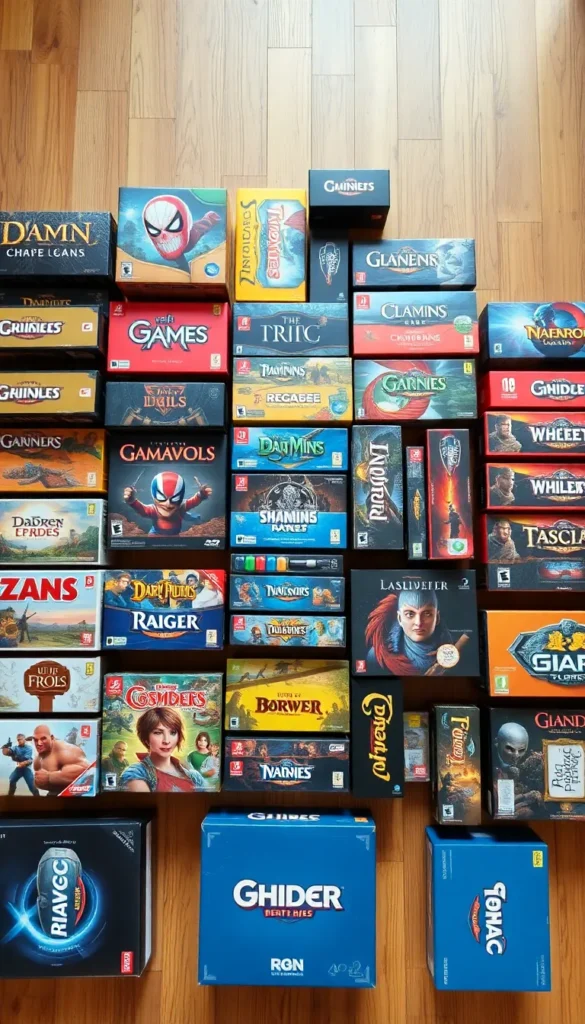
Don’t skip this step. Mixing sizes is the number one reason vertical storage collapses into chaos.
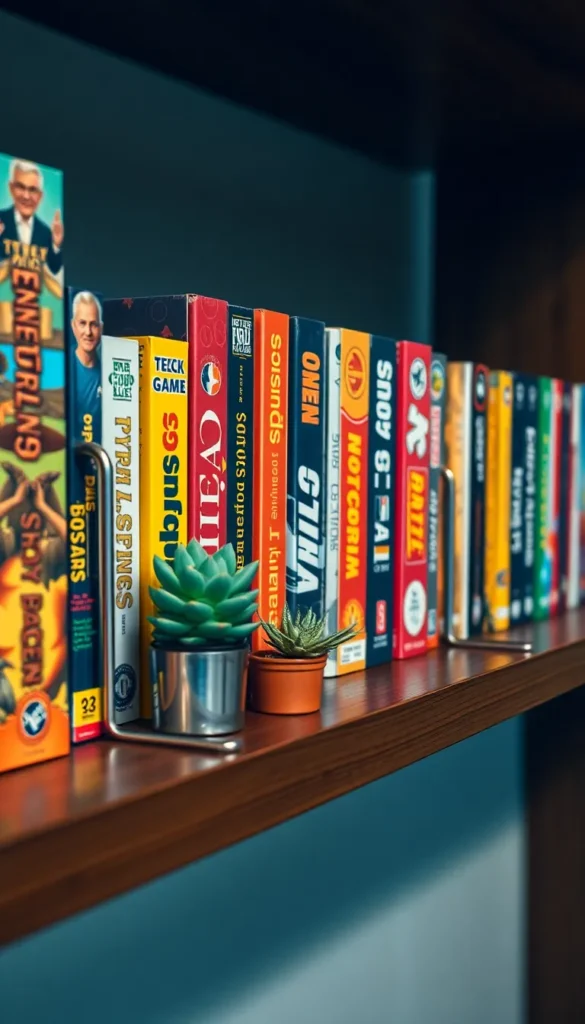
Step 2: Use Bookends or Shelf Dividers
Games aren’t books — they’re bulkier, heavier, and more awkward. Without support on both sides, they’ll lean and eventually tip.
Your best friends here:
- Sturdy bookends — heavy metal ones work better than plastic for heavier games
- Shelf dividers — these clip onto shelves and create little cubbies that keep sections upright
- Tension rods — a clever hack for inside cabinets, creating custom dividers between games
For deep shelves, you can even double-row smaller games in the back and taller games in front without losing access to either.
Step 3: Reinforce Boxes That Won’t Hold Up
Some board game boxes are flimsy. The lid pops off, pieces shift, and storing them vertically turns into a mess inside the box even if it looks fine from the outside.
Quick fixes:
- Rubber bands around the box keep lids snug during storage
- Ziplock bags inside the box keep pieces sorted so they don’t jumble when the box is tilted
- Sleeves or shrink wrap for boxes that are genuinely falling apart
- Foam inserts or small containers inside the box keep cards and components in place
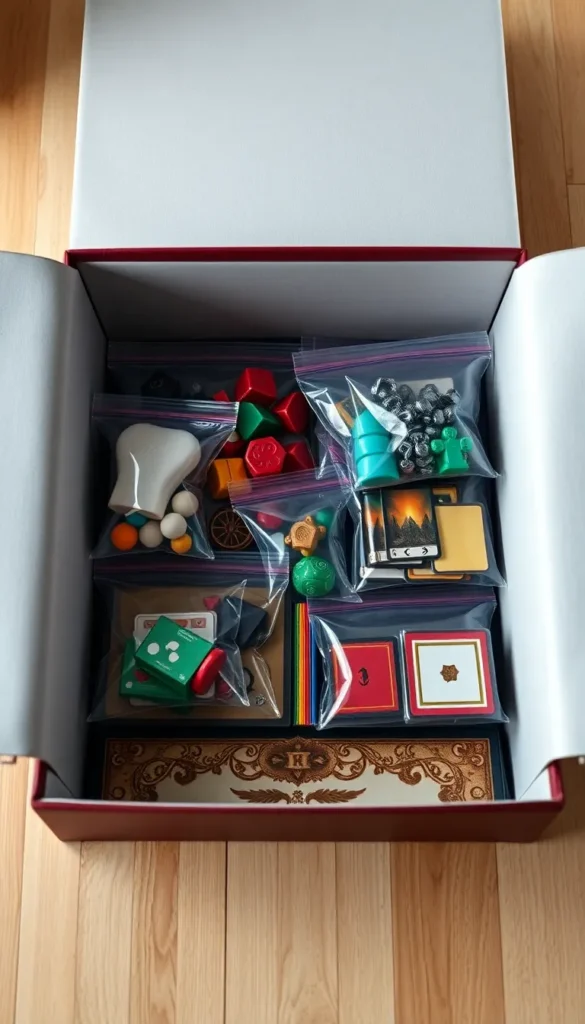
Taking five minutes to prep each box pays off every single time you go to pull a game off the shelf.
Step 4: Label the Spines for Fast Browsing
Most board game boxes have the title printed on the side — but not all of them do, and some are just too small to read at a glance. Fix this with simple spine labels.
- Use a label maker or print neat stickers with the game name
- Add a small colored dot to categorize by type (strategy, family, party, etc.)
- For identical-looking boxes, a label makes all the difference
This turns your shelf into something you can scan in seconds, not minutes.
The Payoff: A Shelf That Actually Works
Once everything is sorted, supported, reinforced, and labeled — the result is a shelf you’ll actually use. No more mystery stacks. No more digging. No more crushed corners or missing lids.
Board game night just got a whole lot easier to kick off.
Save this guide and share it with your fellow board game hoarders — because a well-organized shelf means more time playing and less time searching!