If you’ve ever stepped on a LEGO at midnight or spent twenty minutes hunting for one missing puzzle piece, you already know the struggle is very real. Kids’ toy chaos is practically a rite of passage — but it doesn’t have to be your permanent reality. With the right bins, a simple labeling system, and a toy rotation strategy, you can transform even the most overwhelming playroom into a calm, functional space. And the best part? Your kids will actually be able to find (and put away) their own things.
Step 1: Start With a Toy Purge
Before you organize a single thing, you need to know what you’re working with.
Pull everything out. Yes, everything. Check under the couch, behind the bookshelf, and inside that mystery basket by the door. Then sort into three piles:
- Keep — toys that are used regularly and loved
- Donate — items in good condition that your kids have outgrown
- Toss — broken pieces, incomplete sets, and anything that’s seen better days
This step alone will cut your storage needs in half. Don’t skip it.
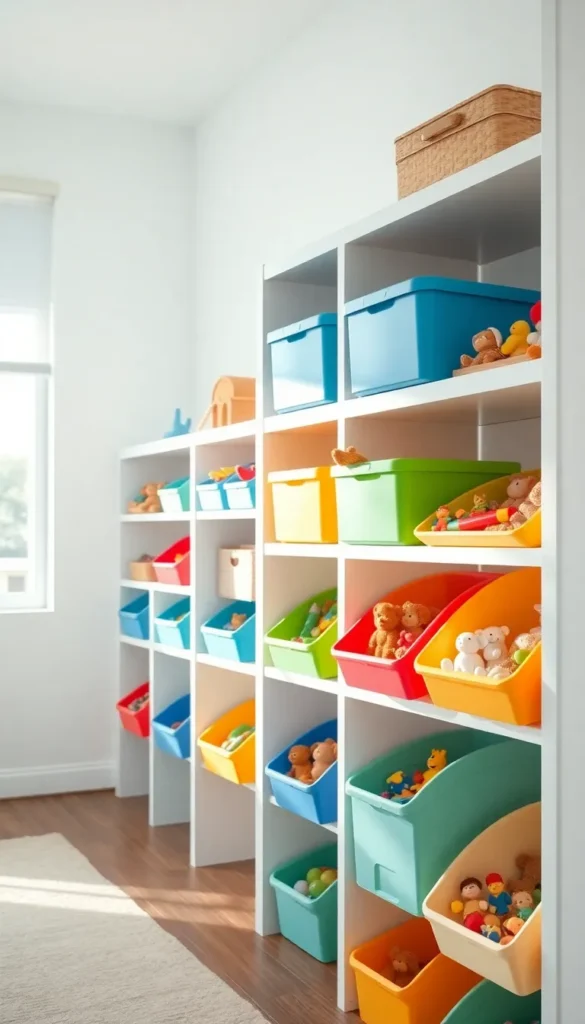
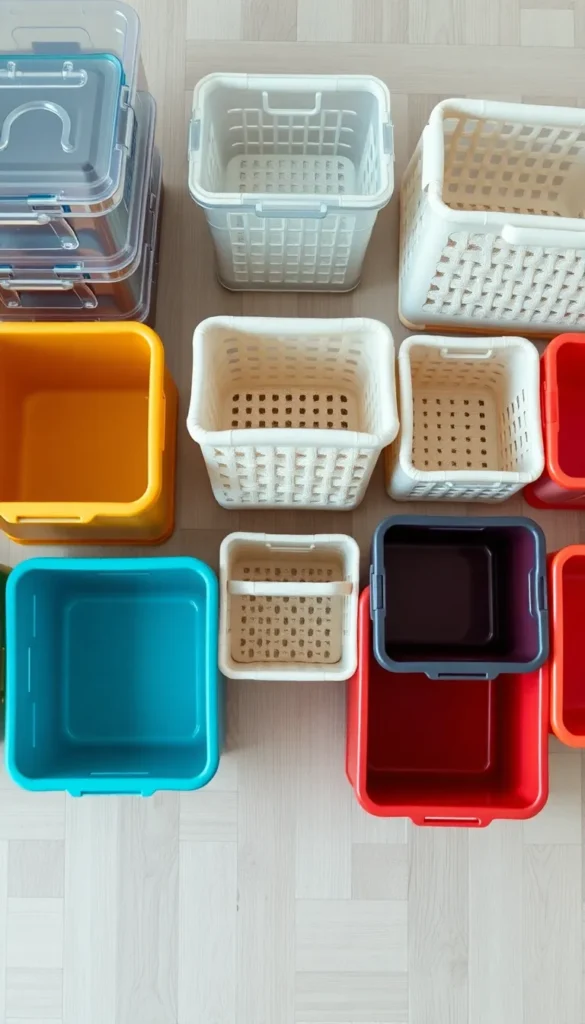
Step 2: Choose the Right Bins
Not all bins are created equal when it comes to toy organization. The goal is easy access for little hands and easy cleanup for everyone.
Here’s what works best:
- Open-front bins for items kids grab daily (stuffed animals, building blocks, cars)
- Clear stackable bins for arts and crafts supplies or small sets
- Fabric baskets for softer items like dress-up clothes or sensory toys
- Divided trays or drawer organizers for tiny pieces like game tokens or magnetic tiles
Stick to a consistent size wherever possible — it makes your shelves look cohesive and makes restocking toy rotation boxes much simpler.
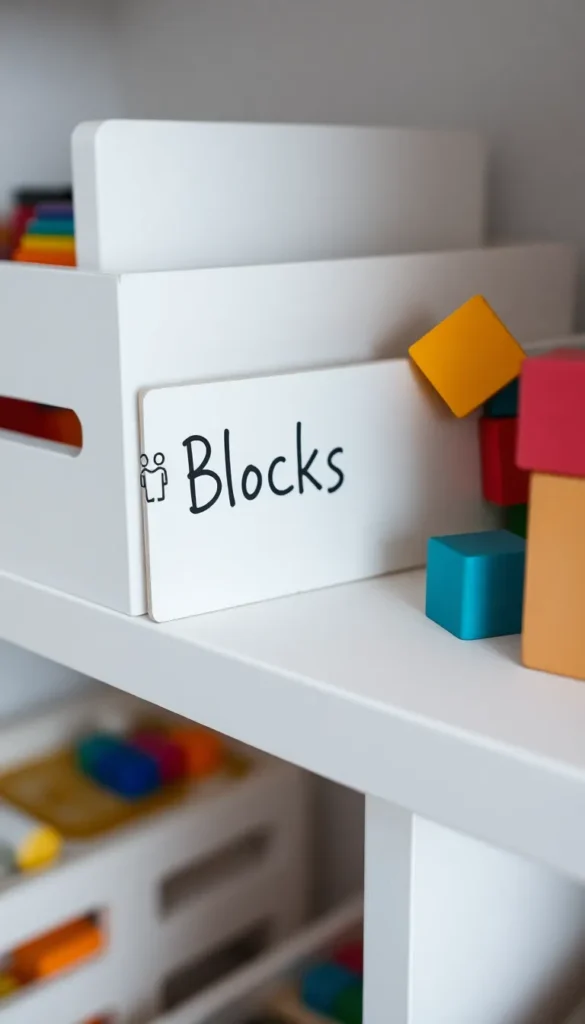
Step 3: Label Everything (Seriously, Everything)
Labels are the secret weapon of every organized playroom. They eliminate the “where does this go?” question and give kids ownership of the cleanup process.
For pre-readers, use picture labels. Print or draw a simple image of what belongs in each bin — a car, a crayon, a ball. Laminate them for durability and attach with velcro so you can swap them out as needs change.
For early readers, combine a picture with a one-word label: Blocks, Puzzles, Books.
For older kids, text-only labels work perfectly and feel more grown-up.
You don’t need a label maker (though they’re fun). Printed cardstock, chalkboard stickers, or even hand-written tags all get the job done beautifully.
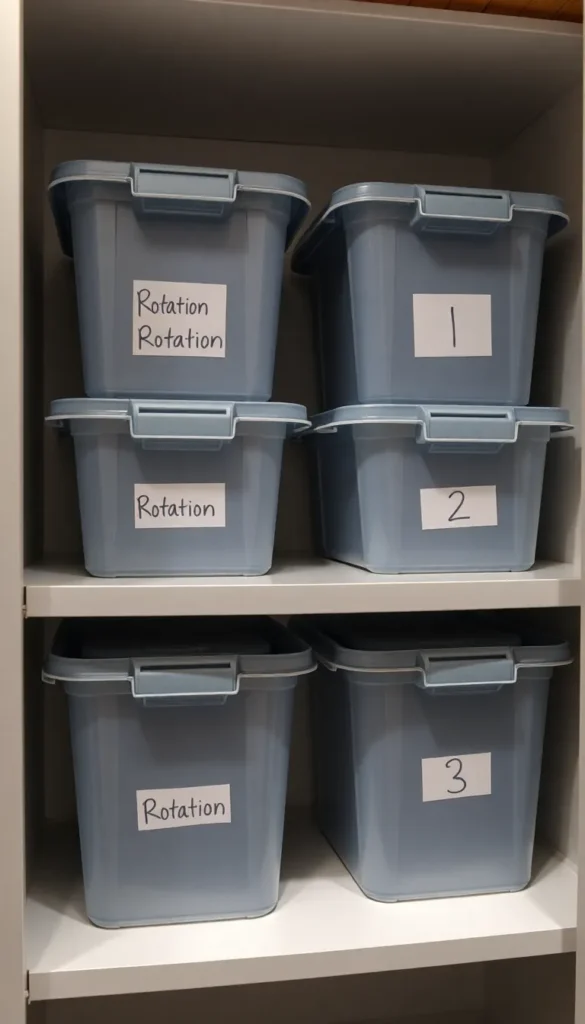
Step 4: Set Up a Toy Rotation System
This is the game-changer most parents overlook. Instead of putting every toy out at once, divide your collection into two or three groups and rotate them every few weeks.
Here’s how to set it up:
- Divide toys into sets — aim for 2–3 balanced groups with a mix of toy types in each
- Store inactive sets in lidded bins or a closet shelf, clearly labeled by rotation number
- Swap every 2–4 weeks — or whenever interest starts to drop
- Watch the magic happen — “new” toys create fresh excitement without spending a single dollar
Toy rotation also makes cleanup faster because there’s simply less stuff out at any given time. Less visual clutter means a calmer environment for both kids and adults.
Step 5: Maintain the System (Keep It Simple)
The best organization system is one that’s easy enough to actually maintain. A few habits that help:
- Do a 5-minute tidy each evening before bed
- Involve your kids — even toddlers can drop toys into labeled bins
- Reassess every season and remove anything that’s no longer being used
- Resist the urge to over-organize — the system should work for your family, not stress you out
The Takeaway
Organizing kids’ toys doesn’t require a Pinterest-perfect budget or a complete room makeover. With a solid purge, the right bins, clear labels, and a simple rotation schedule, you can create a space that’s easy to maintain and actually enjoyable to be in.
Save this article for your next playroom reset — and share it with a fellow parent who could use a little toy-chaos relief!