If you’ve ever opened a dresser drawer only to find a chaotic pile of clothes, you know the frustration of a disorganized space. The good news? A few simple dividers can completely transform your drawers from messy to magazine-worthy — and the system actually stays organized once it’s set up the right way.
Whether you’re dealing with overflowing socks, tangled belts, or mysteriously disappearing underwear, dividers give every item a home. Here’s exactly how to set it all up, category by category.
Step 1: Empty Everything Out First
Before you buy a single divider, pull everything out of your drawers completely. Yes, everything.
This gives you a chance to:
- Declutter — toss anything worn out, too small, or never worn
- See what you actually have before organizing it
- Measure your drawer dimensions so you buy dividers that fit
Wipe the inside of each drawer while it’s empty. A clean start makes the whole process feel fresh and intentional.
Step 2: Decide on Your Categories
This is where the magic happens. Instead of just “shirts” or “bottoms,” get specific with your categories based on what you actually own. Common drawer categories include:
- Everyday t-shirts
- Workout clothes
- Underwear
- Socks (by type — ankle, crew, no-show)
- Pajamas / loungewear
- Accessories (belts, scarves, hair ties)
The more specific your categories, the easier it is to find things in the morning rush.

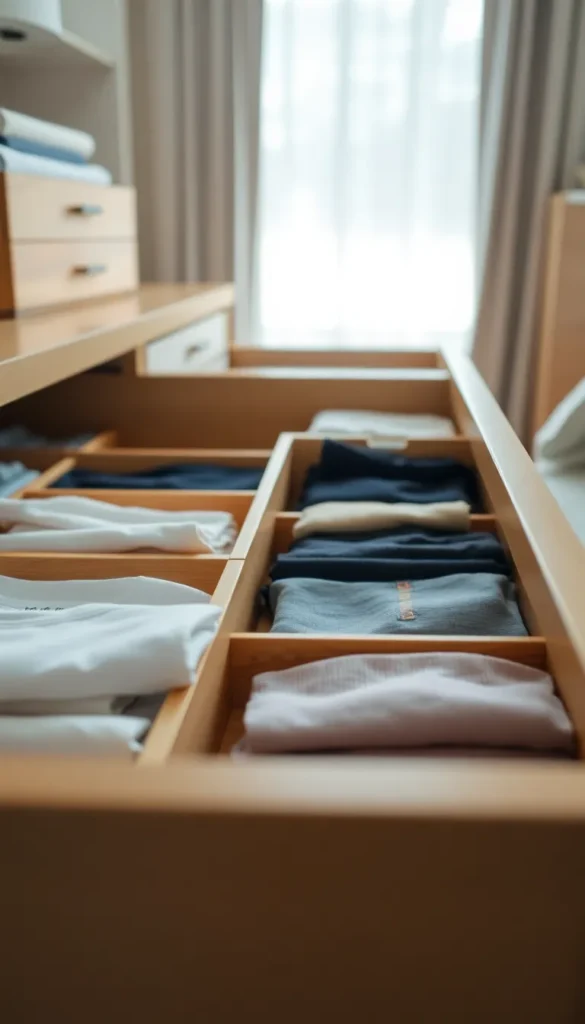
Step 3: Choose the Right Dividers for Each Drawer
Not all dividers are created equal. The type you choose should match what you’re storing:
- Adjustable bamboo or acrylic dividers — great for larger drawers holding t-shirts or folded pants
- Small compartment trays — perfect for accessories, socks, and underwear
- Fabric bins or inserts — ideal for bulkier items like sweaters or gym clothes
- Stackable organizers — a smart choice for deep drawers with limited real estate
Measure your drawer width and depth before purchasing. Most adjustable dividers expand to fit standard dresser sizes, but it’s always worth double-checking.
Step 4: Fold Using the File Method
Here’s a game-changer most people skip: fold your clothes vertically so they stand upright in the drawer like files in a cabinet. This is sometimes called the KonMari folding method.
Why it works so well:
- You can see every item at a glance without digging
- Clothes stay neatly folded instead of getting pulled apart
- You naturally use everything instead of always grabbing from the top

For socks, fold them into a small square or roll them — never ball them up. Balled socks stretch out the elastic and take up way more space than needed.
Step 5: Assign Each Section to One Category Only
Once your dividers are in place, commit to the one-category-per-section rule. This is what keeps the system from falling apart two weeks later.
A few tips to maintain it:
- Label sections if you share the dresser or if kids are putting away their own laundry
- Do a quick reset once a week — takes less than five minutes
- Return items to their section immediately after folding laundry
Mixing categories — even just a little — is how drawers slowly go back to chaos.
Step 6: Adjust as Your Wardrobe Changes
Your drawer system doesn’t have to be permanent. Seasonal swaps, new purchases, and changing routines are all reasons to reassess.
- Move heavy sweaters to storage bins when summer arrives
- Resize your divider sections if one category grows
- Revisit your categories every few months to make sure they still make sense
An organized drawer isn’t a one-time project — it’s a simple habit of tweaking as you go.
The Takeaway
Organized dresser drawers aren’t just about aesthetics — they save you time, reduce morning stress, and make your whole room feel calmer. With the right dividers and a category-based system, you’ll wonder how you ever lived without it.
Save this guide and share it with someone whose dresser could use a little love! 🗂️