If your bathroom drawers look like a tornado hit a beauty supply store, you’re not alone. Tangled hair ties, rolling lip balms, mystery bobby pins — it adds up fast. The good news? You don’t need a fancy organizing system or a big budget to fix it. A quick trip to the dollar store is all it takes to completely transform your drawers from chaotic to calm.
Start With a Full Drawer Dump
Before you organize anything, pull everything out. Yes, everything.
Lay it all on your counter and sort items into categories:
- Daily use – toothpaste, face wash, deodorant
- Makeup & tools – brushes, lip products, eyeliner
- Hair accessories – clips, ties, combs, pins
- Skincare extras – serums, patches, masks
- Miscellaneous – expired products, mystery items, things that don’t belong
Toss anything expired, empty, or unused. This step alone will cut your clutter in half. You can’t organize what you don’t need.
What to Grab at the Dollar Store
Here’s the secret: you don’t need specialty organizing products. Dollar store finds work just as well as the expensive versions. Look for:
- Small plastic bins or containers (usually found in the kitchen or office section)
- Ice cube trays – perfect for bobby pins, earrings, and small items
- Plastic drawer dividers – the adjustable kind are a huge win
- Small baskets or mesh bins for bulkier items
- Sandwich bags or zip pouches to group loose items temporarily
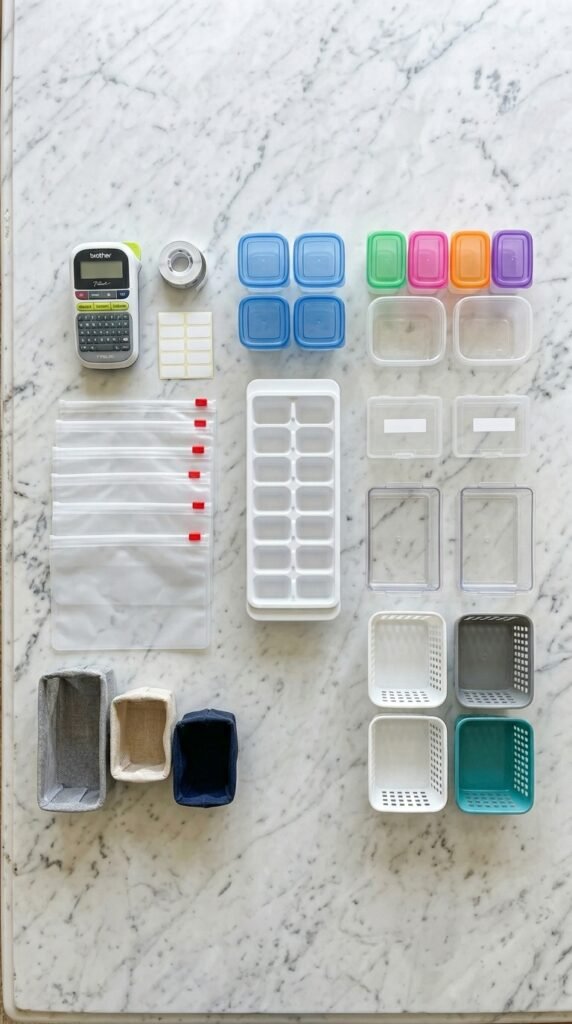
Spend $5–$10 and you’ll have everything you need. Pick up a few extras so you have options when you start arranging.
How to Measure and Plan Your Layout
Don’t skip this step — it saves so much frustration.
Use a tape measure or just a sheet of paper to note the interior dimensions of each drawer. Then group your sorted items by size and frequency of use:
- Items you reach for daily should sit in the front of the drawer
- Backup products and occasional-use tools go in the back
- Keep similar-sized items together so dividers fit cleanly
Sketch a rough layout on paper if it helps. Even a basic map like “hair stuff left, face stuff right” gives you a clear starting point before you start placing bins.
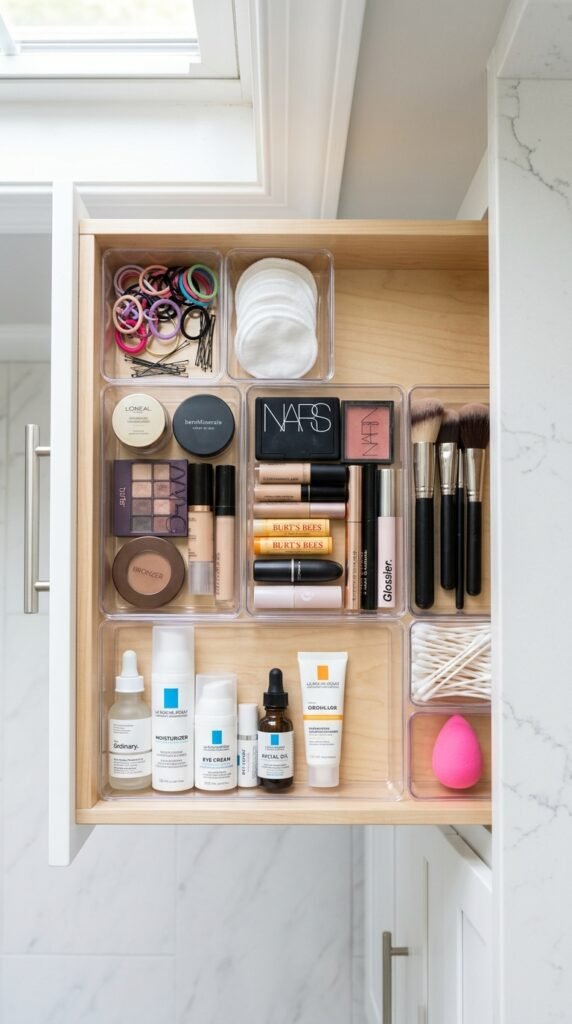
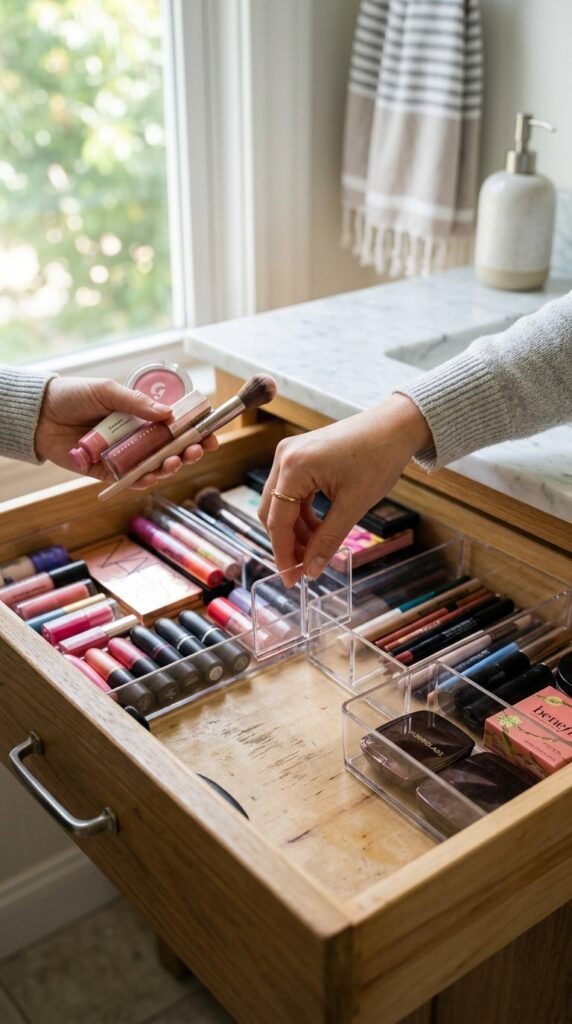
Placing Your Dividers Like a Pro
Now the fun part. Start with your largest bins first — they’ll anchor the layout. Then fill in the gaps with smaller containers.
A few pro tips:
- Ice cube trays are a game-changer for bobby pins, small rings, and hair pins — nothing rolls around anymore
- Tall, narrow containers work great for pencil eyeliners and lip liners standing upright
- Shallow lids or trays keep cotton rounds and face pads dust-free
- Group by habit — put your entire morning routine in one section so you’re not hunting around half-awake

If something doesn’t fit perfectly, don’t force it. Rearrange until the layout feels intuitive. You’ll know it’s right when you can grab what you need without moving anything else.
Maintaining the System Long-Term
The real magic isn’t just the setup — it’s keeping it that way.
A few habits that make a big difference:
- Put things back in their section immediately after use (yes, every time)
- Do a 5-minute reset every couple of weeks to catch any drift
- Swap out products when you buy new ones — don’t just pile on top
- Label bins with a marker or small sticker if you share the bathroom with others
The system only works if it’s easy to maintain. If something keeps ending up in the wrong spot, adjust the layout — not your habits.
Your Drawers, Transformed for Under $10
That’s really all it takes. A drawer dump, a dollar store run, and about 30 minutes of your time — and you go from digging through chaos every morning to having a bathroom that actually feels put-together.
No matching aesthetic bins required. No Pinterest-perfect labels needed (unless you want them). Just a simple system that works for your routine.
Save this article for your next cleaning day — and tag a friend who desperately needs a bathroom drawer intervention!