If your kitchen counter has disappeared under a mountain of mail, your desk is buried beneath random receipts, and you’ve lost an important bill again — you are not alone. Paper clutter is one of the sneakiest messes in any home, and it builds up faster than you’d ever expect. The good news? You don’t need a fancy organizational system or a whole weekend to fix it. Just a simple, consistent filing system can completely transform your space.
Why Paper Clutter Gets Out of Control
Paper doesn’t pile up because you’re messy — it piles up because there’s no designated home for it. When a bill arrives, you set it down “just for now.” When the kids bring home school forms, they land on the counter. Before long, every surface is covered.
The fix isn’t willpower. It’s a system.
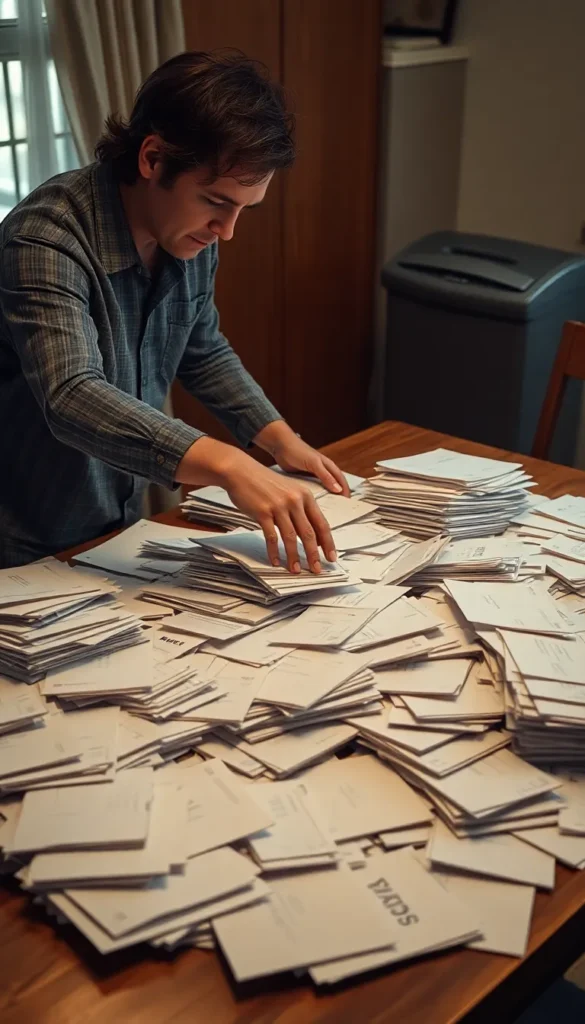
Step 1: Do a Complete Paper Purge First
Before you organize anything, you need to clear the slate.
- Gather every scrap of paper in your home — mail, receipts, notebooks, junk flyers, everything.
- Make three piles: Keep, Shred, and Recycle.
- Be ruthless. If it’s expired, outdated, or something you can find online, let it go.
Most people are shocked by how much they can toss in this step alone. Old takeout menus, expired coupons, and five-year-old utility bills? Gone.
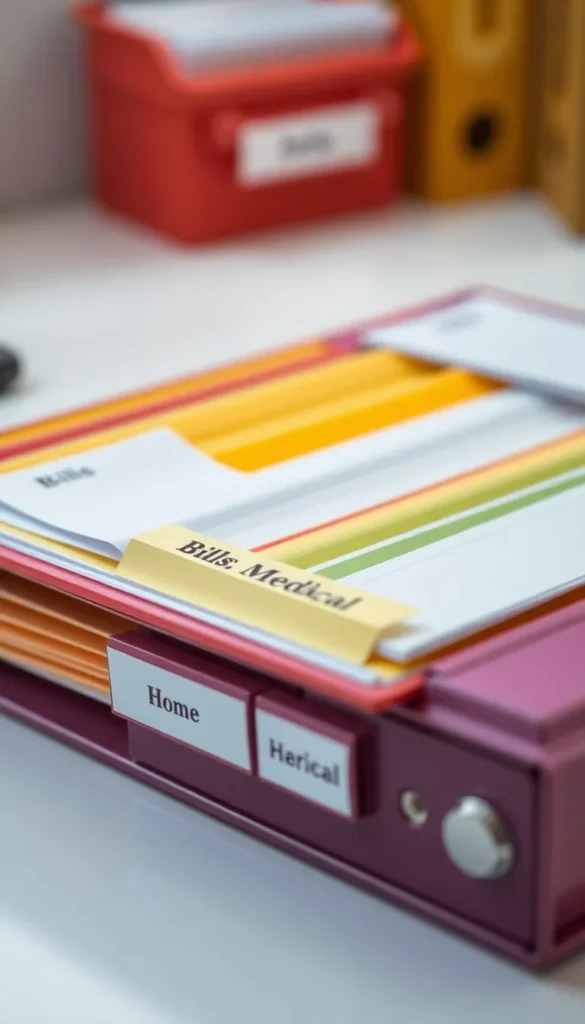
Step 2: Set Up Your Filing Categories
Now that you only have the papers that truly matter, it’s time to give them a home. Keep your categories broad and simple — the more complicated your system, the less likely you’ll stick to it.
Core filing categories to start with:
- Action Required — Bills to pay, forms to sign, appointments to schedule
- Financial — Bank statements, tax documents, pay stubs
- Medical — Insurance cards, health records, prescriptions
- Home — Lease/mortgage documents, warranties, utility info
- Personal/ID — Passports, birth certificates, important licenses
- Kids — School records, permission slips, report cards (if applicable)
You don’t need a category for everything. When in doubt, go broader.
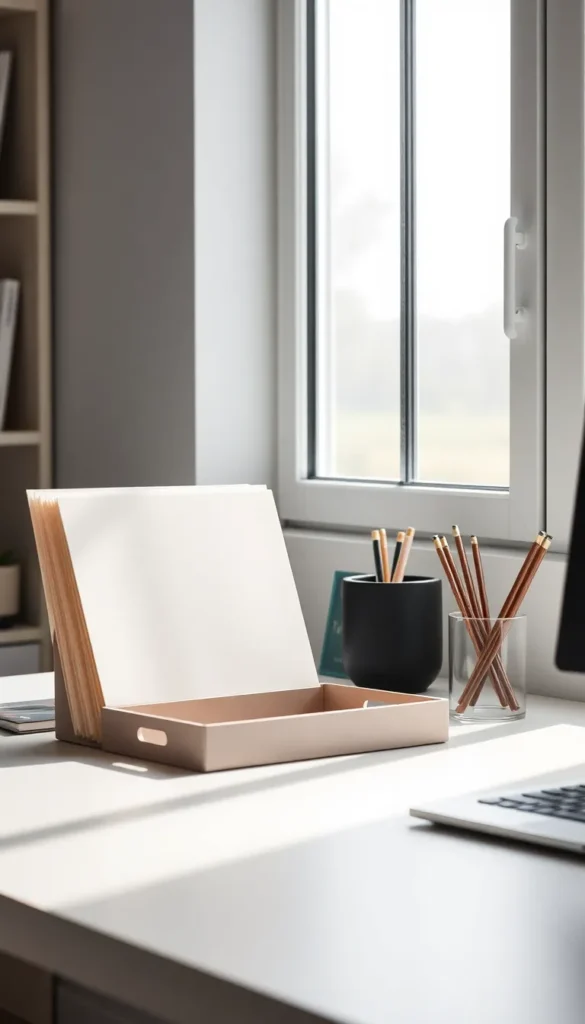
Step 3: Choose the Right Filing Tools
Your filing system only works if it’s easy to use. Complicated binders with 47 tabs get abandoned. Simple tools get used.
Best options for most homes:
- Accordion folder — Perfect for small households, fits in a drawer
- Hanging file system in a drawer — Great for larger paper loads
- Desktop inbox tray — For papers that need action this week
- Binder with clear sleeves — Ideal for important documents you reference often
Label everything clearly. Use a label maker if it motivates you — there’s no shame in it.
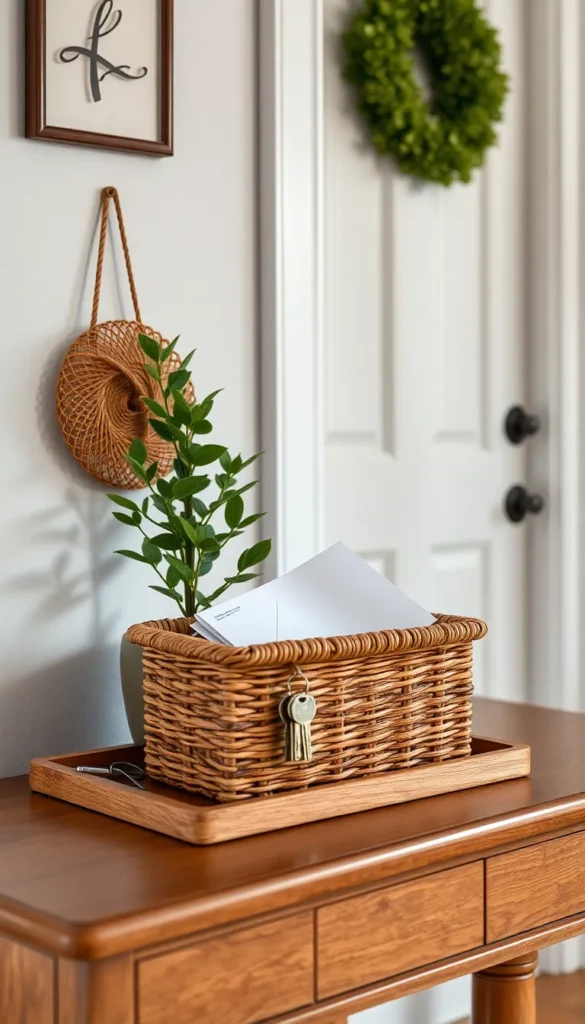
Step 4: Create an “Inbox” for Incoming Paper
Here’s the secret step most people skip: a single landing spot for all new paper.
Instead of letting mail scatter across every surface, designate one tray, basket, or folder as your inbox. Everything goes in there first — without sorting. Then, once a week, you spend 10 minutes processing it.
This one habit stops new clutter from forming before it starts.
Step 5: Do a Weekly 10-Minute Paper Session
A filing system without maintenance slowly becomes another pile. Block 10 minutes every week — Sunday evening, Friday morning, whatever works — to:
- Grab everything from your inbox
- File what belongs in the filing system
- Act on anything urgent
- Shred or recycle what’s no longer needed
That’s it. Ten minutes a week keeps the whole thing running smoothly.
The Bottom Line
Paper clutter doesn’t have to take over your home. With a simple purge, a few broad categories, the right tools, and a weekly habit, you can keep every important document organized and every surface clear.
The hardest part is starting — so start today. Grab a trash bag, pull together every paper in sight, and spend 30 minutes setting up your system. Future you will be incredibly grateful.
📌 Save this article and come back to it when you’re ready to tackle the paper piles for good!