If your garage walls are doing nothing but collecting dust and cobwebs, you are leaving serious storage potential on the table. A well-planned wall storage setup can turn a cluttered, frustrating space into a workshop that actually works for you. Whether you have a small one-car garage or a sprawling three-bay shop, the right storage ideas can give every tool a home. This guide walks through 30 practical, budget-friendly ways to store tools on your garage walls — no fancy contractors needed.
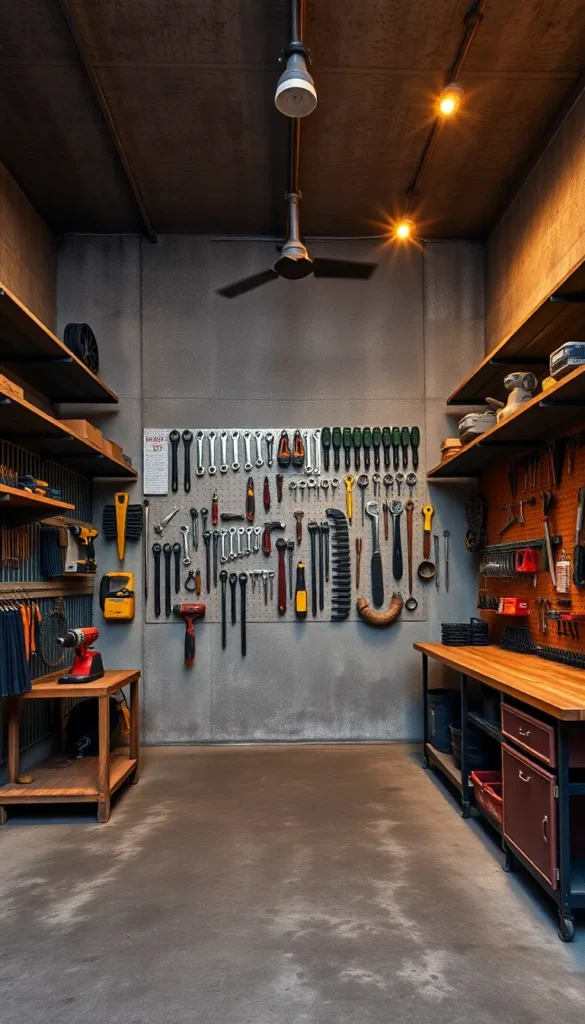
1. Classic Pegboard Panel System
Pegboard is the original garage wall storage solution — and it still works brilliantly.
A 4×8 sheet of pegboard costs around $15 at most hardware stores. Mount it with standoffs so hooks have room to grip. Then buy a pack of assorted metal hooks for another $10–15.
Trace tool outlines in marker or paint so everything has a clear spot. This makes it easy to see at a glance what is missing.
Great for hand tools, small power tool accessories, and frequently used items. Start with one panel and expand as needed.
2. French Cleat Wall System
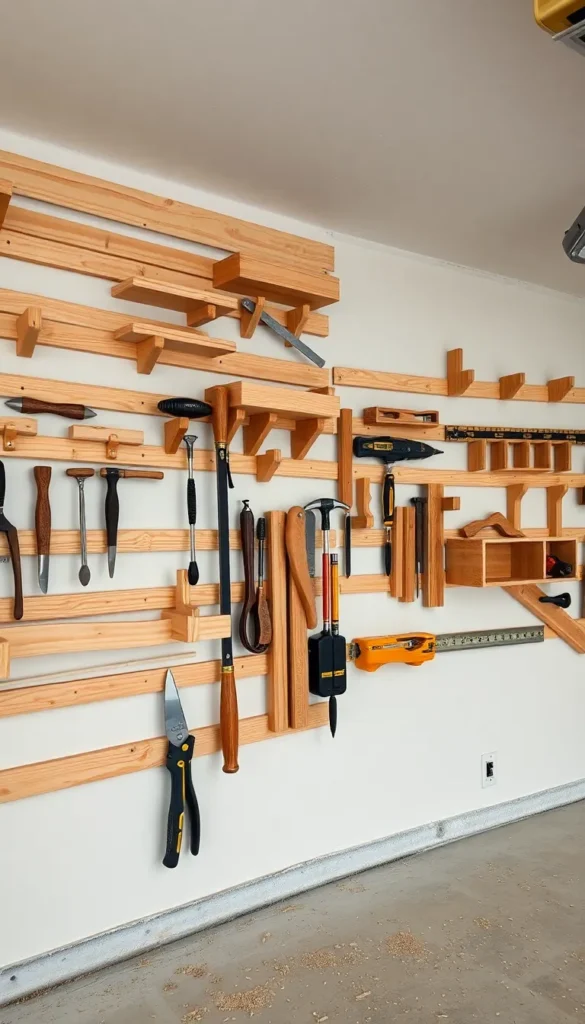
A French cleat system is one of the most flexible storage walls you can build.
The concept is simple. Rip plywood strips at a 45-degree angle. Mount one strip to the wall, hook a matching strip on any holder or shelf you build. Everything hangs securely and can be moved in seconds.
A full sheet of 3/4″ plywood costs around $50–60. You can cover an entire wall for under $100 in materials.
Build your own custom holders out of scrap wood. Shelves, drill holders, clamp racks — anything goes. No two setups look the same.
3. Wall-Mounted Magnetic Tool Strip
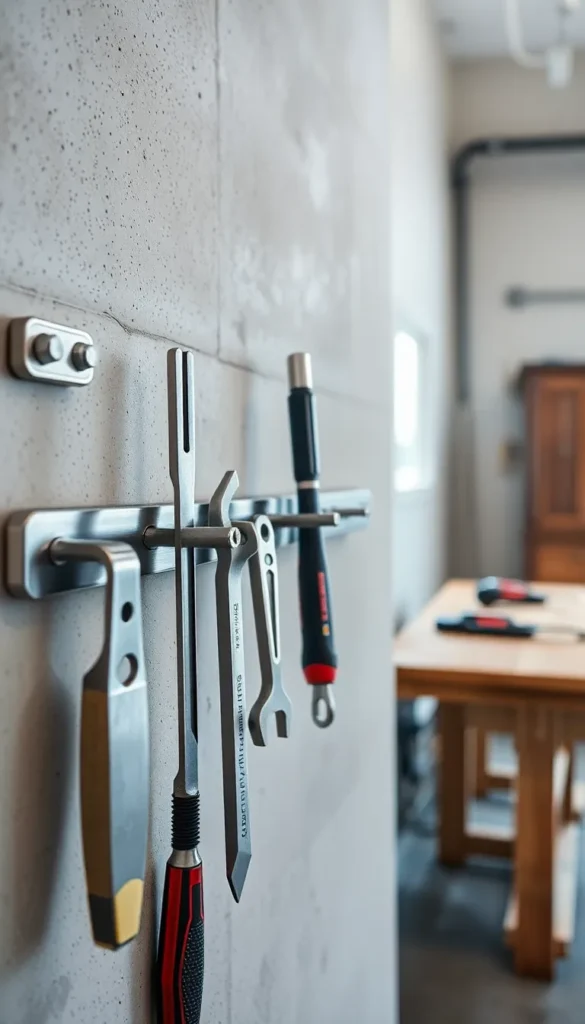
Magnetic strips are perfect for metal tools you reach for constantly.
A 24-inch magnetic strip runs about $15–25 online. Mount it at eye level near your workbench. Chisels, utility knives, Allen wrenches, and pliers snap on and off in one motion.
No drilling into tools. No hooks to fumble with. Just grab and go.
Buy heavy-duty strips rated for at least 20 lbs. Cheap ones lose their grip over time. Space two or three strips vertically to double your capacity without taking up extra wall width.
4. Slatwall Panel Storage
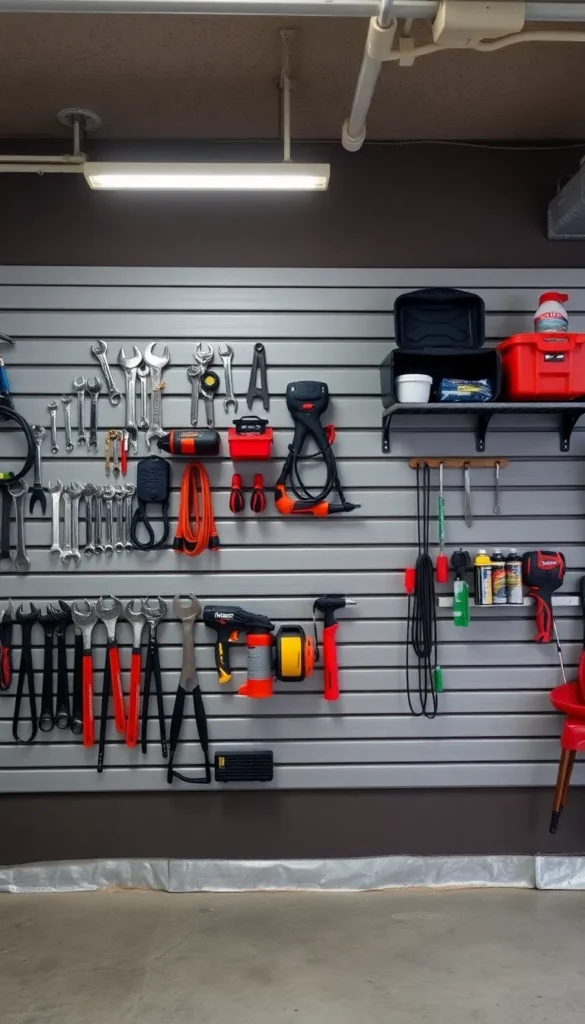
Slatwall panels give you a retail-style storage wall for your garage.
The horizontal grooves accept a wide range of accessories — hooks, bins, baskets, and shelves. You can rearrange everything without removing screws.
Slatwall panels run about $25–40 per 4×8 sheet. A starter kit with hooks and bins adds another $30–50. It is a bigger upfront cost than pegboard, but the accessories slide in and out with no tools.
Great for storing cords, spray cans, small bins of hardware, and power tool accessories. Works well when your needs change often.
5. Metal Pipe and Fitting Shelving
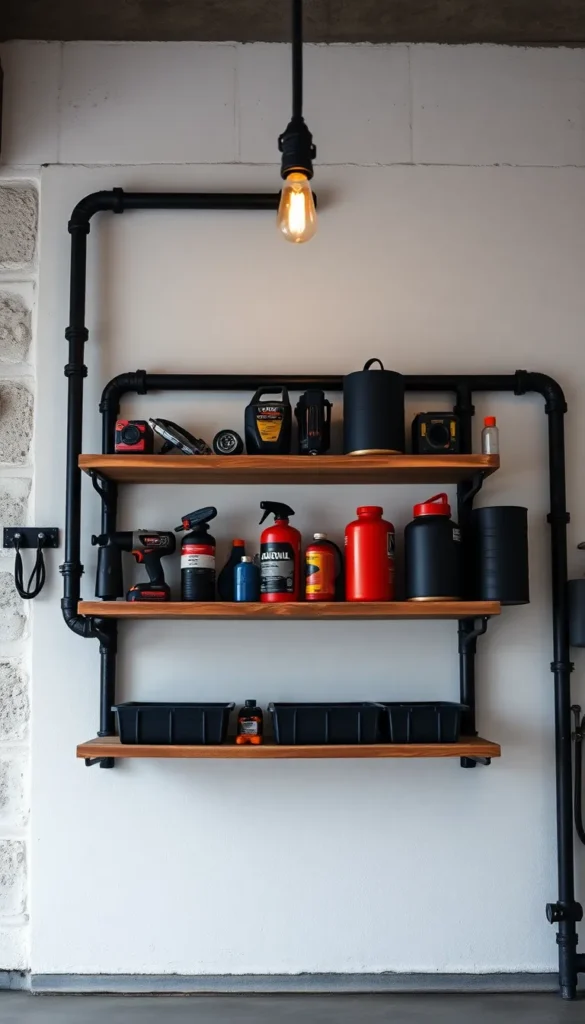
Black iron pipe shelving looks sharp and holds a serious amount of weight.
Buy 3/4-inch black iron pipes and flanges from a hardware store or online. Mount the flanges into wall studs. Slide pipes into place, add a plank shelf, and you are done.
A single shelf section with two pipes costs around $30–45 in materials. Seal the wood with polyurethane so it handles oil and moisture.
This style works especially well in garages with exposed brick or concrete walls. It handles heavy toolboxes, bins, and parts organizers without flexing.
6. Bike and Cord Hook Rail
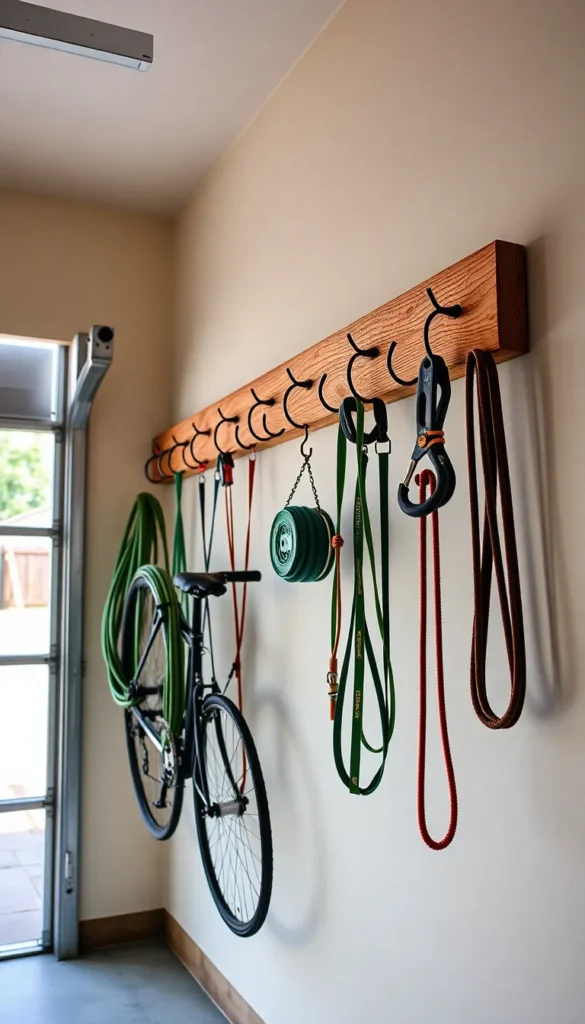
A simple hook rail solves the tangle problem fast.
Cut a 2×4 or 1×6 board to span your wall. Mount it into studs at chest height or higher. Then screw in heavy-duty hooks — the kind rated for 50+ lbs each.
A 6-foot board and a pack of hooks runs under $20 total.
Hang extension cords looped in figure-eights. Hang hoses, bungee cords, straps, and ropes. This one change can clear a shocking amount of floor clutter. Add a second rail lower down for lighter items like gloves and rope.
7. Lumber and Long-Stock Wall Rack
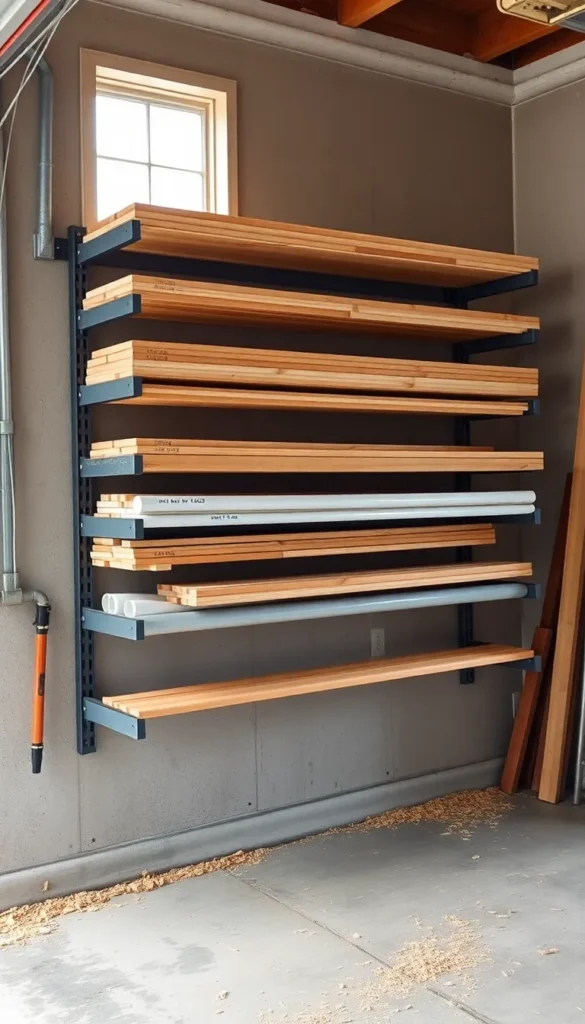
Long materials like lumber and pipe are the hardest things to store — wall racks fix that.
Buy heavy-duty wall-mounted cantilever arms (about $10–15 each). Install three or four arms in a vertical column, spaced 16 inches apart. Load lumber, PVC pipe, conduit, and trim boards horizontally across them.
This keeps long stock off the floor and out of the way. A set of four arms holds hundreds of pounds when properly anchored into studs.
Always install into studs, not just drywall. Lumber is heavy. Use lag screws rated for the load.
8. Wall-Mounted Tool Cabinet
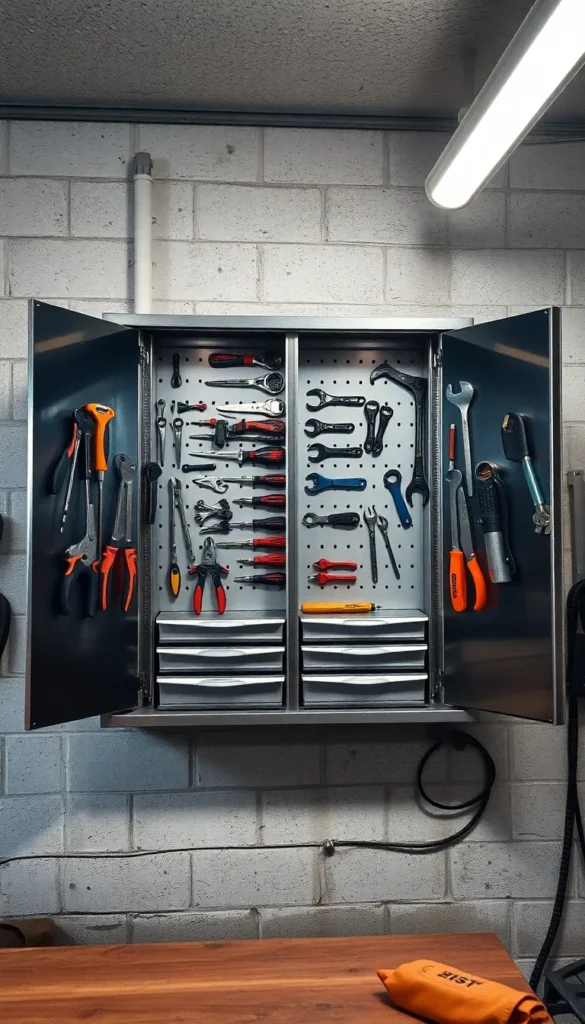
A wall-mounted cabinet keeps your best tools protected and organized behind closed doors.
Metal wall cabinets come in sizes from 24 inches to 48 inches wide. A basic 24-inch unit runs $50–80. More heavy-duty versions with locking doors cost $120–200.
Mount it at chest height so drawers and doors open comfortably. Use the interior panel hooks for frequently used tools.
This is a great option if you have kids or want to keep tools away from dust. Lock it if you store expensive items. Pair it with open pegboard for everyday tools.
9. Clear Bin Wall Grid
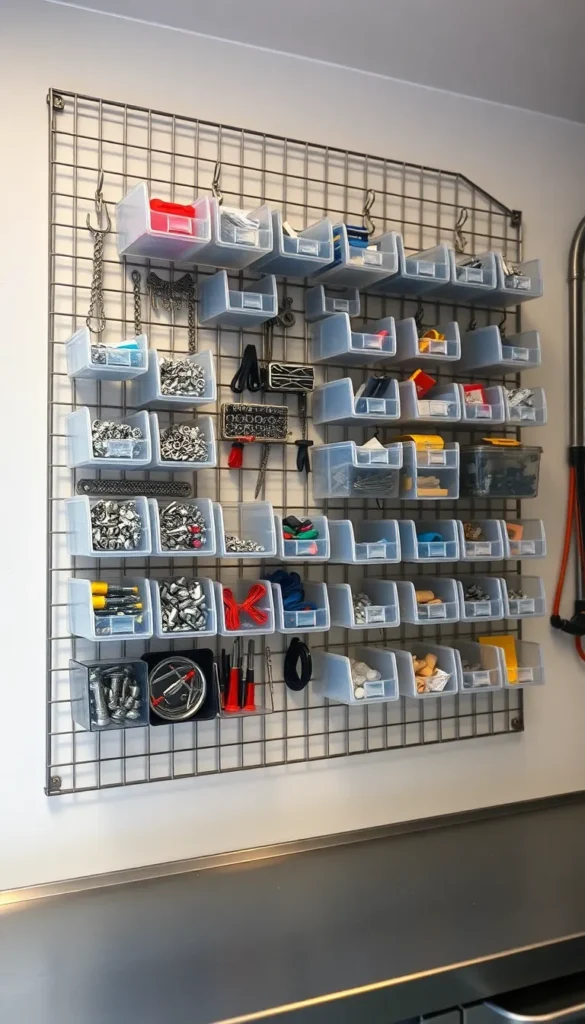
Small parts are the hardest things to find when you need them. A clear bin wall solves that.
Buy a 2×4 foot metal wire grid panel for around $20. Add metal bin hooks and clear hanging bins in assorted sizes. Everything stays visible through the clear plastic.
Fill bins with screws, bolts, drill bits, wire nuts, and connectors. Label each bin with a marker or printed labels.
The grid can be repositioned anywhere there is a screw. Expansion is easy — just add more grid panels side by side. Great for tight walls where you need maximum visibility.
10. Socket Organizer Rail Mount
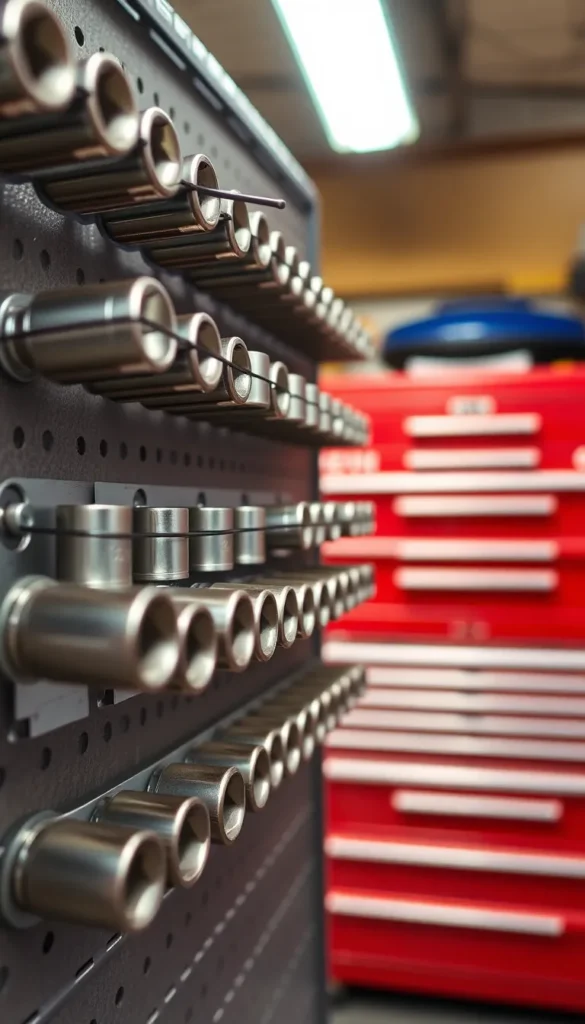
Loose sockets disappear. Mounted socket rails end that forever.
Metal socket organizer rails cost about $15–25 for a full set. Mount them on a wood backer board screwed into wall studs. Arrange by drive size — 1/4 inch, 3/8 inch, 1/2 inch.
Every socket goes back in the same spot every time. You will never dig through a drawer looking for a 10mm again.
Add a few pegboard hooks alongside the rail to hang the ratchet handles and extensions. The whole setup takes less than an hour to install.
11. Pallet Wood Accent Storage Wall
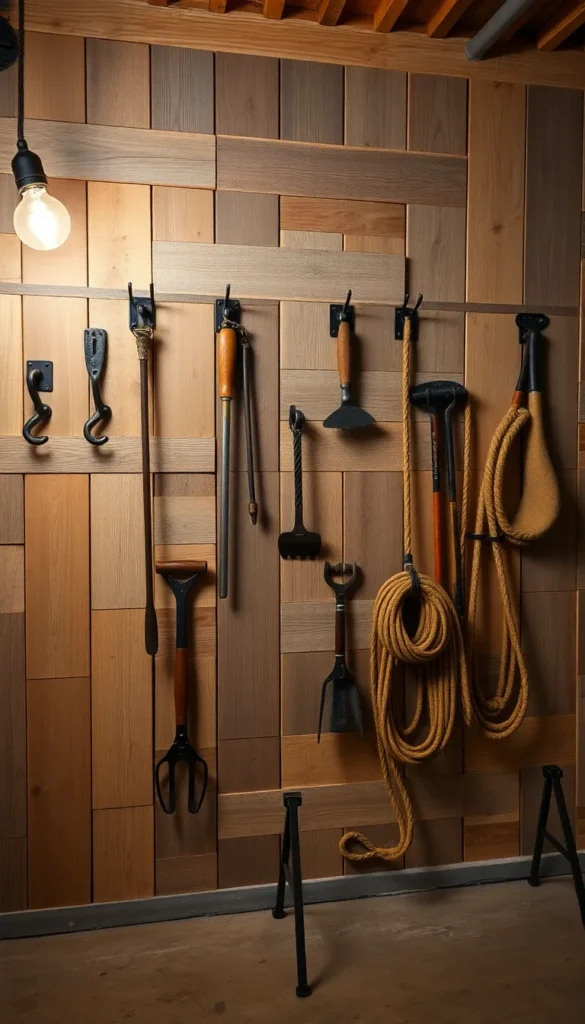
Free pallets turn a blank wall into a functional storage display.
Find pallets at hardware stores, nurseries, or loading docks — most give them away. Pry them apart, sand lightly, and mount the planks horizontally across your wall. Space them for airflow.
Screw in hooks, cup hooks, and L-brackets wherever you need them. The natural wood texture adds a rugged look without costing anything.
Total material cost can be near zero. Just your time and a box of screws. Great for lightweight tools like levels, squares, clamps, and straps.
12. Power Tool Charging Station Wall
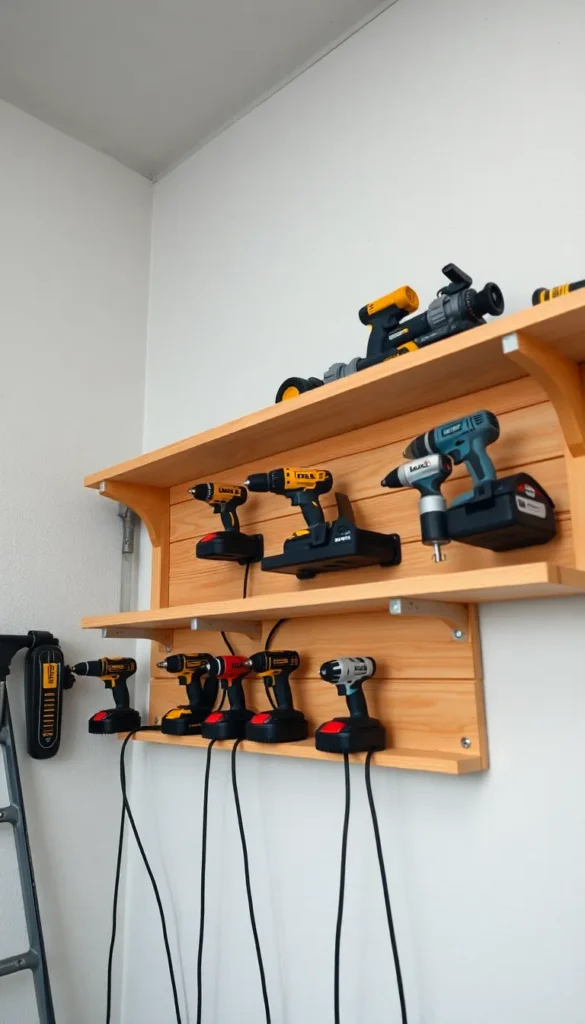
Cordless tools are only useful when they are charged. A dedicated wall charging station keeps them ready.
Build a simple shelf from 3/4-inch plywood and mount it at eye level. Screw chargers directly to a wood backboard. Add a power strip behind it with cable clips to keep cords off the floor.
Group chargers by brand so you always grab the right one. This costs about $20–30 in wood and hardware if you already have a power strip.
Add a label strip below each charger so family members know which charger belongs to which tool.
13. Spray Can and Chemical Shelf
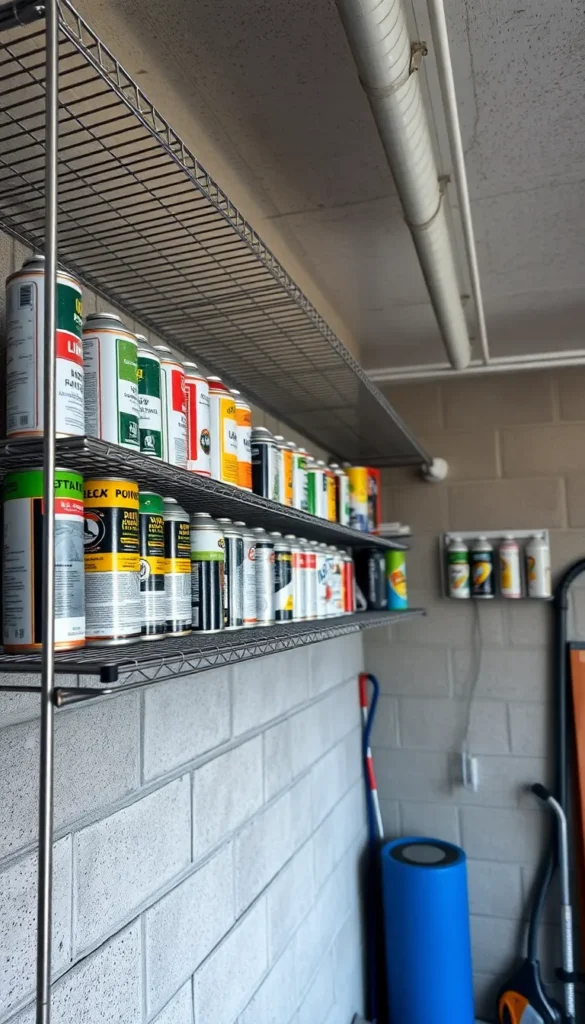
Spray cans roll around and get lost fast. A dedicated wall shelf keeps them in one place.
A wall-mounted wire shelf — the kind from a closet section of the hardware store — works perfectly. A 12-inch deep, 24-inch wide shelf costs about $10–15.
Mount it at about shoulder height so you can read can labels from below. Group by type: lubricants together, paints together, primers together.
Make sure the area is ventilated and away from heat sources. Keep flammable chemicals away from your water heater and furnace wall.
14. Clamp Rack Strip
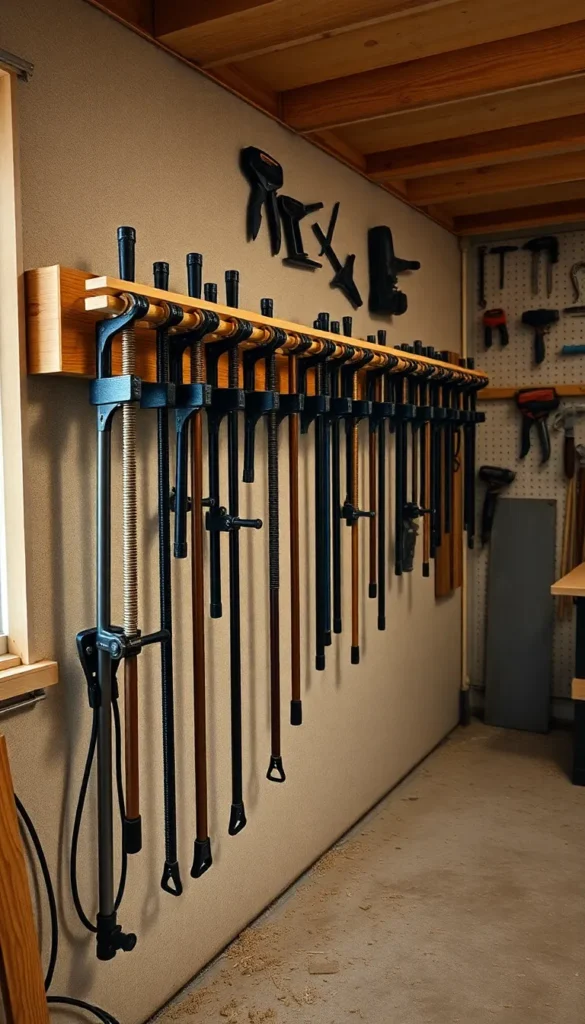
Clamps are awkward, heavy, and take up huge amounts of space when stored wrong.
Build a simple clamp rack from a 2×4 and some 1-inch wooden dowels. Drill dowel holes at 4-inch intervals. Mount the 2×4 horizontally on the wall at waist height.
Hang bar clamps and pipe clamps over the dowels. Add a second rail above for spring clamps and smaller sizes.
The whole build costs under $15 and takes about an hour. Every clamp stays visible and accessible. No more digging through a pile when you need one fast.
15. Overhead Wall-to-Ceiling Bridge Shelf
The space above your head on garage walls is almost always wasted. Bridge shelves fix that.
Install heavy-duty wall brackets near the ceiling line — typically 7 to 8 feet up. Lay 3/4-inch plywood or solid boards across them. This creates a long overhead shelf that runs the full length of the wall.
Use it for bulky items you do not need daily — storage totes, sporting goods, holiday decorations, and tool cases.
Brackets and plywood for a 10-foot run cost around $60–80. Label bins so you know what is up there without climbing a ladder.
16. Garden Tool Wall Organizer
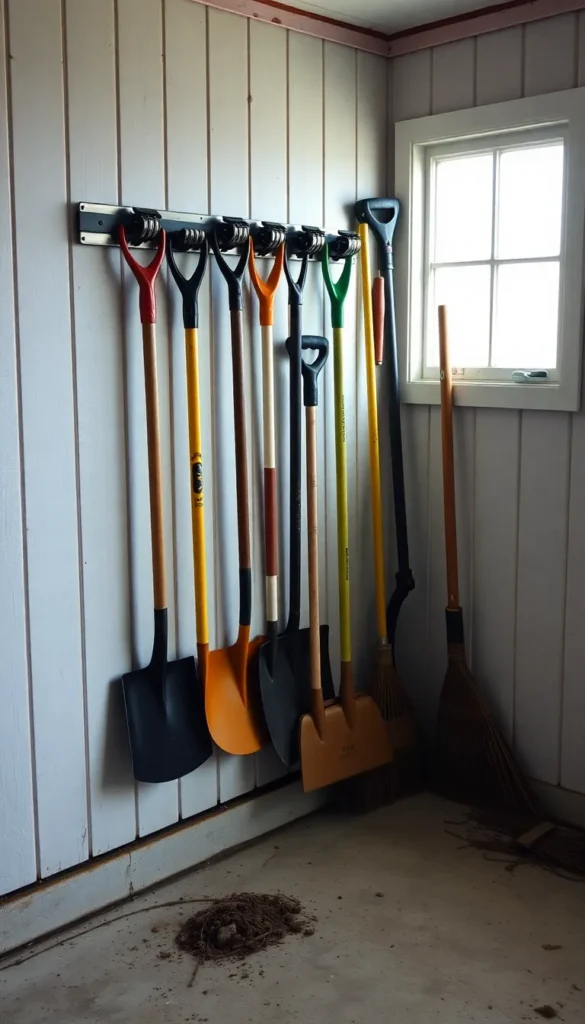
Long-handled garden tools are awkward to store and easy to trip over.
Wall-mounted tool gripper strips hold handles with spring-loaded rubber clips. A 40-inch strip holds six to eight tools and costs about $15–20.
Mount it at about 5 feet high so heads clear the floor. The tools stay upright and you can grab a shovel or rake in one motion.
Pair this with a short rail of hooks below for gloves, knee pads, and garden bags. You can have your entire outdoor tool collection on one wall section without anything touching the floor.
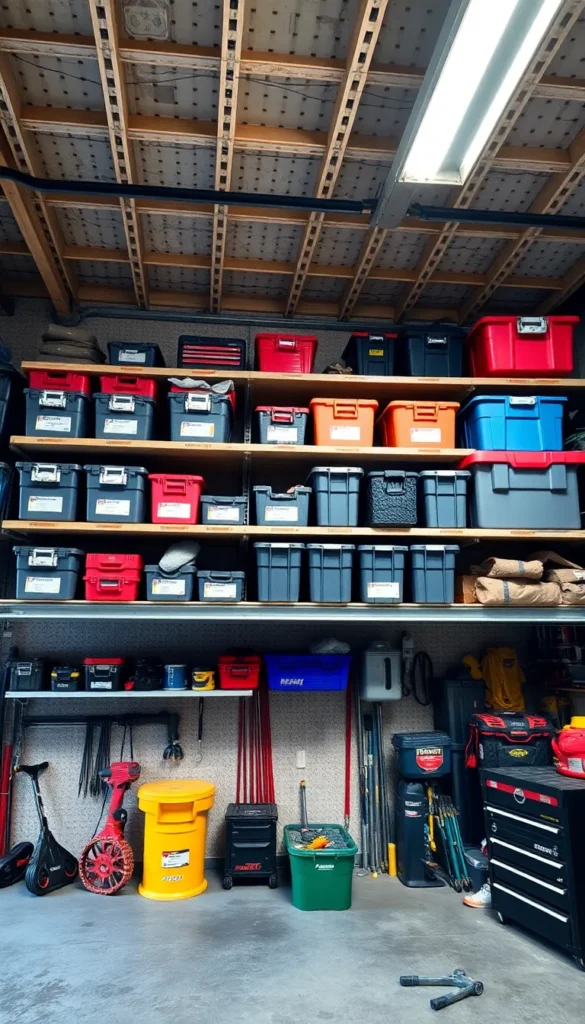
17. Wire Shelf Bin System for Hardware
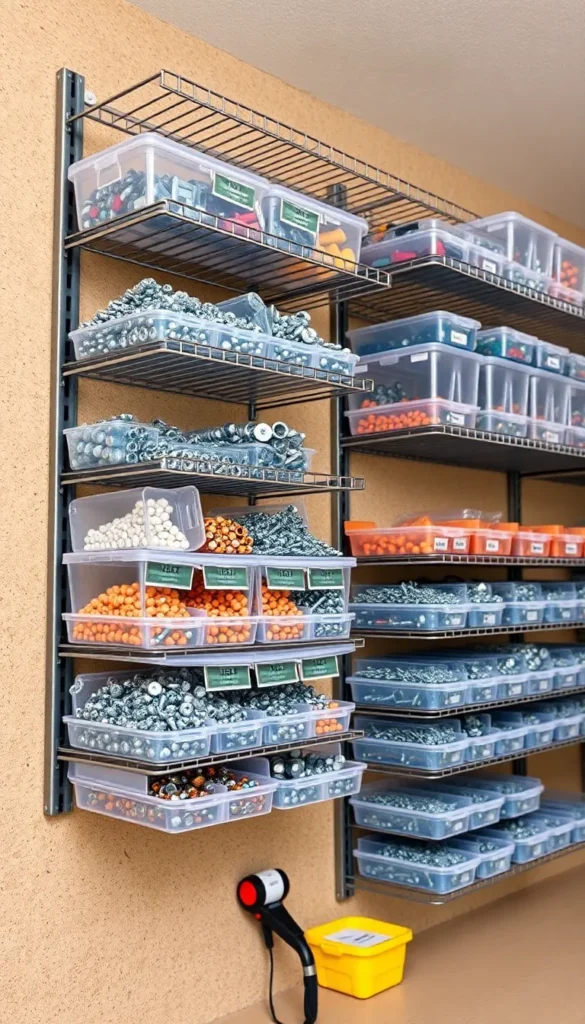
Small hardware — screws, nails, bolts — is what most garages manage worst.
Wire shelving from the closet aisle at the hardware store costs about $20–30 for a 4-foot section with two shelves. Mount it on the wall and fill it with plastic hardware organizers.
The stackable divider boxes with small compartments cost $8–15 each. Label every compartment. Being able to see exactly what you have prevents buying duplicates.
Start by sorting screws by size, then nails, then bolts and nuts. It takes an afternoon — and saves hours in the long run.
18. Safety and PPE Station
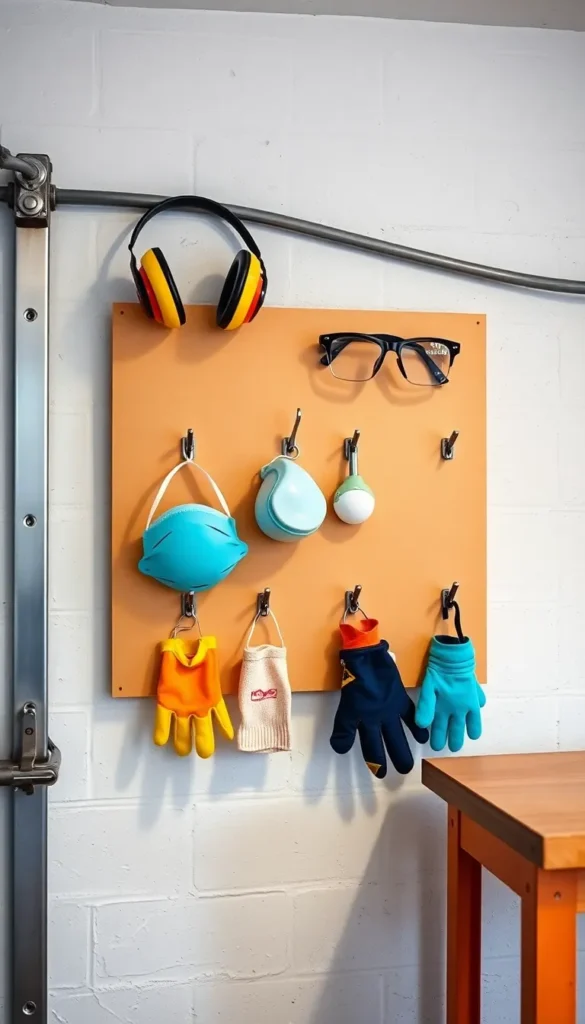
Safety gear only gets used when it is easy to grab. A dedicated PPE station makes it effortless.
Mount a small 2×3-foot plywood panel at the entrance to your workspace. Add cup hooks, wire clips, and small bins. Hang safety glasses, ear protection, dust masks, and gloves here.
Put this panel right by the door you use to enter the garage. You will put gear on before you even start working.
The whole setup costs $15–25. Add a small shelf below for a first aid kit. This simple station builds better habits without requiring any willpower.
19. Tire Storage Wall Hooks
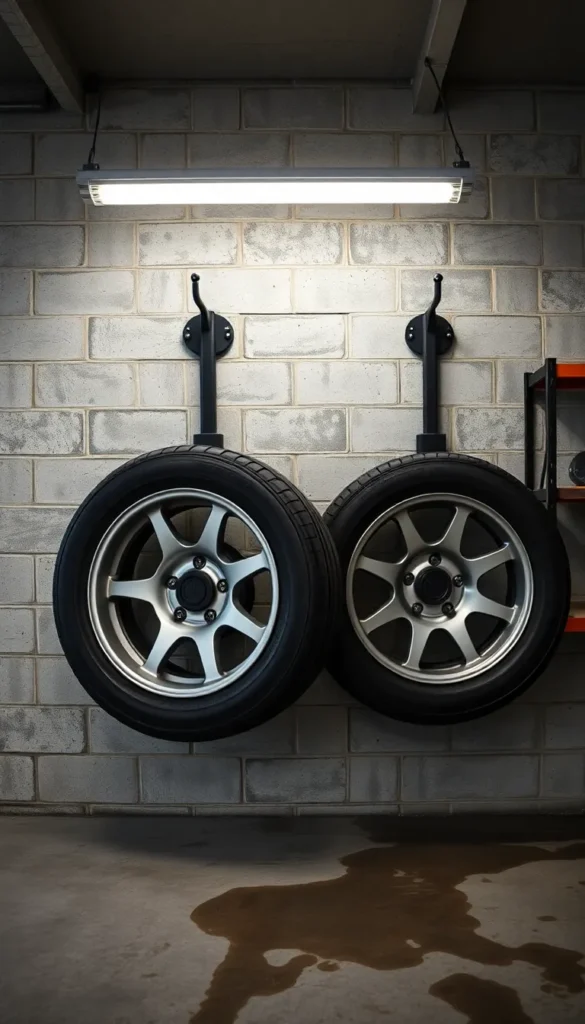
Seasonal tires take up enormous floor space. Wall hooks fix that completely.
Heavy-duty tire storage hooks are L-shaped steel brackets that bolt into wall studs. A pair costs about $20–30. Each hook holds up to 100 lbs.
Mount them at about 4 feet high, spaced 30 inches apart to match tire width. Stack two tires per hook if you have a standard set of four.
Make sure you anchor into solid studs — not just drywall. Tires are heavier than they look. This one change can free up a huge section of your garage floor.
20. Drill and Driver Holster Wall Mount
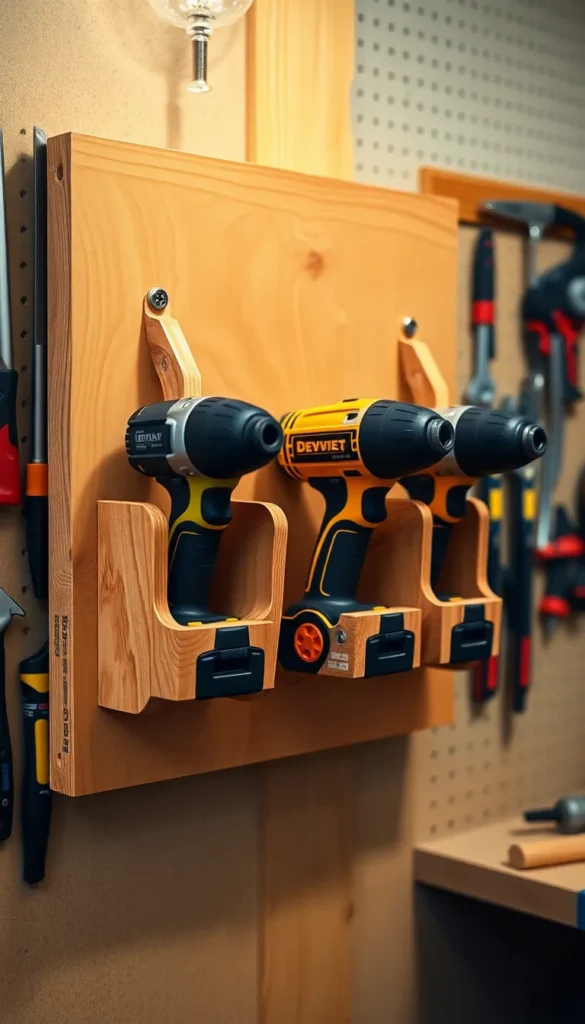
Drills sitting on a shelf get knocked off and damaged. Wall holsters keep them safe and accessible.
Build simple drill holsters from scrap 2×4 wood. Cut angled slots that grip the drill body. Mount the holsters on a plywood backer screwed into studs.
A four-drill holster panel costs about $10–15 in materials and takes under two hours to build. Each drill has a dedicated spot and stays right where you left it.
Search “DIY French cleat drill holder” on YouTube for free plans. You can customize the angle and spacing for any brand or drill size.
21. Bike Maintenance and Cycling Wall Panel
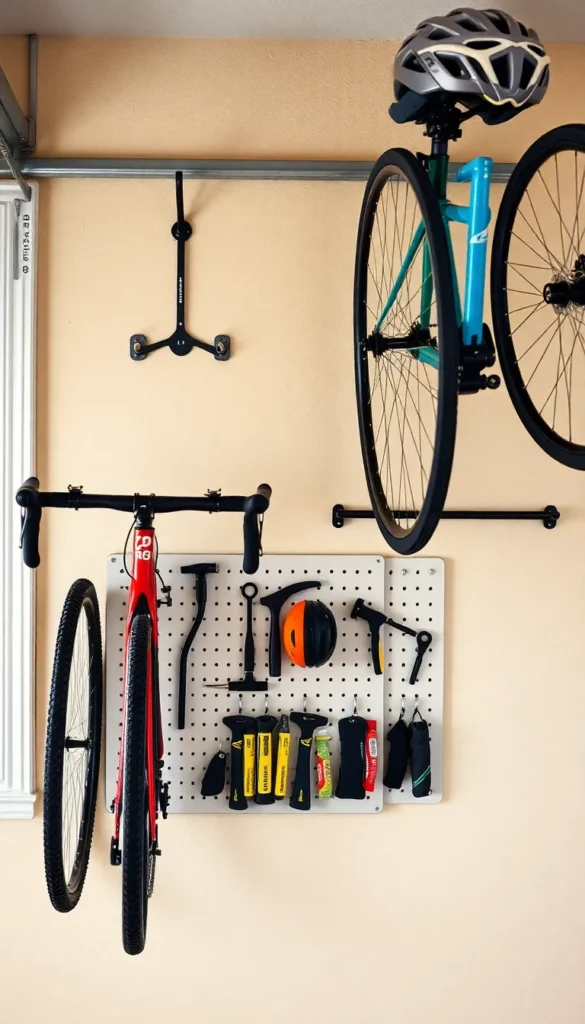
Bike storage and maintenance gear works best when it lives together on one wall section.
Start by installing two heavy-duty J-hooks at about 6 feet high to hang bikes by the wheel. They cost around $15–20 each and hold up to 50 lbs.
Below the bikes, add a small pegboard section for tire levers, pump, hex keys, and patch kits. Everything you need for a quick fix is right there when you pull the bike down.
Total wall space used: about 5 feet wide. A full cycling station for under $60 in parts.
22. Labeled Bin Rail for Automotive Parts
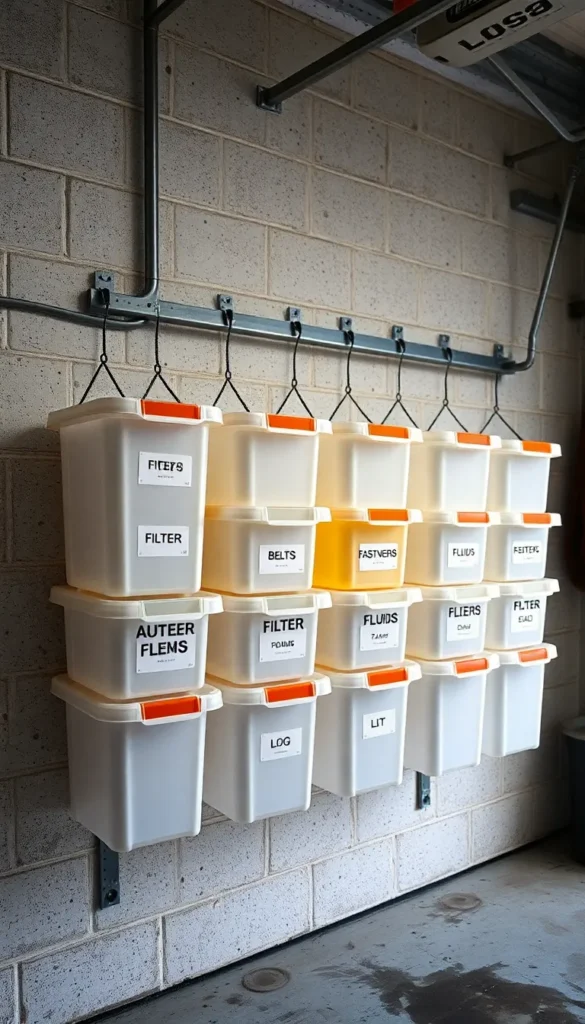
If you work on vehicles, loose parts bins on a wall rail save endless search time.
Buy a wall-mounted bin rail system — the type that accepts standard hanging storage bins. A 48-inch rail with a set of six bins runs about $35–50.
Label every bin clearly. Common categories include filters, belts, hoses, spare fasteners, gaskets, and fluids. Date any opened fluids with a marker on the bin.
Install the rail at eye height so you can read labels without crouching. Add a second rail below for larger parts or service manuals in binders.
23. Fishing Gear and Outdoor Sports Wall
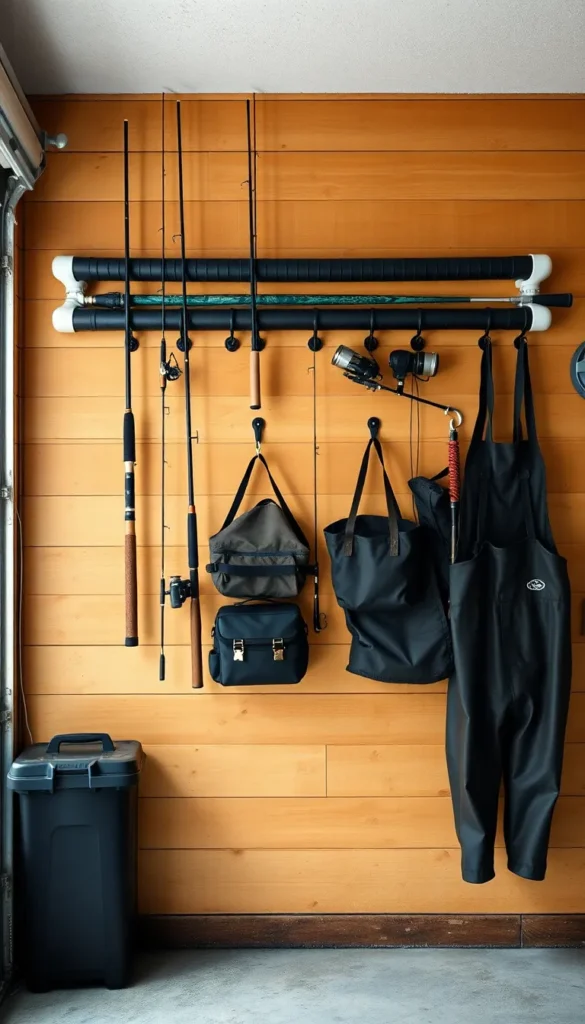
Fishing rods are fragile and get tangled in general storage. A dedicated section protects them.
Mount PVC pipe rod holders horizontally on the wall — cut 2-inch diameter pipe into 4-inch sections, cap one end, and attach to a wood rail. Cost: under $10 for six holders.
Add large hooks below for tackle bags, waders, landing nets, and coolers.
Keep all outdoor sport gear in one zone so packing for a trip takes minutes, not a full afternoon of searching. Kayak paddles, life vests, and camp chairs can live here too.
24. Welding and Grinding Station Wall
Welding gear needs its own area — both for safety and for efficiency.
Mount a steel backing panel (a sheet of 16-gauge steel or heavy angle iron shelving) near your welding table. Hang your helmet, gloves, and chipping hammer from metal hooks. Store grinding discs in a shallow wall-mounted bin.
Keep flammable materials well away from this section. Steel shelving rated for high heat is worth the extra cost here.
A functional welding station wall can be set up for $40–60. Add a small shelf for spare wire spools, wire brushes, and tip cleaners.
25. Rolling Tool Cart Docking Wall
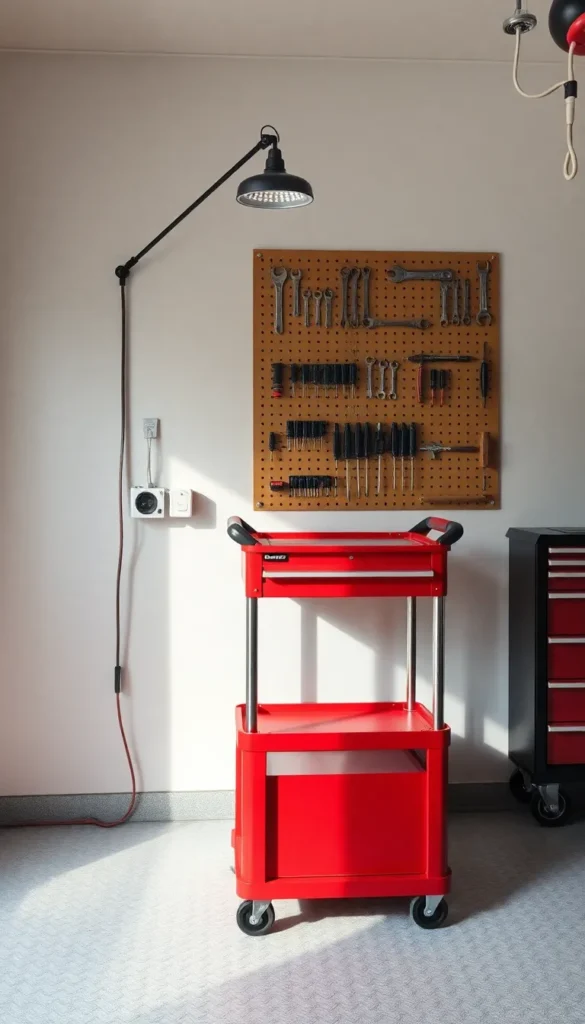
Your rolling cart works harder when its wall space is planned around it.
Pick the permanent parking spot for your tool cart. Then design the wall above and beside it as a complete work zone. Add pegboard above for hand tools. Mount a power strip at cart height. Attach an LED task light arm to the wall.
This turns your cart into a full workstation rather than just a storage box on wheels.
Budget around $30–50 for the wall accessories around the cart. The difference in how efficiently you work is immediately noticeable.
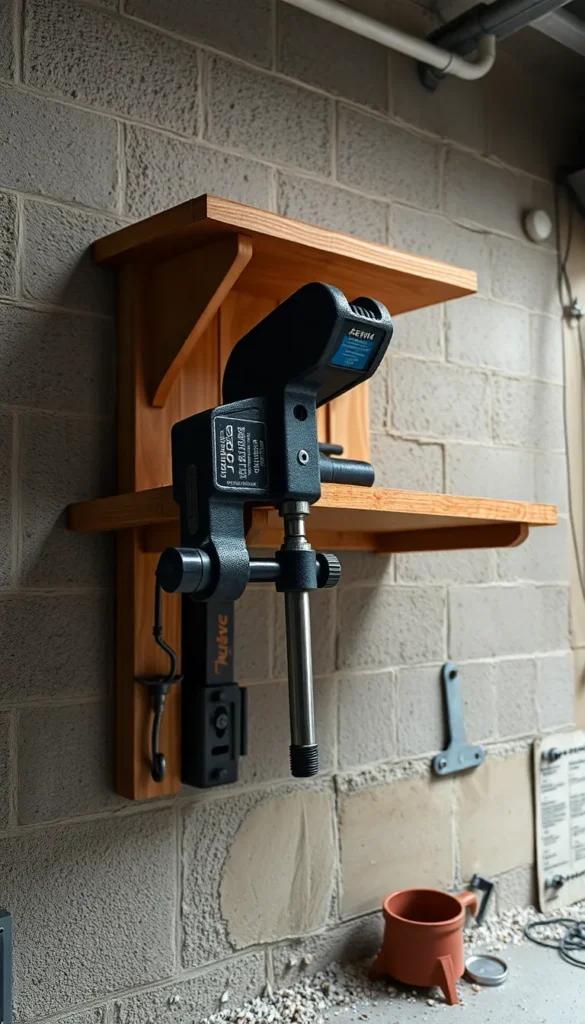
26. Wall-Mounted Vise and Workbench Extension
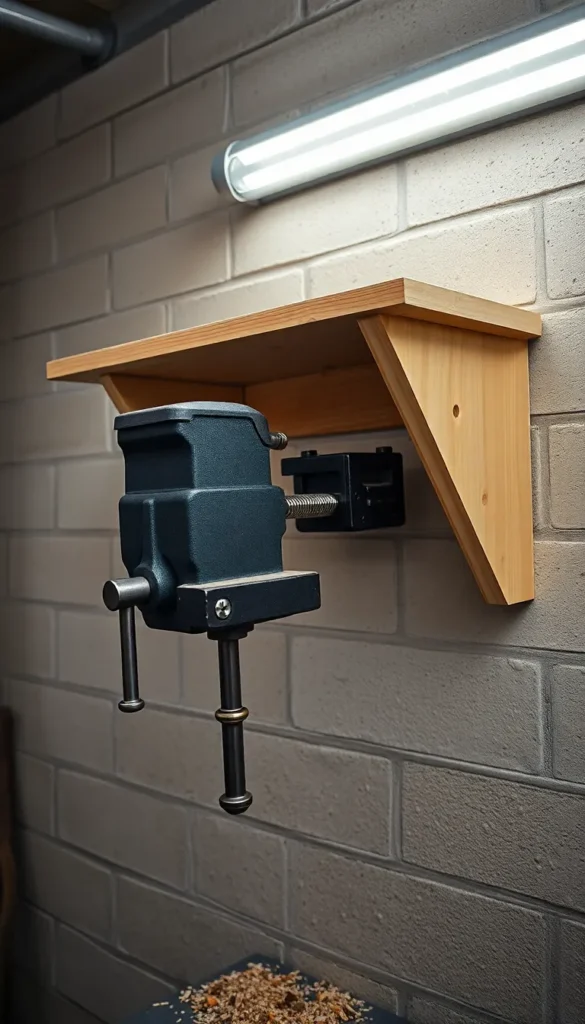
Not everyone has room for a full workbench. A wall-mounted vise creates a compact work point.
Build a sturdy shelf bracket from 3/4-inch plywood and 2×4 braces. Mount it at a comfortable working height — around waist to lower chest. Bolt a medium-duty bench vise to the shelf surface.
This setup takes only 18–24 inches of wall space. The vise folds out of the way when not in use if you use a swivel-base model.
Materials cost about $30–40 for the shelf. The vise itself runs $40–80 depending on size and quality.
27. Tire Chain and Tow Strap Hook Wall
Tow straps and tire chains are the kind of gear you only need once — but absolutely need when you do.
Install a row of heavy-duty steel hooks on a 2×6 board mounted into studs. Hooks should be rated for 50+ lbs each. Keep tow straps, recovery boards, shackles, and tire chains all in one spot.
Label each item with a tag so everyone in the household knows what is there and what it is used for.
A basic setup costs under $20 and takes about 30 minutes. This gear stores badly in drawers — a wall section made for it changes everything.
28. Electrical and Wiring Supply Wall

Electrical supplies are tiny and easy to lose — a dedicated wall section puts everything in reach.
Mount two or three small wire shelves and load them with divided plastic bins. Label every bin: wire connectors, terminals, heat shrink tubing, tape, outlets, and so on.
Add a small pegboard section alongside to hang strippers, testers, and pliers. A 12×18-inch board holds more than you think.
Keep your electrical section near a GFCI outlet so you can test components immediately. Total wall space needed is about 3 feet wide. Setup cost: $20–35.
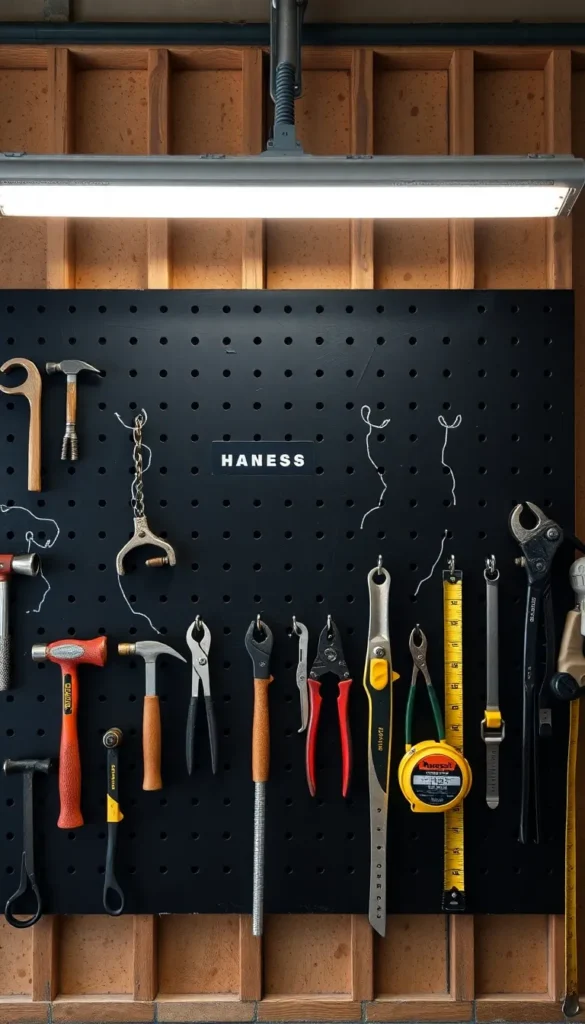
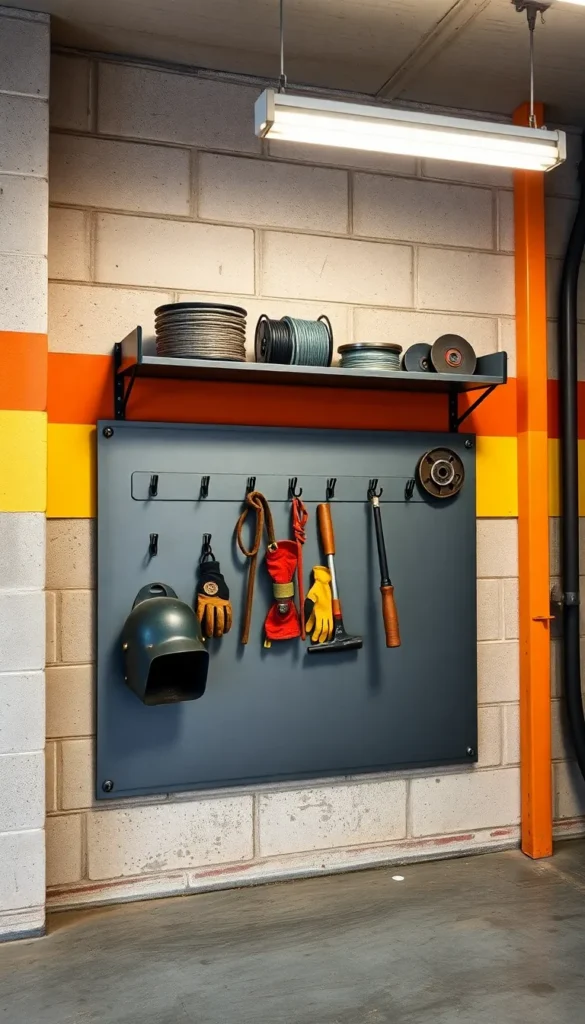
29. Welded Steel Wall Art / Shadow Board
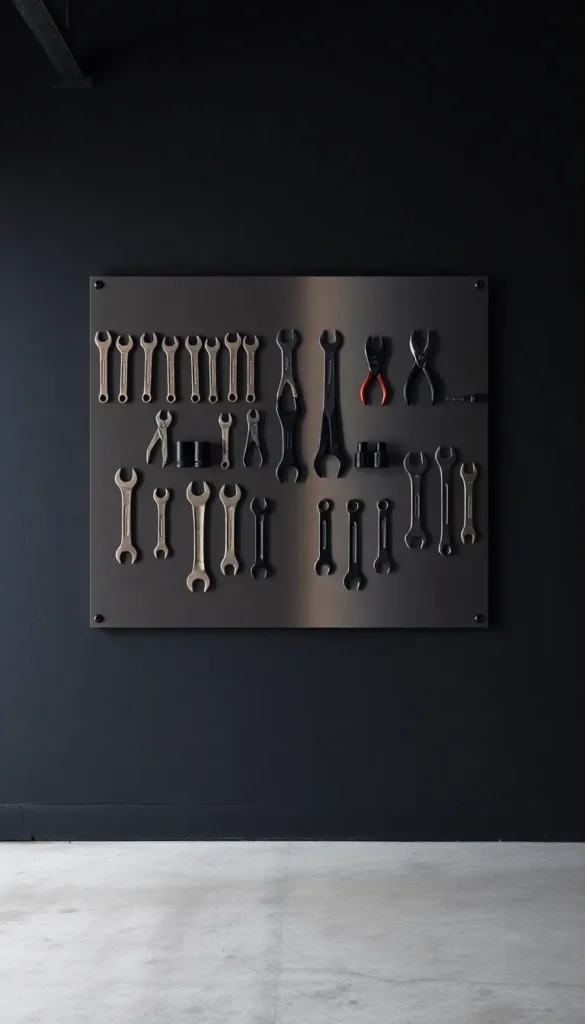
A shadow board is the most satisfying tool organization system you can build.
Shadow boards show the exact outline of each tool on the wall. When a tool is missing, the empty silhouette makes it obvious. Used in professional shops and factories for good reason.
You can make one from painted plywood and traced tool outlines for around $20. Cut foam inserts, paint them a contrasting color, and set them behind each tool.
The pro version uses laser-cut steel — a local fab shop can cut one for $50–150. It lasts forever and looks incredible.
30. Modular Gridwall Panel System
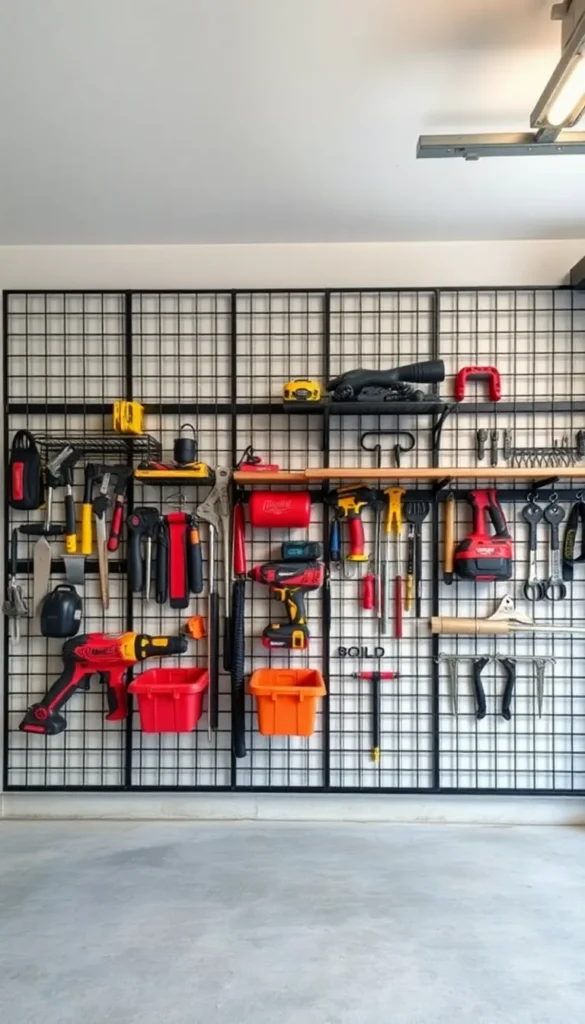
Gridwall panels are the most modular wall storage system available — and they hold almost anything.
Used in retail displays, gridwall panels are available online for $15–25 each. They connect edge-to-edge to cover an entire wall. Every wire intersection accepts a hook or accessory.
Unlike pegboard, you can attach fittings anywhere — not just at preset hole locations. This makes it easy to fit odd-shaped tools or create custom spacing.
Start with two or three panels and expand over time. The wire grid style also works well in humid garages since it does not trap moisture against the wall.
Conclusion
Your garage walls are some of the most underused real estate in your home. With a little planning and a modest budget, they can hold every tool, spare part, and piece of outdoor gear you own — off the floor and right where you need it.
You do not have to overhaul everything at once. Pick two or three ideas from this list that match your biggest pain points right now. Start with a pegboard panel or a French cleat strip. Add a charging station or a clamp rack. Build from there over time.
The best garage storage system is one that fits how you actually work. Keep it simple, keep it labeled, and put things back where they belong. That discipline — more than any fancy product — is what turns a cluttered garage into a workshop you are proud of.