
Jewelry tangles are one of those small daily frustrations that quietly drain your time and patience. You reach for a necklace, and suddenly three others come with it. A pair of earrings goes missing before you even leave the house. The good news? Keeping your collection sorted does not require a big budget or a fancy closet. With the right systems — some bought, some made from things you already own — you can store everything beautifully and grab what you need in seconds. These 27 ideas cover every jewelry type, every space size, and every budget.
1. Use a Rotating Tabletop Organizer
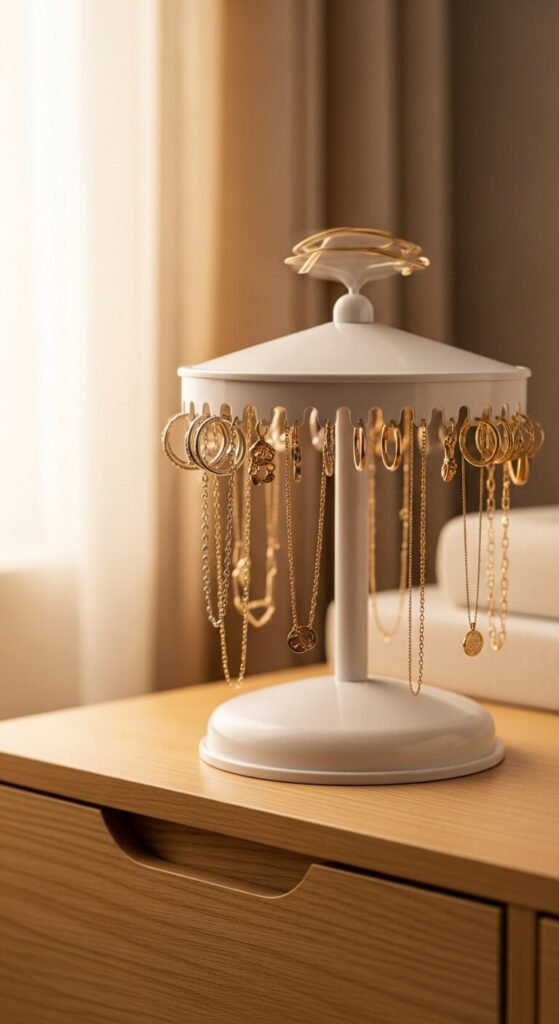
A spinning carousel keeps everything visible at once.
No more digging through a drawer. Rotating organizers sit on your dresser and let you spin through necklaces, bracelets, and earrings without lifting a finger.
They come in acrylic, wood, and metal. Many cost under $25.
Look for one with both hooks and small compartments. That way you can hang chains and store studs in the same spot.
2. Mount a Small Corkboard on the Wall
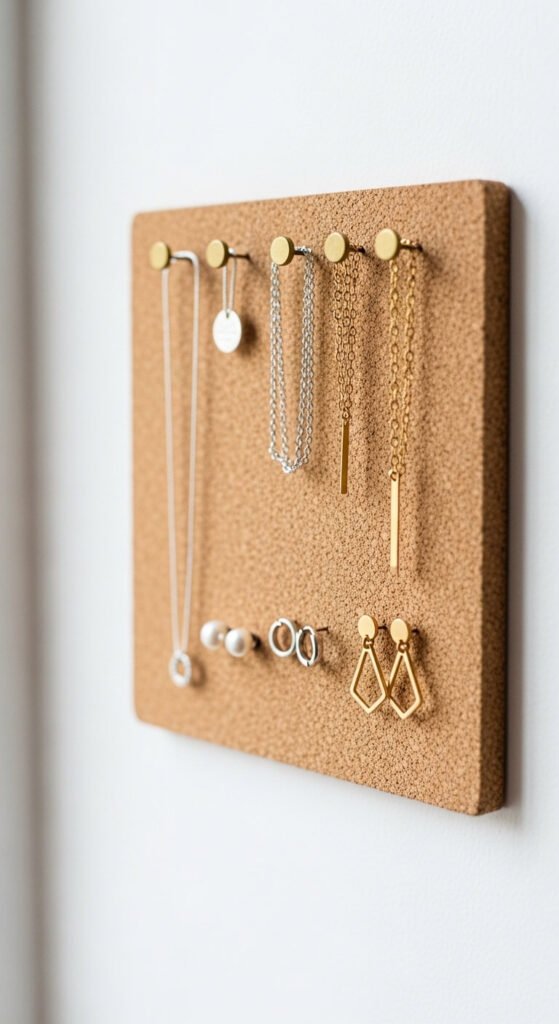
Corkboard is one of the most affordable jewelry solutions out there.
A small corkboard costs a few dollars and holds dozens of pieces. Push a few brass pins into it. Hang your necklaces. Pin your stud earrings directly into the cork.
Mount it inside a closet door to save dresser space.
This works especially well for everyday pieces you reach for often. Everything stays flat, separated, and tangle-free.
3. Repurpose an Ice Cube Tray for Rings and Studs
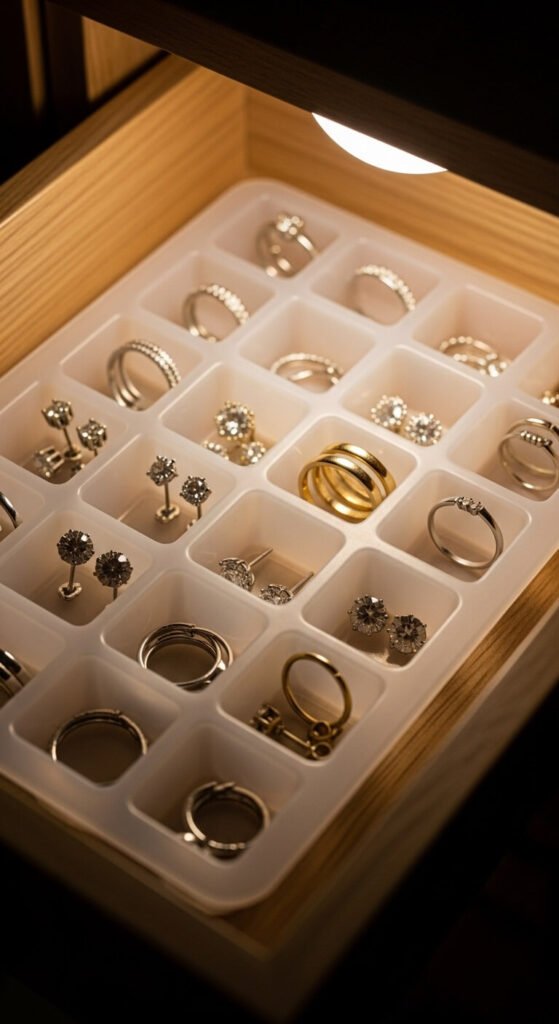
This is a zero-cost trick that actually works beautifully.
Ice cube trays keep small pieces separated without any extra cost. Silicone ones are best — they are soft on metal and easy to clean.
Each compartment holds one ring or a pair of studs perfectly.
Tuck the tray inside a drawer so it stays hidden and dust-free. Label sections with a small piece of tape if you want to go the extra step.
4. Hang Necklaces on a Decorative Branch

A real or faux branch makes a stunning and free display.
Find a slim branch outdoors, let it dry, and mount it to the wall with two small hooks. Necklaces hang beautifully from the natural curves without tangling.
Each chain gets its own spot. You can space them by length, metal tone, or style.
This works in boho, rustic, or minimalist rooms. It costs almost nothing and looks like something out of a design magazine.
5. Try a Pegboard Panel for a Full Collection
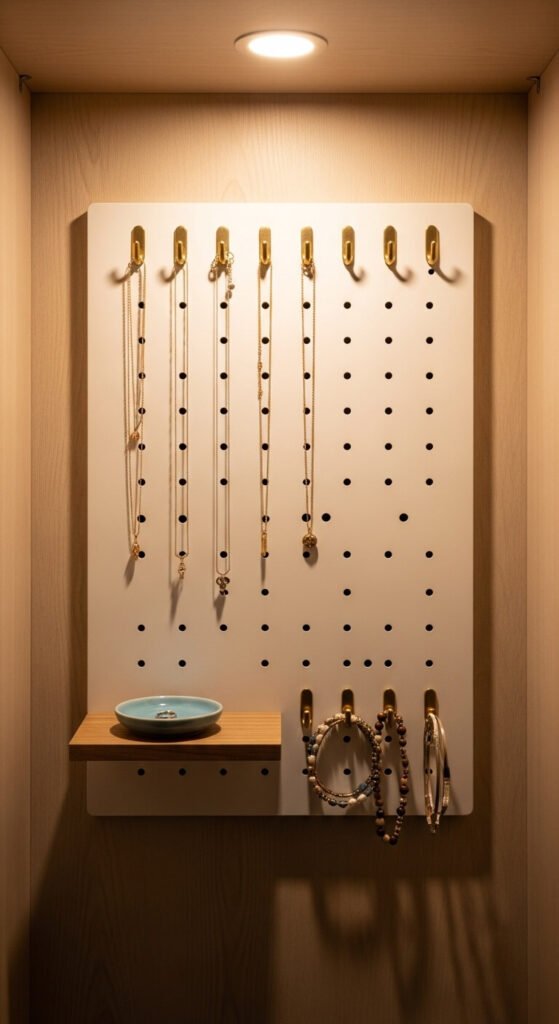
Pegboards are not just for garages.
A small pegboard panel inside your closet or on a bedroom wall can hold an entire jewelry collection. Add hooks at different heights for necklaces. Add small shelves for dishes and boxes.
Everything is visible, reachable, and customizable.
Pegboards cost around $15–$30 at hardware stores. Paint it white, black, or gold to match your room. Rearrange the hooks any time your collection changes.
6. Use a Multi-Pocket Hanging Organizer
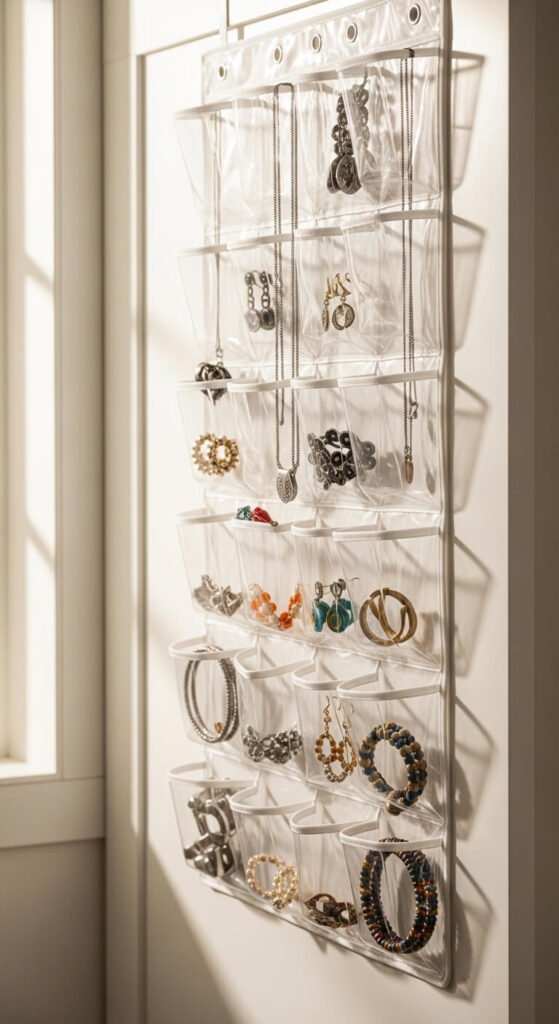
Over-the-door organizers save drawer and dresser space entirely.
Clear pocket organizers let you see every piece at a glance. You can dedicate one pocket per necklace, which prevents tangles completely.
Hang it over a closet or bathroom door. It takes up zero floor or counter space.
Look for one with both large and small pockets. Large pockets hold folded necklaces and bracelets. Small pockets are perfect for stud earrings and rings.
7. Display Bracelets on a Paper Towel Holder
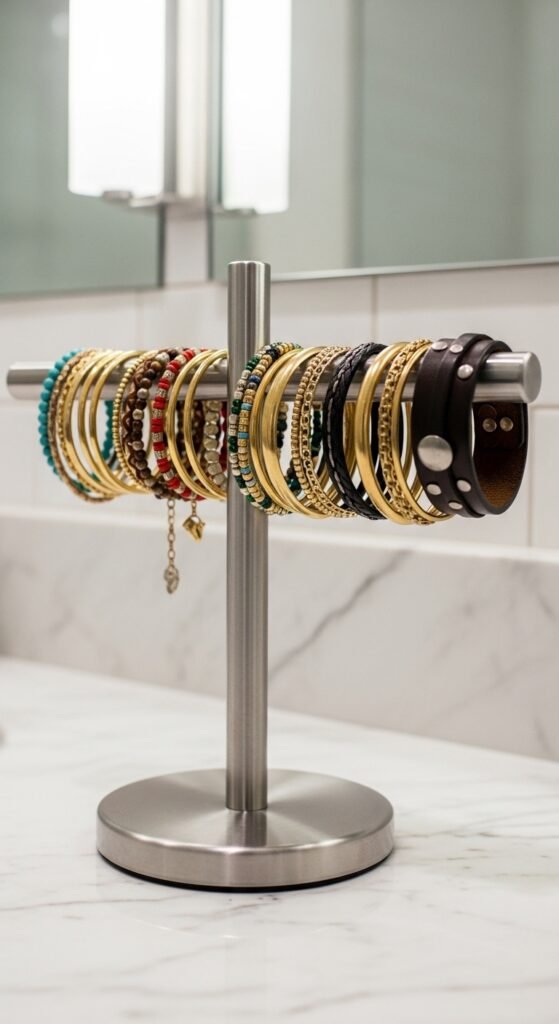
This is one of the cleverest repurposing tricks for bracelets.
A paper towel holder has a horizontal rod that bracelets slide onto perfectly. Stack bangles, cuffs, beaded pieces, and chain bracelets all in one place.
It stands on its own, so it sits easily on a dresser or bathroom counter.
Grab one for a dollar or two at a discount store. It holds far more bracelets than you expect and keeps them from scratching each other.
8. Store Necklaces in Individual Zip-Lock Bags
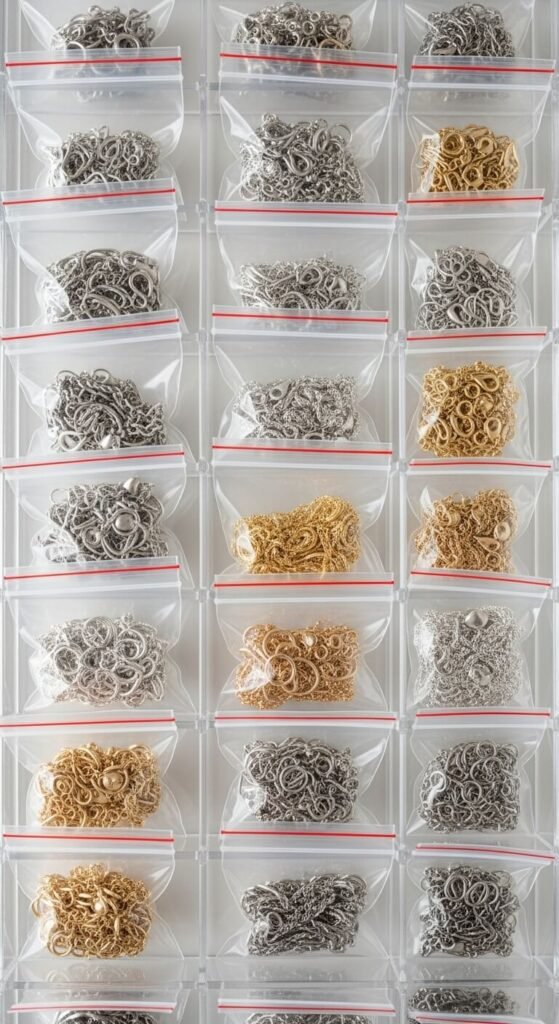
This sounds basic, but it is genuinely one of the best tangle-prevention methods.
Zip-lock bags keep each necklace completely separate. Fold the chain inside, seal the bag, and store bags flat in a drawer or small bin.
Label each bag with a marker if you want.
This is especially smart for travel. Throw the bags into a pouch and nothing tangles, no matter how much the bag moves.
9. Build a Ring Cone from Air-Dry Clay
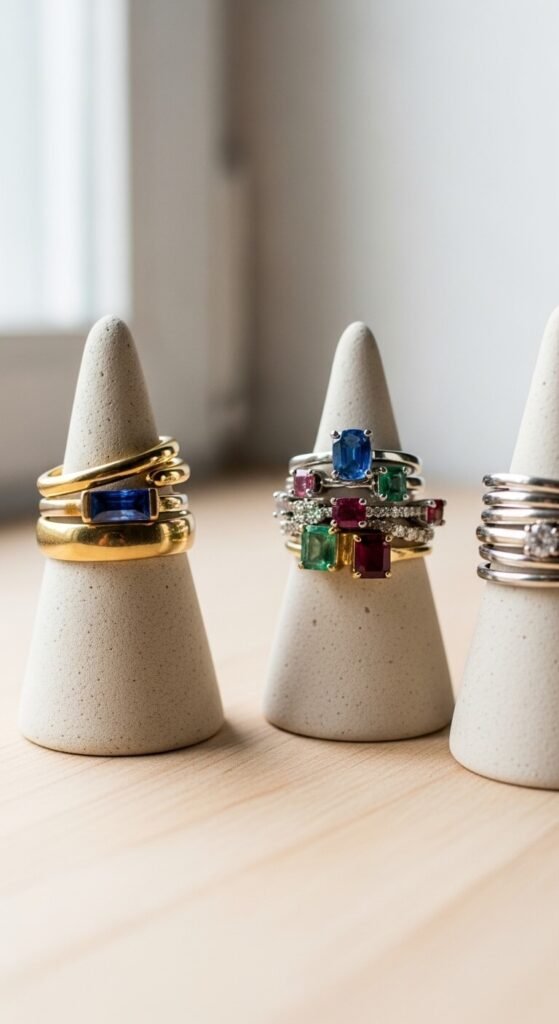
You can make your own ring holder for almost nothing.
Air-dry clay from a craft store costs around $5. Roll it into a cone shape, smooth the surface, and let it dry overnight.
Stack your rings on the cone. They stay separated and upright.
You can paint the cone any color to match your space. Make a few in different sizes for different ring widths. It is a simple afternoon project with a result that looks polished and intentional.
10. Attach Hooks Inside a Cabinet Door
[Image Prompt: A photograph of the inside of a white bedroom cabinet door, small gold adhesive hooks evenly spaced, each holding a necklace or two thin bracelets. Soft interior light, door slightly ajar. Shot with a wide lens, clean styling, wood cabinet texture visible on the door frame.]
Hidden storage is often the most satisfying kind.
Adhesive hooks go inside any cabinet or armoire door without drilling. Each hook holds one or two necklaces.
This works especially well in a bathroom vanity cabinet or a bedroom wardrobe. Everything is hidden when the door is closed, but instantly accessible when open.
Use Command hooks rated for at least half a pound. They come off cleanly without damaging the surface.
11. Use a Velvet Jewelry Roll for Travel and Storage
[Image Prompt: A close-up photograph of an open velvet jewelry roll on a cream linen bedspread, showing small zip pockets holding stud earrings, a hook row holding necklaces, and a ring bar with stacked bands. Soft natural window light, rich jewel-toned velvet. Shot with a wide-aperture lens, fine fabric texture in focus, warm tones.]
A jewelry roll keeps your collection safe whether you are home or traveling.
Velvet jewelry rolls lay flat in a drawer and unroll to reveal organized compartments — hooks for necklaces, pockets for earrings, bars for rings.
Roll it up to tuck it away or pack it in a suitcase.
They cost between $15 and $40. Buy one in a color that feels personal. It makes getting ready feel a little more special.
12. Repurpose a Vintage Mug Tree for Necklaces
[Image Prompt: A photograph of a slim brass vintage-style mug tree on a white dresser, its arms holding draped gold and silver necklaces at varying lengths. Soft evening light from a lamp in the background. Shot with a 35mm lens, warm golden tones, dresser surface lightly styled with a small candle and dish.]
Mug trees were designed for hanging, which makes them perfect for jewelry.
A slim mug tree has multiple arms at different heights. Each arm holds one or two necklaces without tangling.
Thrift stores often have them for under $5. Brass or gold ones look especially elegant on a dresser.
This display also makes your necklaces feel like part of your room’s decor, not just functional storage.
13. Use Foam Earring Inserts in a Shallow Box
[Image Prompt: A photograph of an open shallow white box with a foam insert, rows of holes holding stud earrings upright — pearl studs, diamond studs, gold geometric shapes. Overhead flat light, clean white background. Shot with a macro lens, fine foam texture visible, crisp and organized styling.]
Keeping studs organized is one of the hardest jewelry challenges.
Foam earring inserts are sold at craft stores or online for just a few dollars. They are flat sheets of foam with pre-cut holes just big enough for an earring post.
Press each stud into a hole. The back holds it in place.
Lay the foam flat inside a small box or drawer. Every stud pair stays visible and together. No more single earrings.
14. Hang a Framed Chicken Wire Panel
[Image Prompt: A photograph of a small square frame made from reclaimed wood, filled with chicken wire stretched taut, mounted on a white wall. Gold S-hooks hang from the wire, each holding a necklace. A few small paper tags act as labels. Soft morning light. Shot with a wide-aperture lens, wood grain texture visible, tidy and stylized.]
This DIY is easy to make and looks genuinely beautiful on a wall.
Chicken wire inside a wood frame creates a grid of spots to hang jewelry. S-hooks or bent paper clips serve as individual hangers.
You can make this for under $10 using a small frame from a thrift store and a roll of chicken wire from a hardware store.
Paint the frame to match your room. Hang it on a wall or prop it on a dresser. It holds necklaces, earrings, and light bracelets.
15. Sort Earrings by Type in a Divided Tray
[Image Prompt: A photograph of a long rectangular divided tray on a marble vanity, each section holding a different earring type — hoops in one section, dangles in another, studs lined up in a third. Bright vanity light overhead. Shot with a wide-angle lens, soft shadows between compartments, warm gold hardware accents.]
Sorting by type makes getting dressed much faster.
Divided trays give you specific zones for studs, hoops, dangles, and climbers. When you know where each type lives, you grab what you need without searching.
Bamboo cutlery trays work perfectly and cost very little.
Use one per category if your collection is large. Line the bottom with a thin piece of velvet to prevent scratches and keep pieces from sliding around.
16. Wrap Necklaces Around a Cardboard Roll
[Image Prompt: A close-up photograph of several paper towel cardboard tubes standing upright in a small wooden box, each tube wrapped with a single necklace — gold chain, pearl strand, layered pendant. Soft natural light from a nearby window. Shot with a macro lens, cardboard texture and chain detail both crisp, neutral tones.]
This is a completely free tangle-prevention method.
Cardboard tubes from paper towels or toilet paper rolls hold necklaces beautifully. Wrap one chain around each tube and secure the clasp.
Stand the tubes upright in a small box or drawer.
Each necklace stays separate, untangled, and easy to unwrap. This works especially well for delicate chains that knot easily. It takes two seconds to wrap and two seconds to unwrap.
17. Use a Tiered Cake Stand as a Jewelry Display
[Image Prompt: A photograph of a small two-tiered ceramic cake stand on a dressing table, top tier holding a ring dish and a few bracelets draped over the edge, bottom tier holding earring pairs laid flat. Soft natural light, white and gold styling. Shot with a 50mm lens, soft background blur, elegant and minimal.]
Tiered stands were made for display — and jewelry is worth displaying.
A small two-tiered cake stand gives you levels to work with. Use the top tier for rings and studs. Drape bracelets and necklaces from the edge of each tier.
Look for one at a thrift store or dollar store. White ceramic and gold metal ones look especially polished.
This also doubles as a beautiful dresser vignette when you are not getting dressed.
18. Mount a Small Magnetic Strip for Bobby Pins and Earrings
[Image Prompt: A photograph of a thin silver magnetic knife strip mounted horizontally on a white bathroom wall, small gold bobby pins and stud earring pairs attached to it in a neat row. Bright bathroom vanity light. Shot with a macro lens, sharp detail on the pin tips and earring posts, clean white tile background.]
Magnetic strips do not just work in kitchens.
A small magnetic strip mounted in your bathroom or bedroom holds metal earrings, bobby pins, and small hair clips securely.
Many earring posts and backs are metal enough to stick. Test yours before committing.
These strips cost under $10 at kitchen or hardware stores. Mount one near your mirror where you do your hair. Everything you reach for daily is right there in one strip.
19. Use a Linen Pouch System for Seasonal Pieces
[Image Prompt: A photograph of several small linen drawstring pouches laid flat on a white wood shelf, each labeled with a small paper tag — one reads ‘layered gold’, another ‘vintage brooches’. Soft natural light from a nearby window. Shot with a wide-aperture lens, linen fabric texture visible, calm and organized styling.]
Not every piece needs to be on display every day.
Small linen pouches are perfect for storing seasonal or occasional jewelry. Put your holiday pieces, vintage brooches, or sentimental items in individual pouches.
Label each one with a small tag. Store them in a drawer or on a shelf.
This keeps your everyday display uncluttered. It also protects delicate pieces from dust and light. Linen pouches cost almost nothing and are gentle on all metal types.
20. Create a Jewelry Station Inside a Shallow Shadow Box
[Image Prompt: A photograph of a shallow white shadow box frame mounted on a bedroom wall, its interior fitted with small hooks, a pin row for earrings, and a ring bar. Necklaces hang from the hooks, studs line the pin row. Soft diffused afternoon light. Shot with a wide lens, frame edges sharp, clean wall background.]
Shadow boxes turn storage into wall art.
A shallow shadow box gives you a defined frame for your jewelry display. Add small hooks to the back panel for necklaces. Use a strip of foam or a thin velvet bar for rings.
Mount the box on a wall near your mirror.
This works especially well in small spaces where you cannot spare dresser or counter room. The frame keeps everything looking intentional rather than cluttered.
21. Line a Drawer with Velvet Drawer Inserts
[Image Prompt: A close-up photograph of an open dresser drawer fully lined with black velvet jewelry inserts — ring rolls, earring pads, necklace compartments, bracelet bars. Each slot holds one piece. Overhead flat light, rich velvet texture visible. Shot with a wide-angle lens, crisp and organized, no empty spaces.]
A lined drawer is one of the most satisfying upgrades for a jewelry collection.
Velvet drawer inserts come in modular sets designed to fit most standard drawer sizes. Each section has a specific job — ring rolls, earring pads, necklace compartments.
The velvet keeps pieces from sliding and prevents scratches.
A basic set costs $15–$30 online. Measure your drawer first. Once everything is sorted by type, getting dressed takes half the time it used to.
22. Use a Decorative Bowl for Everyday Favorites
[Image Prompt: A photograph of a small deep gold ceramic bowl on a white marble nightstand, holding a few everyday pieces — a thin gold ring, a delicate chain necklace loosely coiled, a pair of small hoop earrings. Warm bedside lamp light. Shot with a 50mm lens, soft shadows inside the bowl, elegant and minimal.]
Sometimes the simplest solution is also the best.
A small ceramic or glass bowl near your bed or bathroom mirror is perfect for the three to five pieces you wear every single day.
Drop your most-worn items there each night. Pick them up each morning.
This keeps your main organizer for less-frequent pieces and prevents your daily favorites from getting lost in a larger collection. Any pretty bowl you already own works perfectly.
23. Thread Necklaces Through a Straw for Travel
[Image Prompt: A close-up photograph of three paper drinking straws lying flat on a white surface, each with a necklace chain threaded through — gold chain visible at both ends of the straw. A small travel pouch open in the background. Bright flat overhead light. Shot with a macro lens, crisp detail on the chain links and straw texture.]
This travel hack stops necklace tangles completely.
Thread each necklace through a drinking straw before clasping it. The chain runs inside the straw, so it cannot loop around other chains in your bag.
Clasp the necklace at the end to hold it in place.
Paper or reusable straws both work. This takes ten seconds per necklace and saves several frustrated minutes at your destination. It also works for thin bracelets.
24. Use a Shoe Organizer Pocket for Jewelry at a Vanity
[Image Prompt: A photograph of a small hanging fabric shoe organizer with clear pockets mounted on the inside of a closet door, each pocket holding a jewelry item — a folded necklace, a pair of hoops, a bracelet. Closet overhead light. Shot with a wide lens, organized pockets in rows, white closet door background.]
A few pockets of a hanging shoe organizer hold more than shoes.
Clear shoe organizer pockets are wide enough for folded necklaces and shallow enough that earrings do not get buried.
Dedicate the top row to necklaces, the next row to earrings, and the bottom to bracelets and larger pieces.
Hang it inside a closet door to keep the display hidden. This is ideal for renters who cannot drill into walls or people who prefer concealed storage.
25. Make a Leather Earring Strip
[Image Prompt: A photograph of a long horizontal strip of soft tan leather mounted on a white wall with two small brass nails, rows of small slits cut into it holding dangling earrings by their hooks. Earrings in varying styles — gold, silver, beaded. Soft window light from the right. Shot with a 35mm lens, warm leather tones, shallow depth of field.]
Leather strips make beautiful, low-cost earring displays.
Cut a strip of leather about 2 inches wide and as long as you need. Use a sharp blade to cut small slits across the strip at equal spacing.
Hang the strip on the wall using two small nails.
Each earring hook slides into its own slit and hangs securely. The leather is firm enough to hold the weight without sagging. Leather scraps from craft stores cost very little.
26. Use a Compact Acrylic Organizer for a Small Space
[Image Prompt: A photograph of a small clear acrylic tiered jewelry organizer on a compact bathroom counter, each level holding different pieces — rings laid flat, studs in a grid pattern, a small hook bar holding a necklace. Bright vanity light overhead. Shot with a macro lens, sharp acrylic edges, clean white tile background.]
Small spaces call for smart, compact storage.
Acrylic organizers with multiple tiers take up very little counter space while holding a surprising amount of jewelry.
Look for one that is about the size of a paperback book. Many have both flat compartments and hooks in a single unit.
Clear acrylic keeps everything visible without looking cluttered. It is easy to clean with a damp cloth. These cost between $15 and $35 and work especially well in bathroom vanity areas.
27. Create a Jewelry Wall Gallery with Mixed Hooks and Shelves
[Image Prompt: A photograph of a small bedroom wall section styled as a jewelry gallery — two small floating shelves holding ceramic dishes and a ring cone, interspersed with gold wall hooks holding necklaces and a leather earring strip. Soft natural light, white walls, warm gold accents throughout. Shot with a wide-angle lens, the overall arrangement intentional and gallery-like.]
A wall gallery turns your jewelry into part of the room’s design.
Mix floating shelves, hooks, and display pieces on one wall section. Use a shelf for a ring dish and a small sculpture. Use hooks below for necklaces. Mount a leather strip between them for earrings.
This makes getting dressed feel enjoyable rather than chaotic.
Plan your layout on paper first. Use matching metal finishes — all gold or all matte black — to keep it cohesive. This is the most personalized jewelry storage you can build.
Conclusion
The right jewelry organization system is not about spending a lot of money or redesigning your entire space. It is about choosing the methods that match your collection size, your room layout, and the way you actually get dressed each day. Some of these ideas cost nothing — a cardboard tube, a bowl you already own, a zip-lock bag. Others are small investments that pay off in saved time and fewer lost pieces every single morning. Start with two or three ideas that feel most practical for your life. Build from there as your habits settle. Once your jewelry has a home, you will stop losing pieces, stop fighting tangles, and start enjoying every item you own.