Tangled cables make even a beautiful room look messy. Whether it’s behind your TV, under your desk, or around your charging station, loose wires have a way of multiplying overnight. The good news? You don’t need to spend a fortune or hire anyone to fix it. With a few simple supplies and some free time, you can create a clean, organized space that stays that way. These 23 DIY cable management hacks are practical, affordable, and easy enough for anyone to tackle this weekend.
1. Use Binder Clips on Your Desk Edge
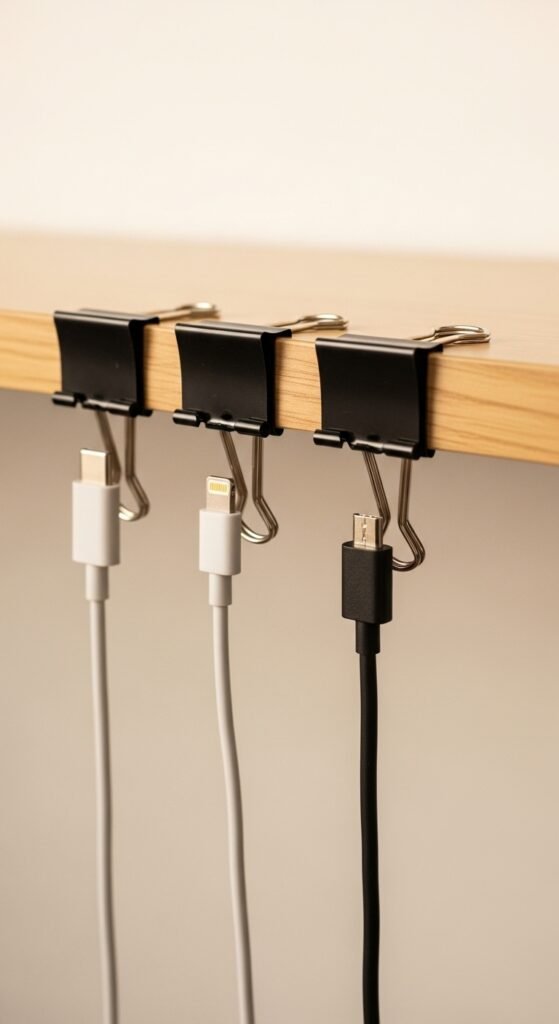
Binder clips are one of the cheapest cable hacks out there. Clamp them to the edge of your desk and thread your cables through the metal loops. Each clip holds one cable perfectly. You can label them with a marker too. A pack of binder clips costs under $2 at any dollar store. This keeps your charging cables off the floor and easy to grab without hunting. No tools. No drilling. Just clip and go.
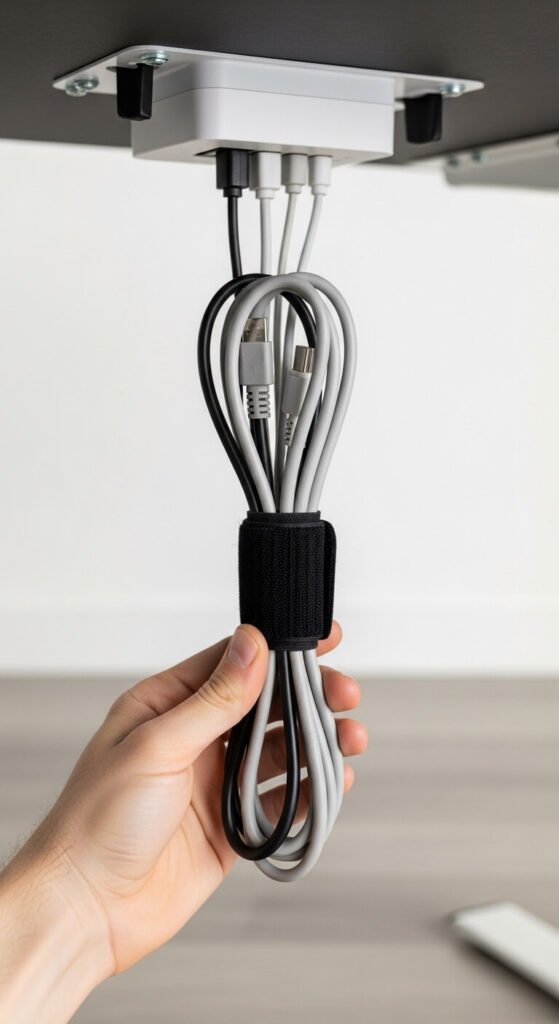
2. Bundle Cables with Velcro Ties
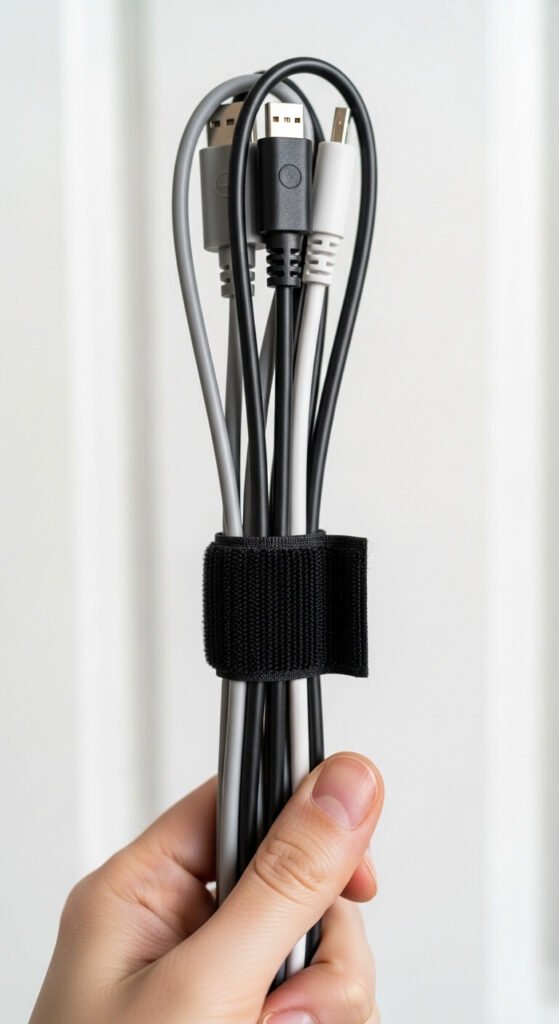
Zip ties are permanent. Velcro ties let you adjust, add, or remove cables anytime. Pick up a pack of reusable velcro straps for a few dollars online or at a hardware store. Bundle cords that run the same direction together. This instantly cuts visual clutter in half. Behind a TV stand or under a desk, a bundled set of cords looks 10 times cleaner than individual wires going in every direction. Reusable means no waste either.
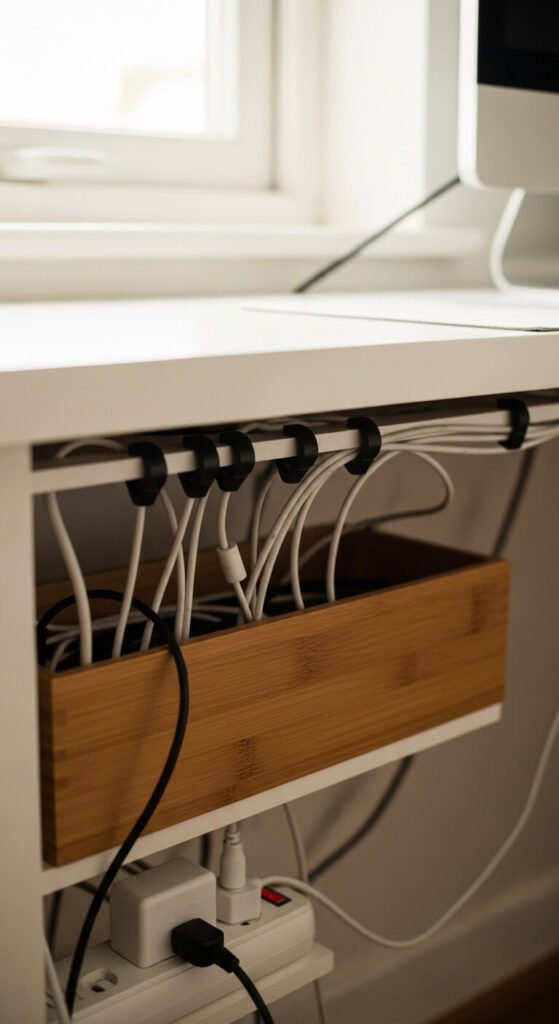
3. Mount a Power Strip Under Your Desk
Most people just set their power strip on the floor — and then wonder why the area looks messy. Mounting it underneath your desk hides the strip completely. Use double-sided mounting tape or two small screws to secure it. All your cables now run upward and disappear. You get the same number of outlets with zero visible clutter. This single change makes under-desk setups look dramatically cleaner for under $5 in supplies.
4. Run Cables Inside a Baseboard Cable Raceway

Cable raceways are plastic channels that snap onto your baseboard or wall. They hide wires completely while keeping them easy to access. You can paint them to match your wall color for a nearly invisible look. A 6-foot raceway kit runs about $10–$15 at any hardware store. No fishing wires through walls. No mess. Just stick it on, run your cables inside, and snap the cover shut. Perfect for TV-to-wall mounting setups.
5. Use a Shoebox as a DIY Cable Box
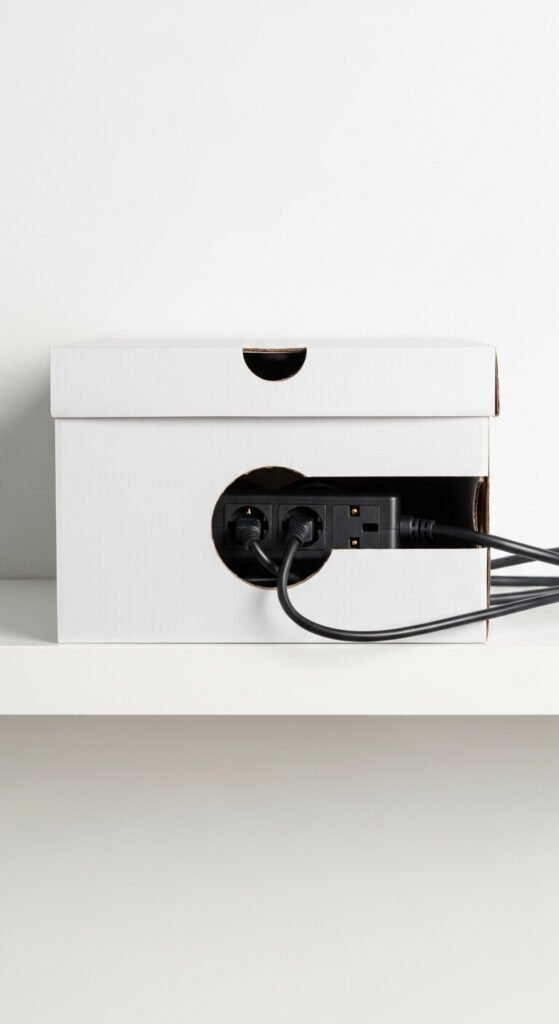
A cable box hides your power strip and tangled adapters from sight. You can buy fancy ones, or just grab a shoebox. Cut a hole in each end with scissors or a box cutter. Feed your cables in and out. Set your power strip inside. Place the lid on top. Done. Wrap the box in contact paper or fabric to match your room. Total cost? $0 if you have a shoebox lying around. It looks clean, and you can access it anytime.
6. Label Every Cable with Bread Clips
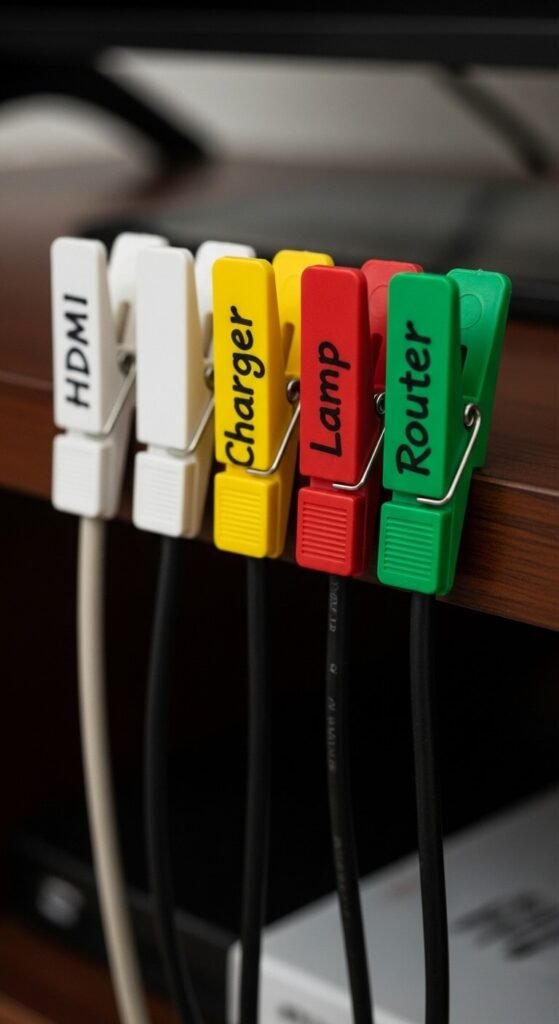
Ever unplugged the wrong thing because all your cables look identical? Bread clips are a free labeling hack. Save the plastic tags from bread bags, write the cable name with a marker, and clip it right onto the cable. They grip snugly and slide off easily. Color-coded bread clips make it even faster — red for power, blue for HDMI, and so on. Free. Takes two minutes. Saves you from the unplugging guessing game every single time.
7. Stick Cable Clips Along Your Wall
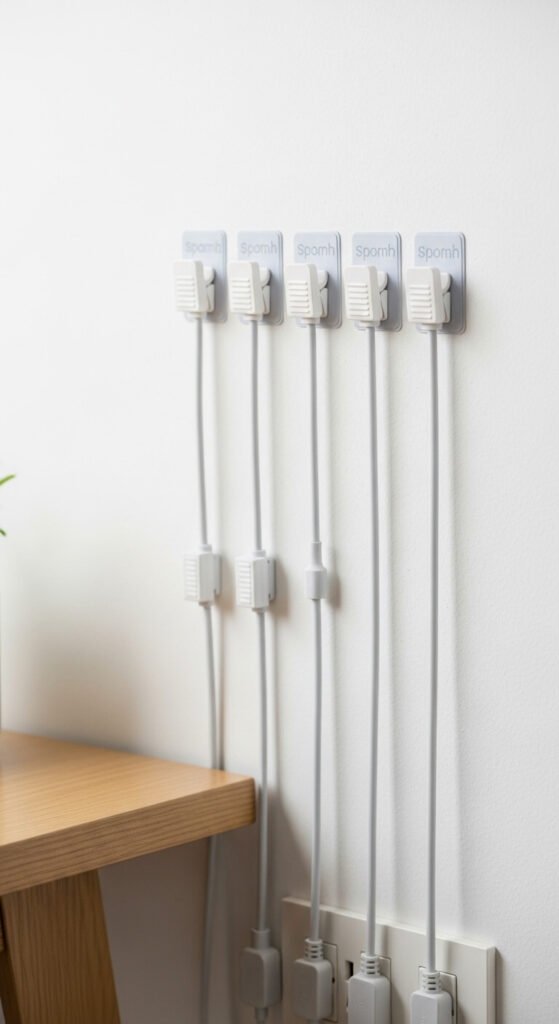
Adhesive cable clips are little plastic hooks that stick to walls, desks, or furniture. They guide individual cables in clean straight lines. A pack of 20 costs about $5. Stick them in a row along your wall or desk edge and snap each cable in. No tools needed — just peel and press. They hold well on painted walls and come off cleanly if you ever want to reroute. Great for phone chargers, lamp cords, and monitor cables.
8. Use a Pegboard for Full Desk Cable Control
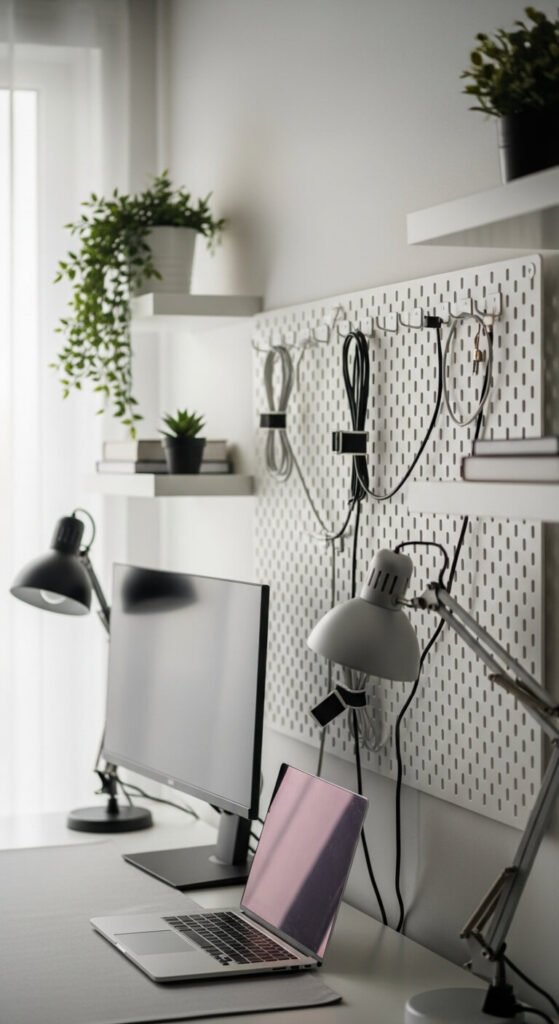
Pegboards are popular for tool walls, but they work brilliantly for cable management too. Mount one on the wall behind your desk and use small pegboard hooks to route and secure each cable. You can reposition hooks any time without new holes in your wall. Pegboards at hardware stores start around $15 for a basic 2×4 panel. Add a coat of paint in your accent color and it looks like intentional decor — not a cable fix.
9. Spiral Cable Wrap for Bundles on the Move
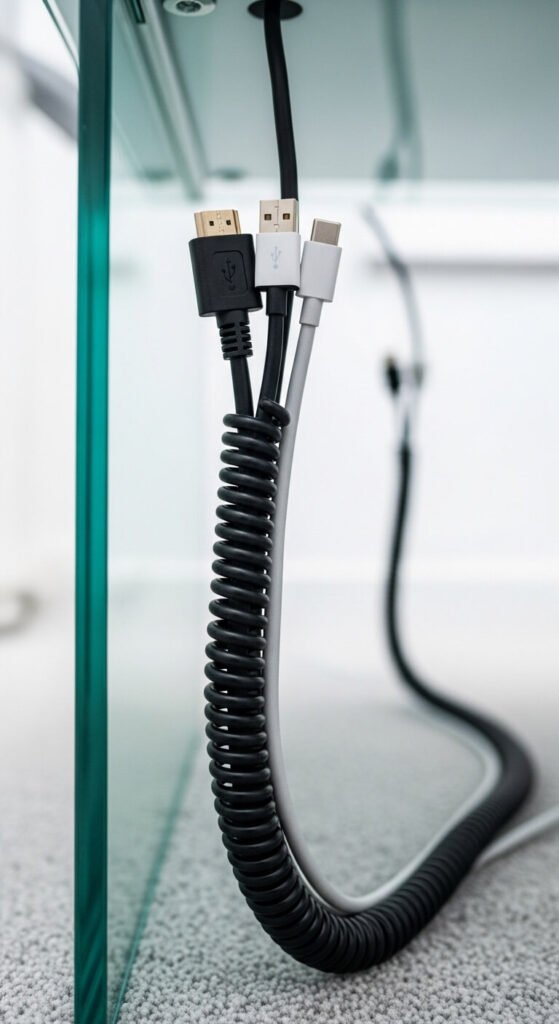
Spiral cable wrap is flexible plastic tubing that spins around a bundle of cables. It turns a messy cluster into a single, tidy cord. Cut it to any length with scissors. It’s especially useful on cables that move or flex, like behind a monitor arm or under a rolling chair. A 10-foot roll costs about $4. The spiral design lets you add or remove cables without cutting or re-wrapping. Clean, professional look for almost nothing.
10. Use Cord Covers for Floor Cables
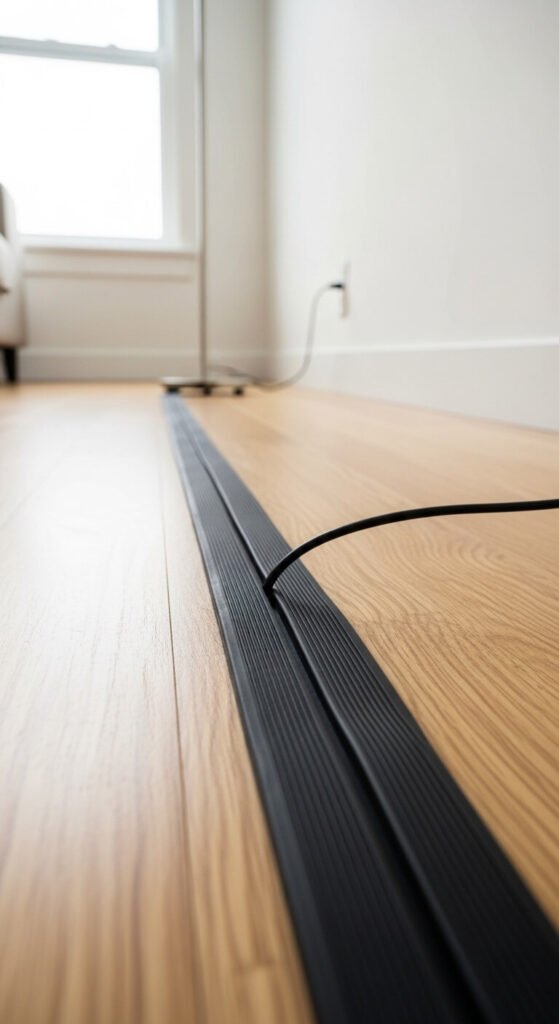
Running a cable across the floor is a tripping hazard and an eyesore. Cord covers solve both problems at once. These flat plastic or rubber channels sit flush with the floor and snap over your cables. They come in wood grain, black, or white to blend in. A 5-foot cover costs around $8. Great for living rooms where a floor lamp or TV cable needs to cross an open area. Safe, clean, and surprisingly easy to install in minutes.
11. DIY Cable Sleeve from Old T-Shirt Material
You can make your own fabric cable sleeve from an old T-shirt. Cut a long strip, fold it lengthwise, and sew or glue the edges. Thread your cables through the tube. It looks custom and soft — way nicer than plastic wrapping. Jersey fabric stretches, so getting cables in and out is easy. Use a patterned shirt for a fun look, or plain grey for minimal style. Cost: $0 if you have an old shirt. This is a genuinely satisfying weekend project.
12. Command Strips for Routing Behind Furniture
Command strips aren’t just for hanging pictures. Use Command hook strips to route cables neatly along the back of furniture. They pull off cleanly without damaging wood or paint, which is great for renters. Stack them in a line to guide a cable in a straight run. The small clear or white strips are nearly invisible. A pack of 16 costs about $6. Use them behind bookcases, along bed frames, or under floating shelves for hidden cable paths.
13. Zip Tie to Chair or Desk Legs
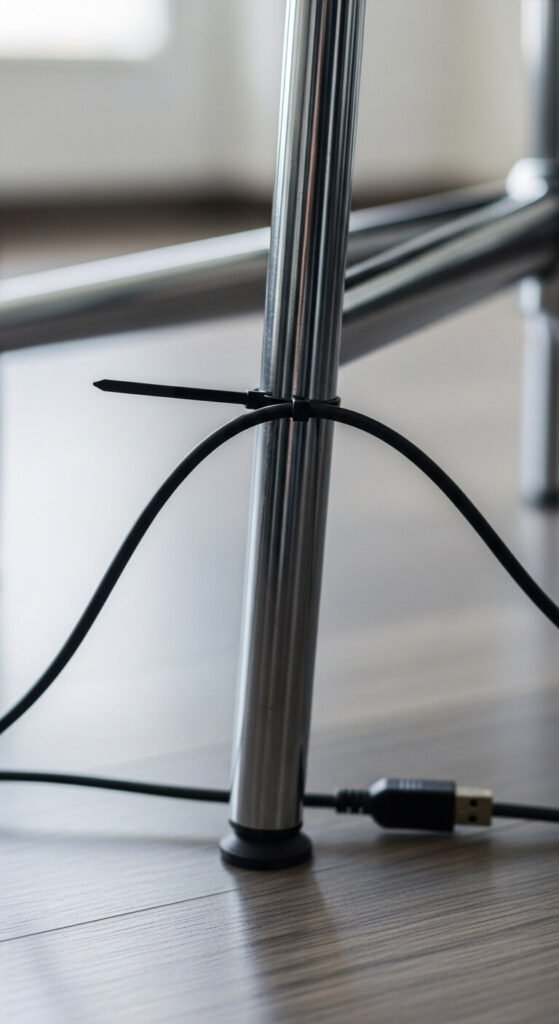
If cables need to travel along a desk or chair leg, zip ties keep them flush and out of the way. Space them every few inches down the leg for a clean run. Use black ties on black furniture and white on white — they practically disappear. A bag of 100 zip ties costs under $3 and lasts forever. For a cleaner look, trim the excess tail after fastening. Not reusable like velcro, but super strong for permanent setups.
14. Hide Cables in a Hollow Curtain Rod
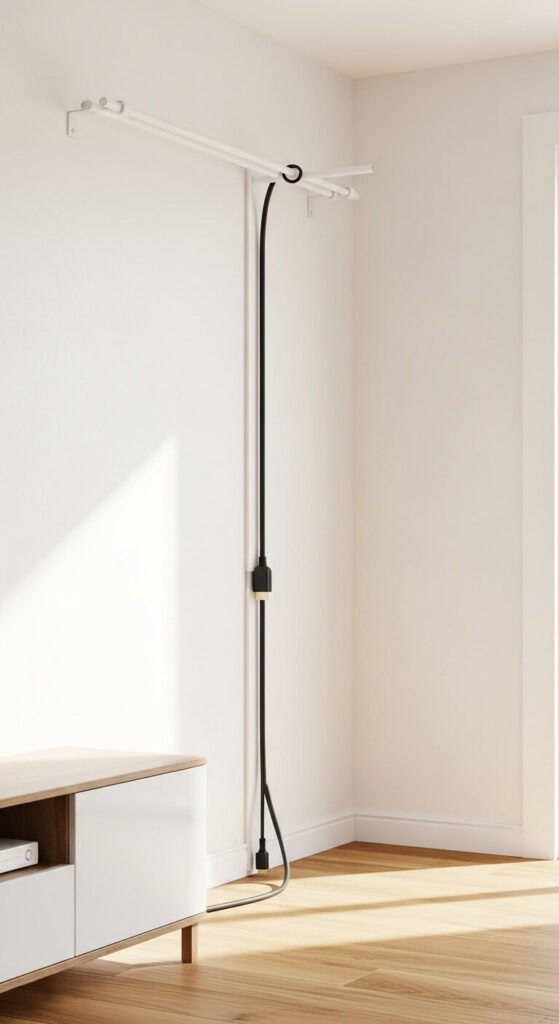
This one surprises people. A hollow curtain rod makes a nearly invisible cable conduit. Run a cable for a projector, sconce light, or TV from ceiling to floor without a single clip or raceway showing. The cable slides right through the rod’s hollow center. Use end caps to hide the entry points. Pick a rod that matches your trim color. A basic curtain rod costs $8–$15. This is especially impressive for ceiling-mounted projector setups.
15. Repurpose a Magazine Holder as a Charging Station
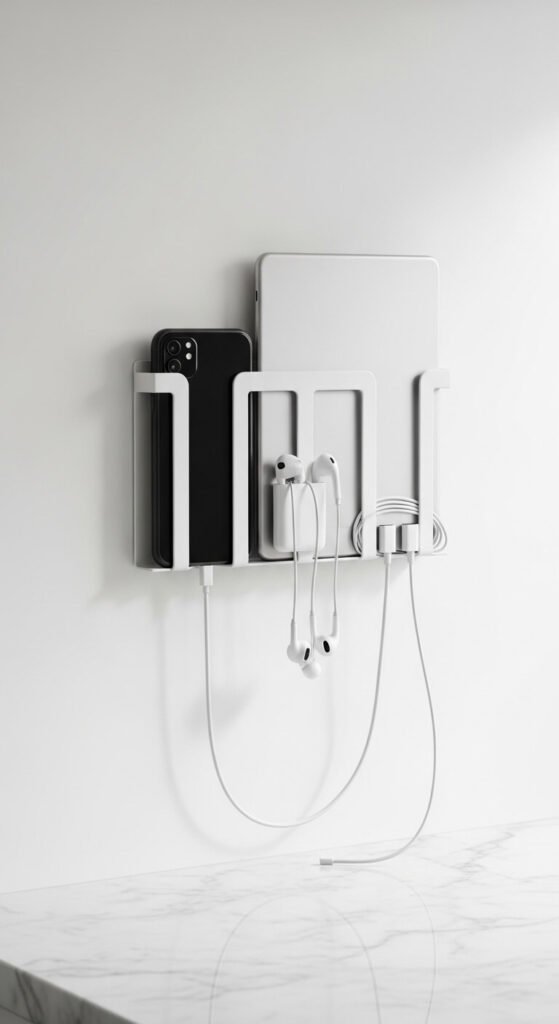
A wall-mounted magazine holder becomes a clean, organized charging dock with zero extra tools. Mount it to your wall, thread your charging cables up through the bottom slots, and let your devices rest inside while they charge. Phone, tablet, earbuds — all in one place, off the counter, cables out of sight. Thrift stores often sell these for $2–$5. Paint it to match your wall and it looks completely intentional.
16. Use Cable Turtles for Slack on Short Cables
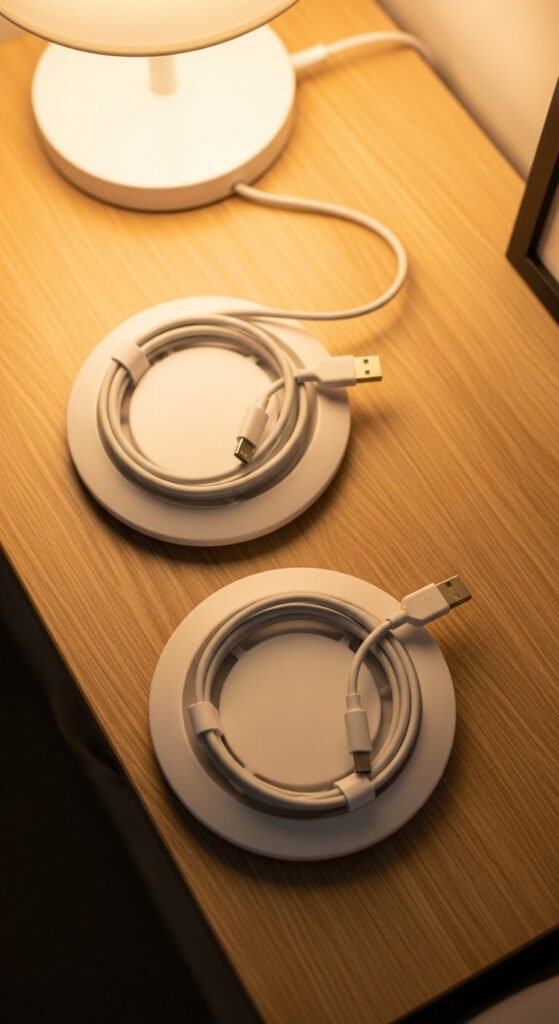
Short cables that are too long for your setup pool up on the surface in an ugly coil. Cable turtles are round discs that wind excess cable inside. Pull out exactly as much length as you need. The rest stays wound inside the turtle. No tangles. No dangling slack. A pack of two costs around $5. Great for desk lamps, charging cables, and earphones. They come in black, white, or clear — nearly invisible on a light surface.
17. DIY Painted Conduit for an Industrial Look
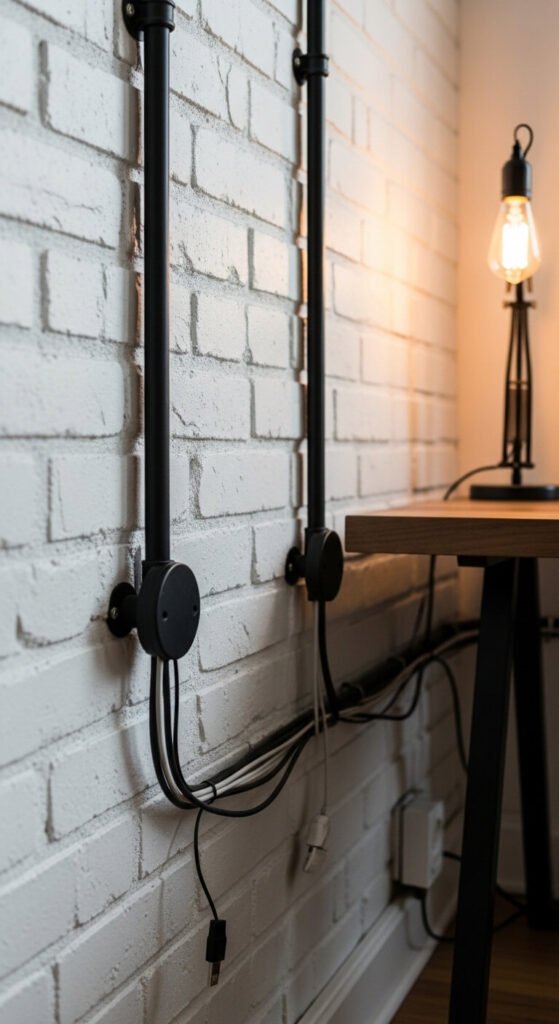
This is for people who want function AND style. Metal conduit pipe from a hardware store makes a stunning cable channel. Buy a few lengths of 1/2-inch EMT conduit, spray paint them matte black, and mount them on your wall with pipe clamps. Feed your cables through. It looks intentional — like high-end industrial design, not a cable hack. Total cost is around $15–$25 depending on length. Pairs beautifully with brick walls and wooden desks.
18. Tuck Cables Behind a Rug or Carpet Edge

For short cable runs across a room, the edge of a rug can hide a flat extension cord completely. Lift the rug edge, tuck the cable underneath, and press it back down. Use a flat extension cord (not a round one) for the cleanest result. These are sometimes called “floor cords” and cost about $10. The rug holds the cord flat and hides it from view. No drilling, no clips, no raceways — just the rug doing double duty.
19. Use a Washi Tape Lane to Guide Cables
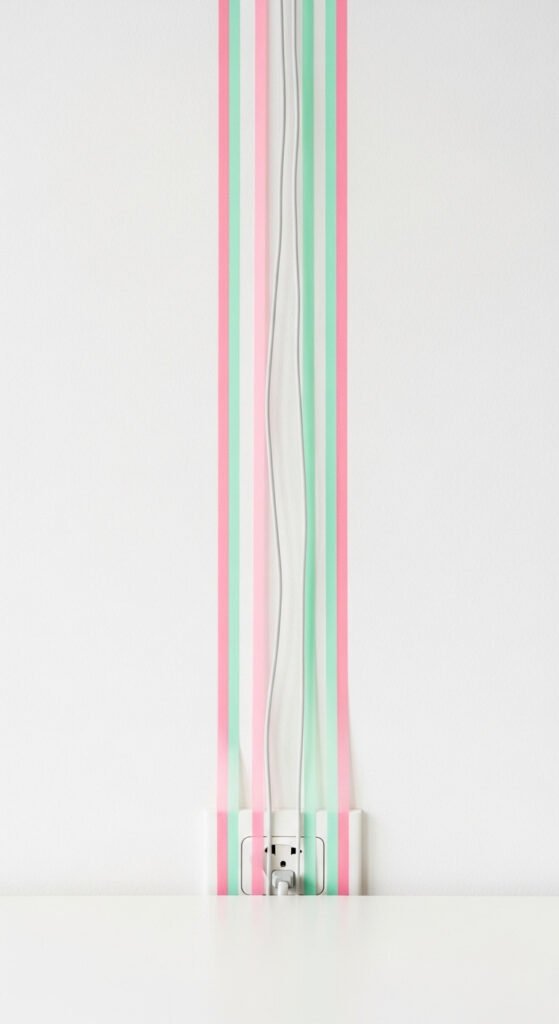
This one is equal parts functional and decorative. Washi tape creates defined lanes that guide cables along walls in a graphic, stylish way. Apply two strips of tape in parallel lines, then run your cable between them. The cable stays put and the tape acts as a frame. Mix colors for a fun pattern or use neutral tape for a subtle look. Washi tape removes cleanly — perfect for renters. A roll costs $2–$4 and it genuinely makes cables look like intentional wall art.
20. Build a DIY Cable Tray Under Your Desk
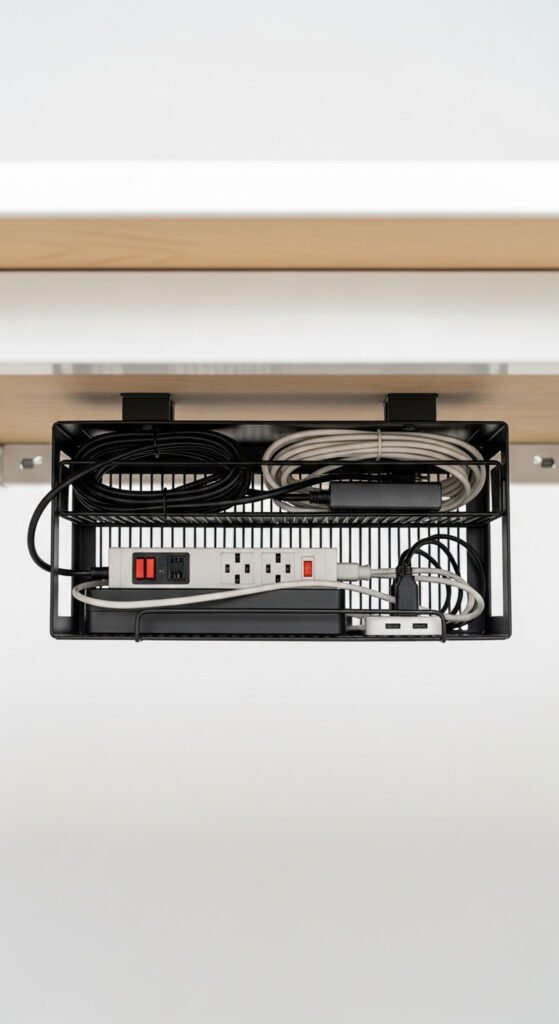
A cable management tray hangs under your desk and hides everything from sight. You can buy one for $15–$25 or build one from a wire shelf section and zip ties. Cut a cheap wire shelf to fit under your desk width, attach it with bolts or mounting tape, and lay your power strip and excess cables inside. From above or in front of the desk, zero wires are visible. It’s the single biggest upgrade for any desk setup, and the DIY version costs almost nothing.
21. Clip a Surge Protector to Your Desk Grommet
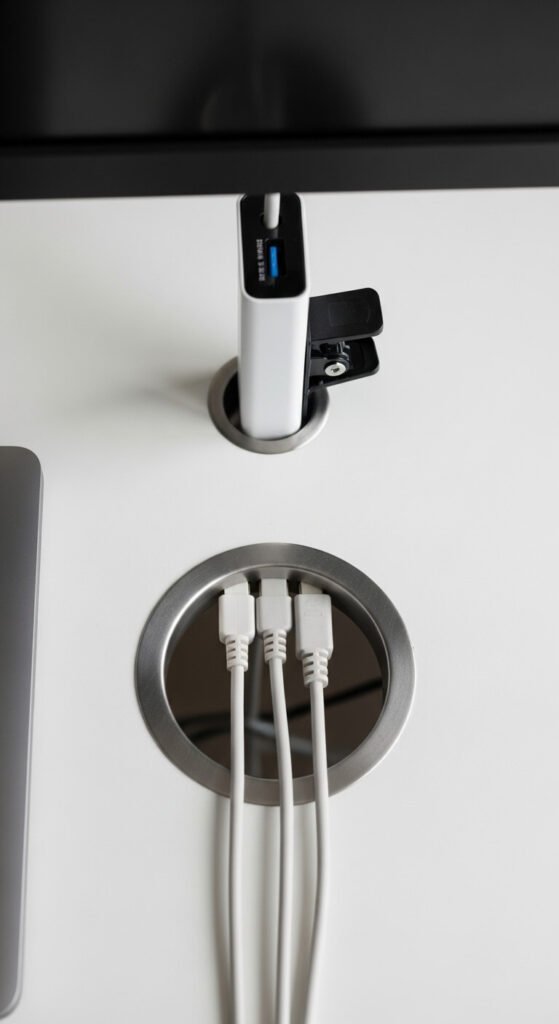
Many desks have a round grommet hole for cable routing. If yours does, use it to its fullest potential. A slim surge protector or USB hub clipped right below the grommet means all your cables emerge from a single clean point on the desk surface. Thread power cables down and plug them in below. Only the device cables come up through the hole. This single setup change can eliminate 80% of visible desk cable clutter. No extra products needed beyond what you have.
22. Route TV Cables Inside the Wall with an In-Wall Kit
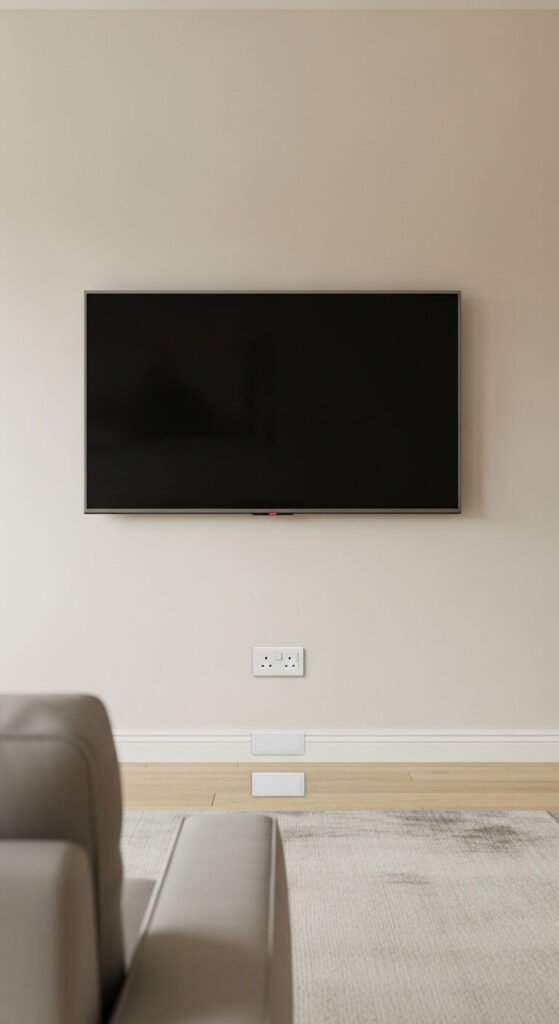
The cleanest TV wall install has no visible cables at all. In-wall cable management kits let you run cables through the wall legally and safely. They use two wall plates — one behind the TV, one near the baseboard — with a non-metallic tube running between them. No electrician needed. Kits cost $15–$30 and come with everything. You cut two small holes with a drywall saw, feed your cables through, and pop in the plates. The result looks completely professional.
23. Create a Nightstand Charging Dock with a Small Box
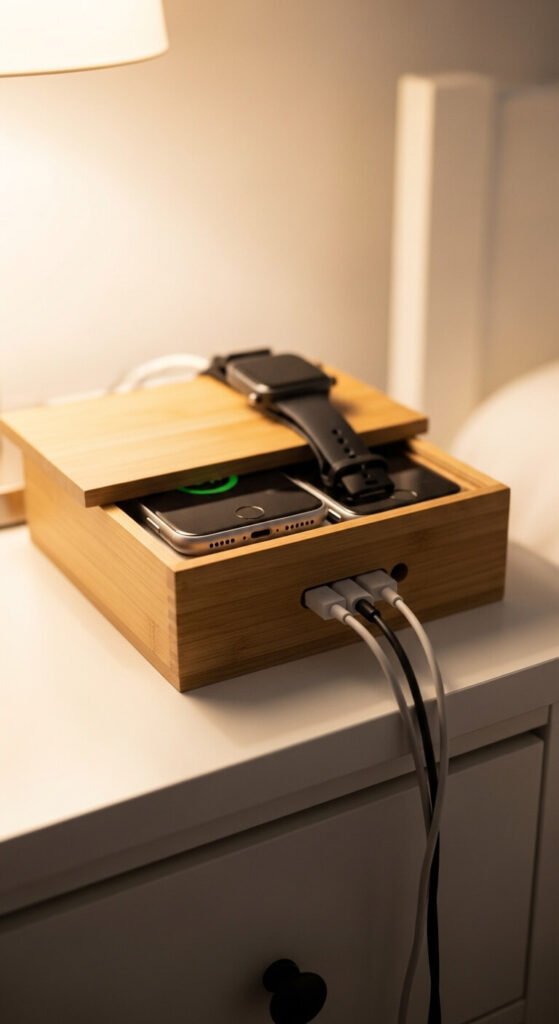
A small wooden box from a craft store becomes a tidy nightstand charging dock in under an hour. Drill a hole in the back for cables, set a small surge protector inside, and thread your charging cables through the hole. Place the box on your nightstand, set devices on top or inside the lid. Stain or paint the box to match your bedroom decor. Craft store boxes cost $5–$10. Your entire nightstand cable situation — power strip, three chargers, zero visible clutter — solved cleanly and cheaply.
Conclusion
Cable clutter is one of those problems that feels permanent until you actually tackle it. As you can see, fixing it doesn’t require expensive gear, professional help, or a complete room redesign. Most of these hacks cost under $10 and take less than an hour. Pick just two or three from this list and start there. Once you see how clean your space looks after even one change, you’ll want to keep going. A tidy room isn’t about perfection — it’s about removing the small annoyances that drain your energy every day. Start with the cables. The rest gets easier from there.