A tight broom closet can feel like a lost cause. Too narrow, too dark, and somehow always a mess the moment you close the door. But with the right setup, even the smallest cleaning closet can work hard for you. Whether you have a shallow hall closet or a sliver of space near the laundry room, these 26 organization ideas will help you reclaim every inch. No fancy renovations required — just smart, affordable changes you can make this weekend.
1. Add a Tension Rod for Spray Bottles
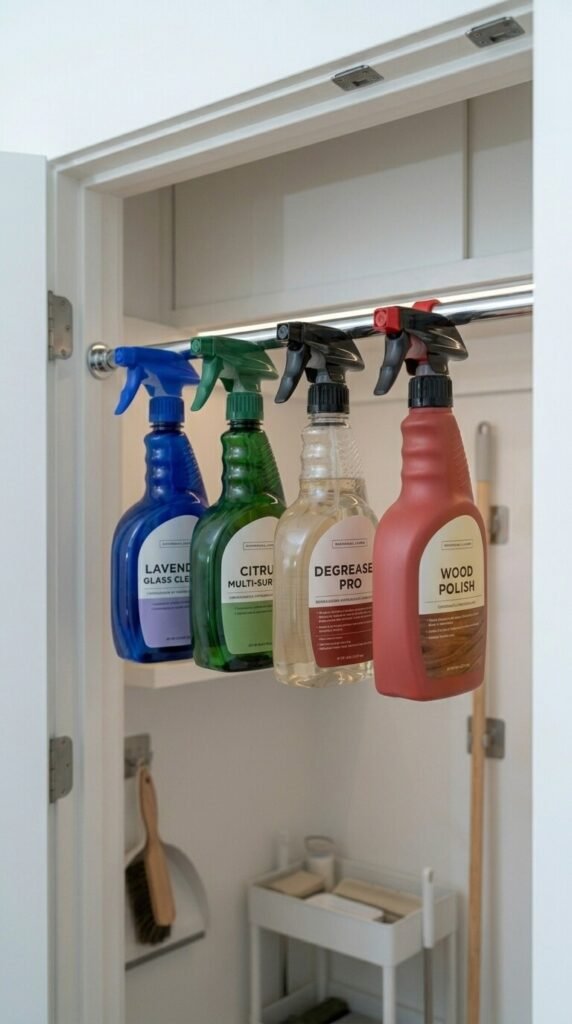
A tension rod costs about $5 and takes two minutes to install. Hang spray bottles upside-down by their triggers. This keeps them off the floor and easy to grab. No drilling, no tools needed. Just twist the rod to tighten it between two walls. Pick a sturdy rod rated for a few pounds. It works perfectly near the top of the closet or inside the door frame. Simple, cheap, and genuinely useful.
2. Use the Back of the Door
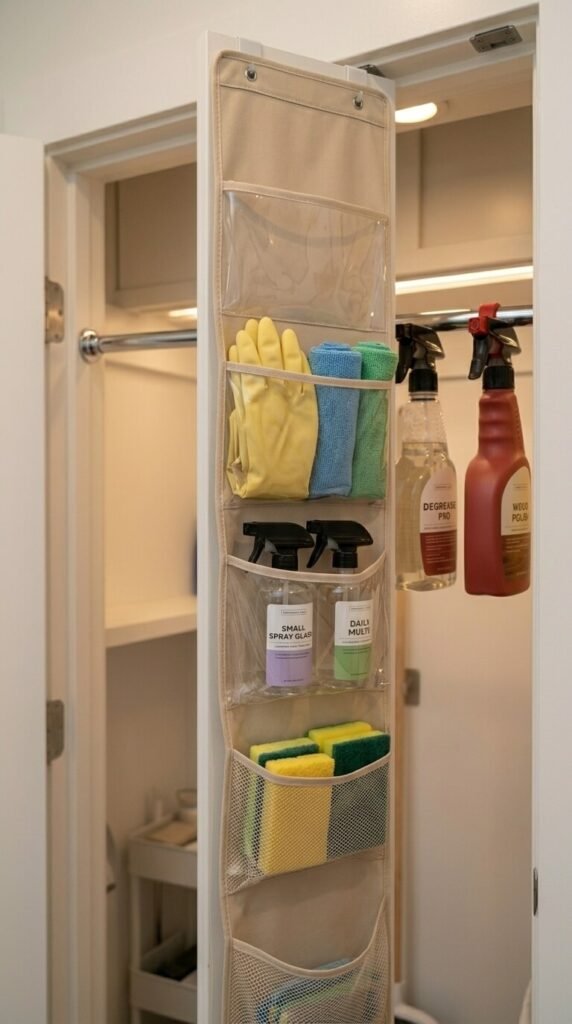
Over-door organizers are one of the easiest wins in a small closet. You can find them for under $15 at any home goods store. Use the pockets for rubber gloves, dusting cloths, extra sponges, and small bottles. The door is dead space most people ignore completely. A clear pocket organizer also makes it easy to see what you have without digging around. No hardware needed — just hang it over the top of the door.
3. Mount a Pegboard Panel Inside
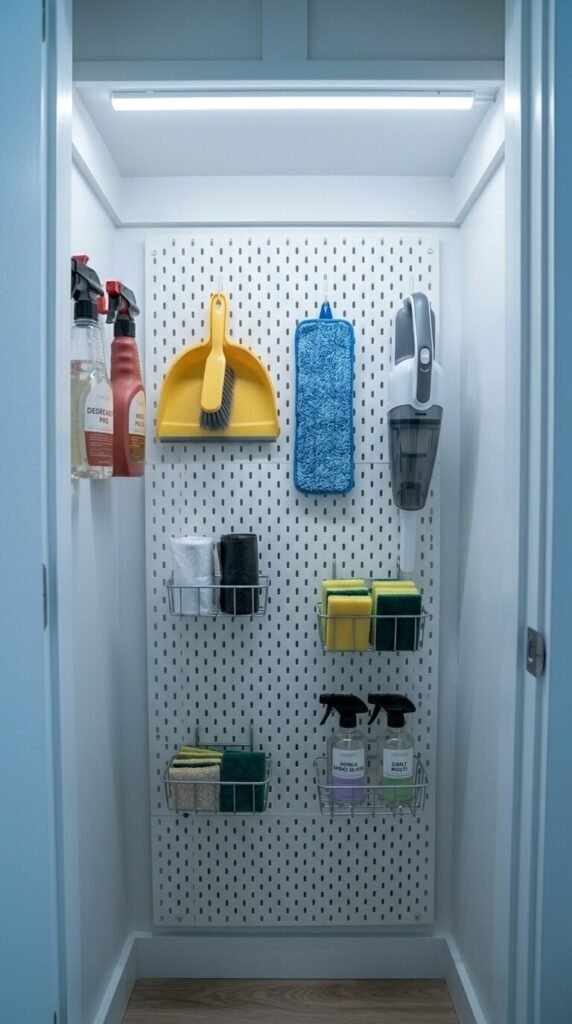
A pegboard panel turns a blank wall into a fully customizable storage wall. Cut one to fit your closet wall and attach it with a few screws. Add hooks, small bins, and holders wherever they make sense. You can rearrange them any time. Pegboard is cheap — usually under $20 for a 2×4 sheet. Paint it white to keep things looking clean. It’s one of the most flexible upgrades for a small cleaning closet.
4. Install a Slim Shelf Above Head Height
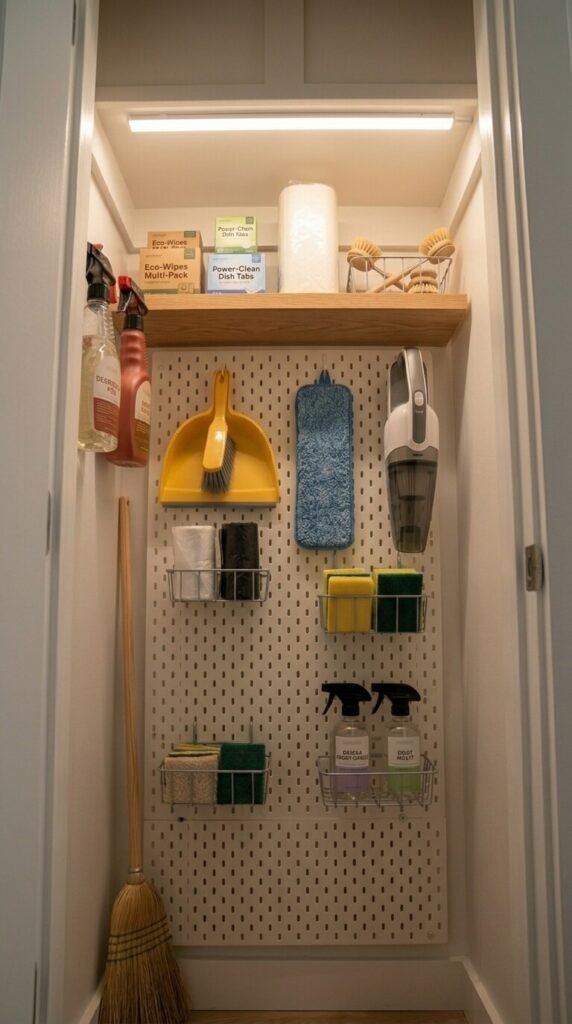
That empty space above eye level is prime storage. Install a single shelf up high for items you don’t reach for every day — extra trash bags, backup cleaning products, or a box of dryer sheets. A basic pine board from the hardware store plus two shelf brackets will do the job for around $10. Keep the everyday items lower and let the top shelf hold your overflow. It adds real capacity without touching the floor.
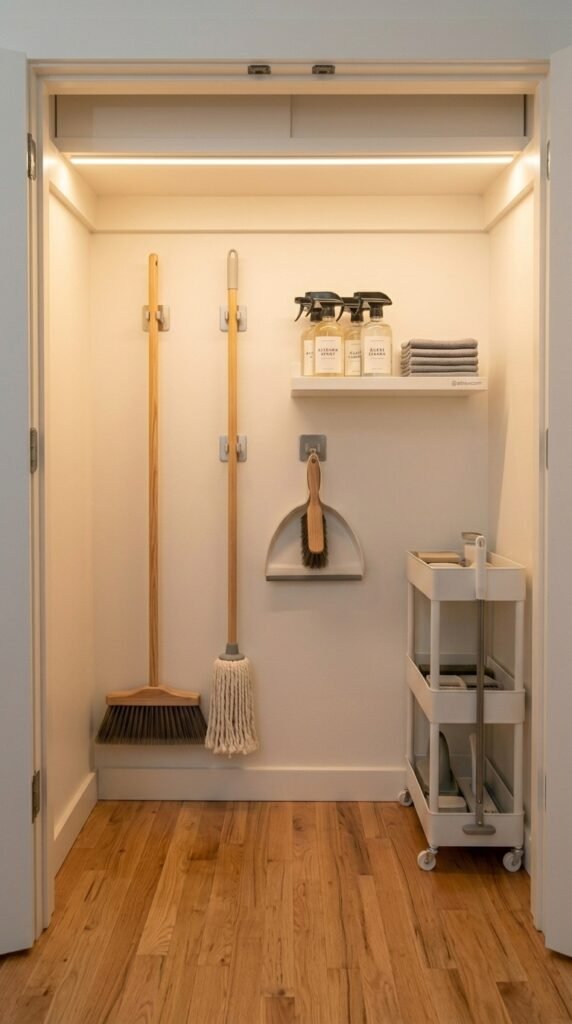
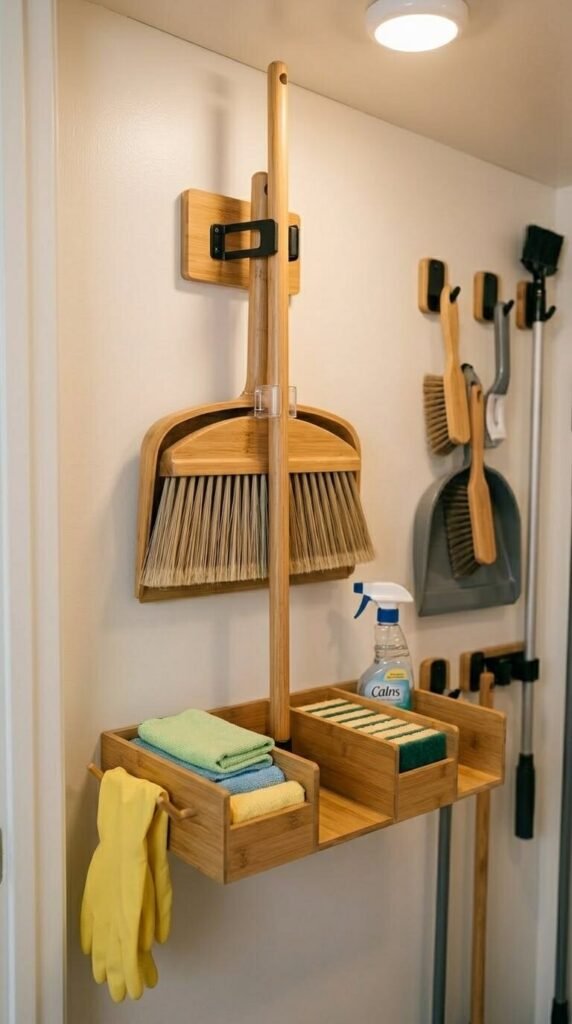
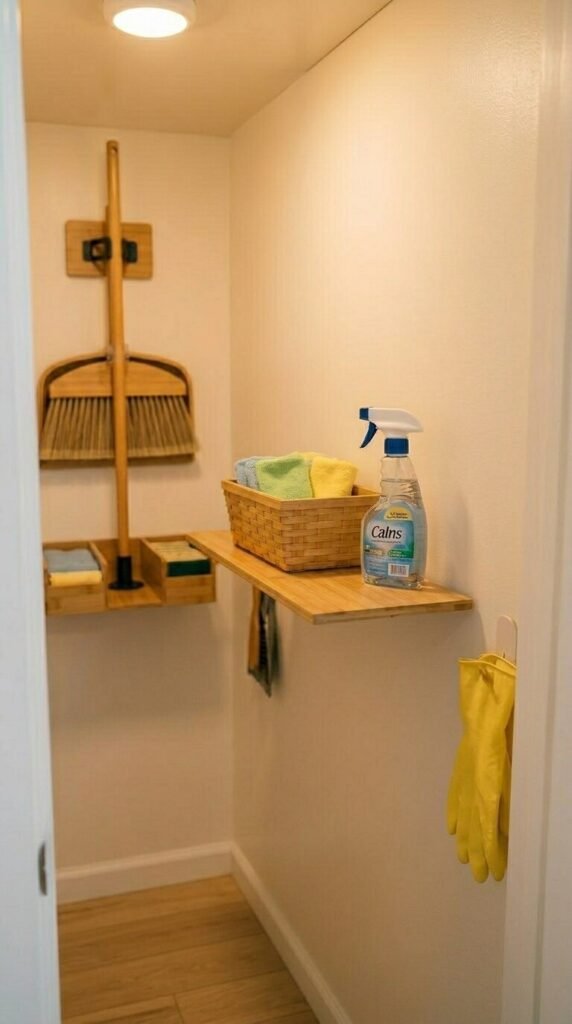
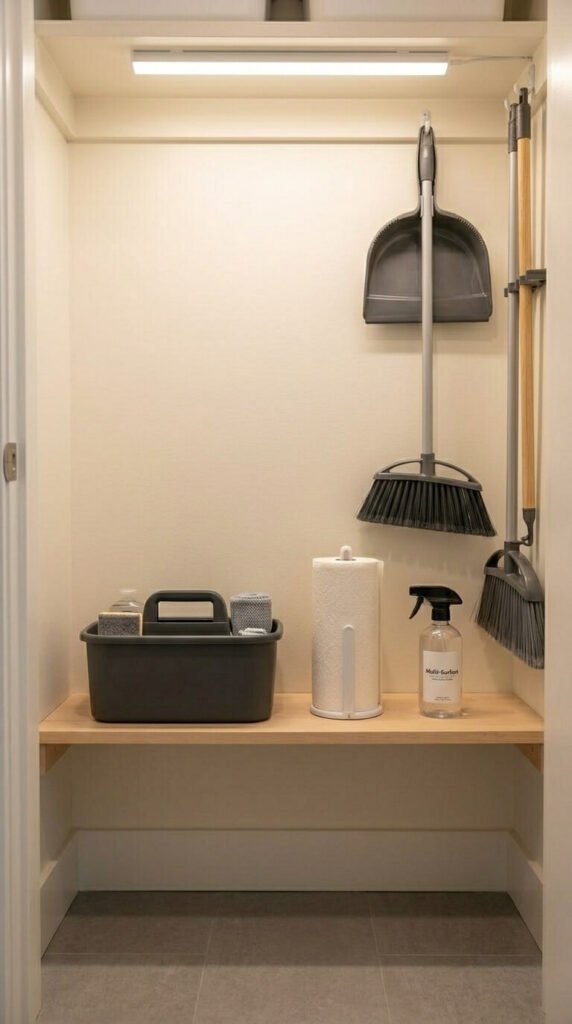
5. Stand Brooms and Mops with Wall Clips

Brooms and mops falling over is the #1 closet frustration. Wall-mounted broom clips solve this instantly. They grip the handle and hold it vertical on the wall. A pack of five clips runs about $8–$12. Screw them into the wall at handle height and snap your brooms in. The floor stays clear, handles stay upright. You can also find self-adhesive versions if you prefer not to drill. This one small change makes the whole closet feel more organized.
6. Roll In a Slim Utility Cart

A rolling utility cart fits in spaces as slim as 10 inches wide. Roll it in when needed, pull it out when you clean. It keeps supplies grouped and easy to transport from room to room. Wire versions let you see everything at a glance. They typically cost $25–$45. Look for one with three tiers and wheels that lock. This works especially well if your closet is just a sliver of space without room for shelves.
7. Hang a Bungee Cord Rack for Balls and Bulky Items

A bungee cord rack is a quirky but effective DIY solution. Stretch bungee cords between two wall-mounted hooks to create a stretchy holder for oddly-shaped items. It’s perfect for vacuum attachments, bulky scrub brushes, or rolled-up microfiber pads. The whole setup costs under $10. Screw two cup hooks into the wall about 12 inches apart and loop bungee cords across them. Easy to adjust and surprisingly sturdy.
8. Label Everything
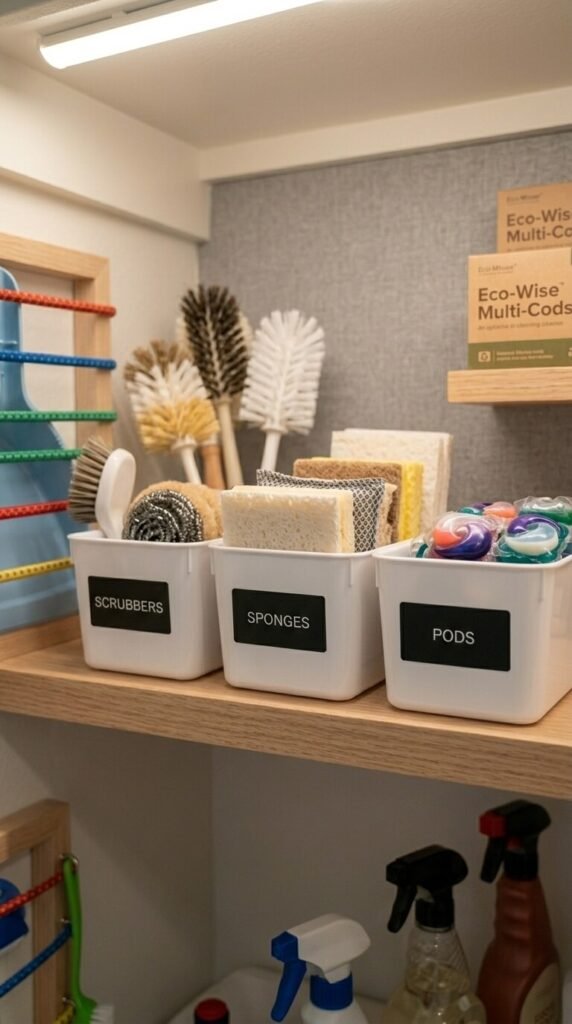
Labels seem obvious, but they change how a space functions. When every bin and basket has a label, you always put things back in the right spot. A label maker costs around $15 and pays for itself quickly. You can also use masking tape and a marker for free. Labeled zones mean no more digging. It also helps other household members know where things go. Clear labels keep your organization system working long-term.
9. Use Stackable Bins on the Floor
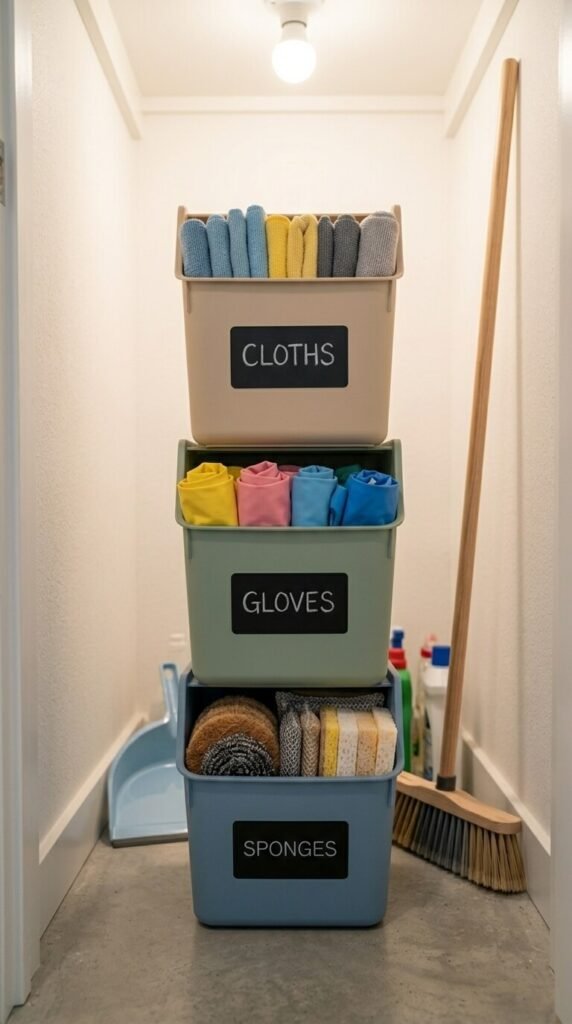
Stackable bins make use of vertical floor space without spreading out. Stack two or three bins in a corner to hold different categories of supplies — one for cloths, one for gloves, one for sponges. Look for bins with open fronts so you can pull items out without unstacking. Sets of three typically run $15–$25. Choose a consistent color for a tidy look. Matching bins make even a small closet feel more put-together.
10. Install a Towel Bar for Mop Heads and Rags
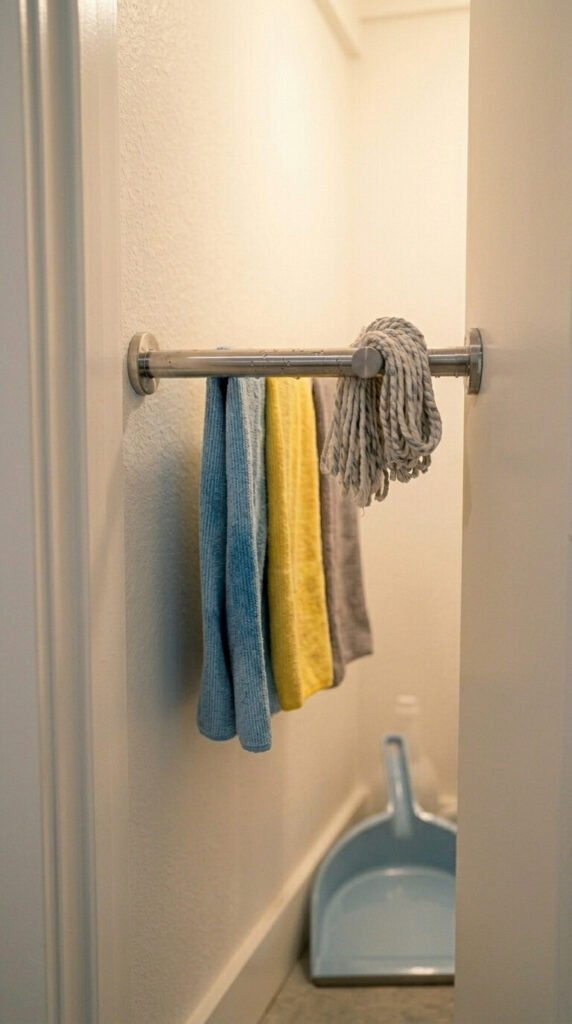
A towel bar inside the closet is a simple, cheap addition. Hang it on an empty wall and drape microfiber cloths, rags, or mop heads over it to dry. This prevents mildew and keeps damp items off the floor. A basic bar costs $8–$15 and takes about 15 minutes to install. It’s especially smart if you store your mop inside the closet. Damp mops need airflow — a bar solves that neatly.
11. Add Magnetic Strips for Small Metal Tools
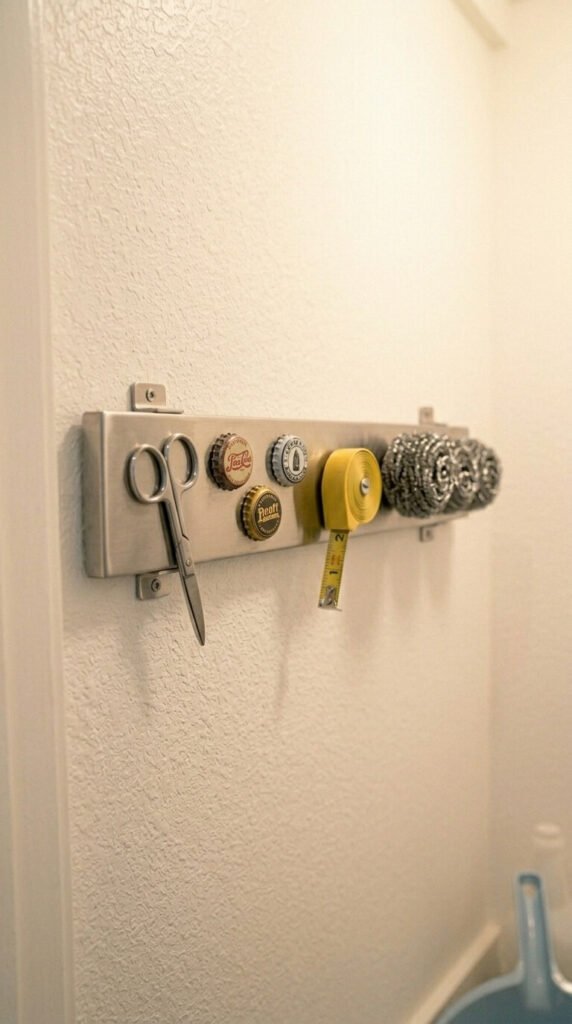
Magnetic strips are a kitchen hack that works just as well in a broom closet. Mount one on the wall for small metal items — bottle openers, scissors, steel wool pads, twist ties. It keeps tiny tools visible and off shelves. A 12-inch magnetic strip costs under $10. Just screw it into the wall at any height that works for you. It clears up bin space for bigger items and keeps the little stuff from getting lost.
12. Hang a Shoe Organizer for Cleaning Pods and Small Supplies
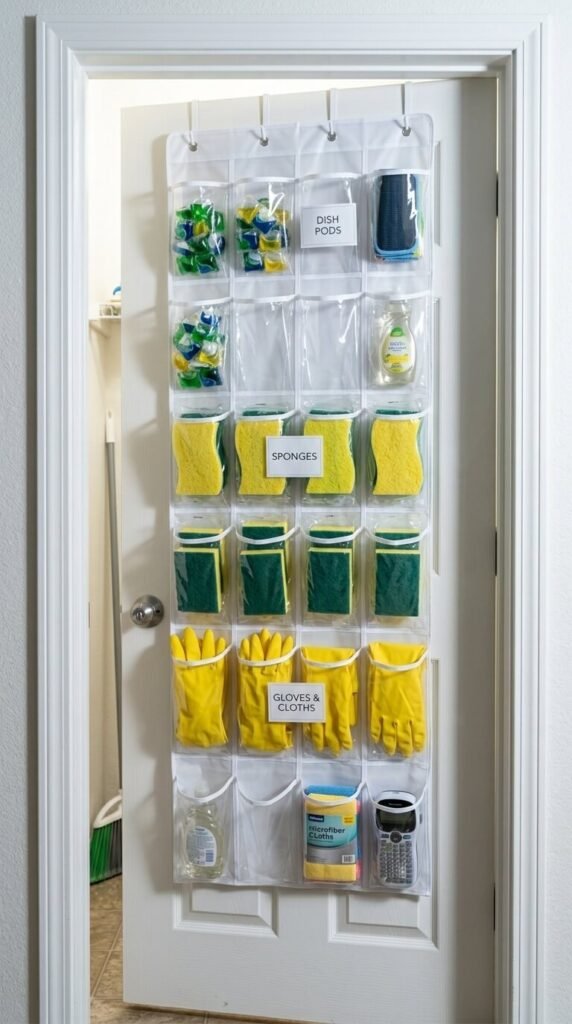
A clear hanging shoe organizer has way more uses than shoes. Hang one on the back of the closet door and fill the pockets with dish pods, sponges, extra sponge heads, scrubbing pads, and small bottles. You can see every item at a glance. These organizers cost $8–$15 and hold an impressive amount of product. The clear pockets mean no mystery — you always know what you have. It’s one of the most space-efficient hacks for a cramped cleaning closet.
13. Use a Lazy Susan for Corner Space
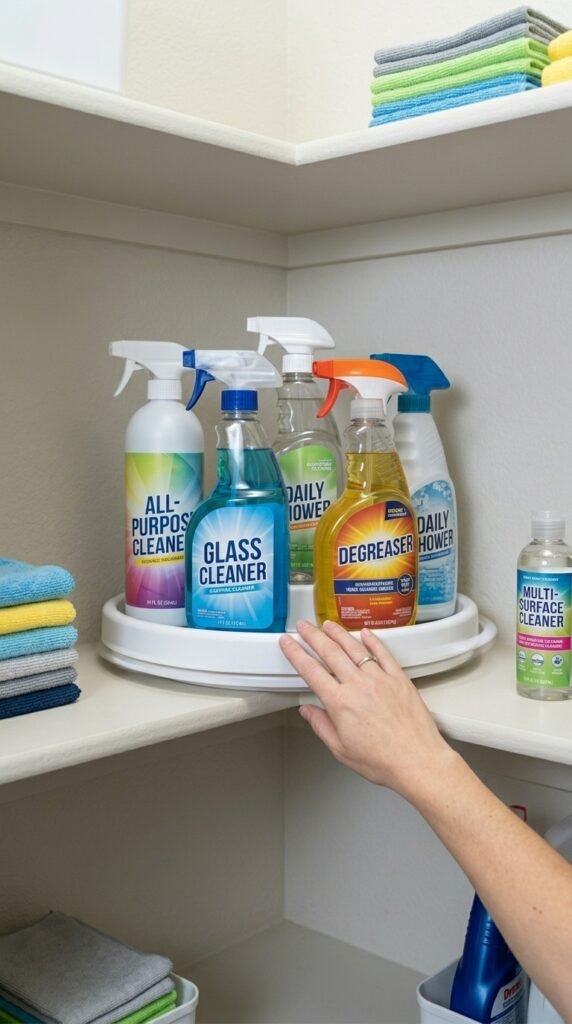
That awkward corner shelf space is hard to access. A lazy Susan turntable fixes that completely. Place one on any shelf and load it up with spray bottles. Spin it to reach the ones in the back. No more knocking things over or pulling everything out. A basic round turntable runs $8–$15. Choose a non-slip version so it stays put when you spin it. It’s especially useful on a deeper shelf where bottles tend to disappear.
14. Hang a Broom Holder Rail
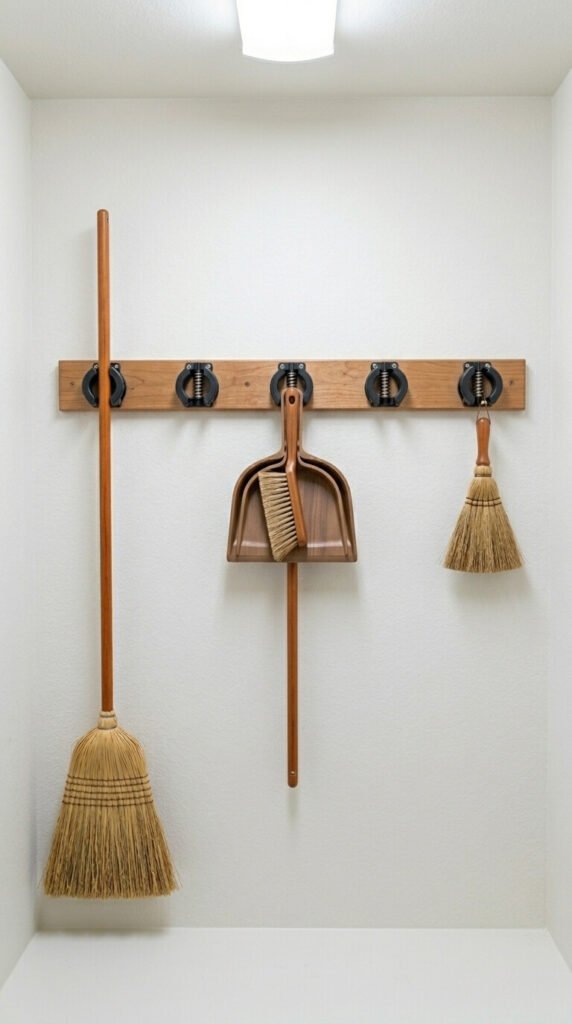
A broom holder rail is a dedicated strip that mounts on the wall with spring-loaded clips at intervals. You can fit a broom, dustpan, mop, and brush in a row. Most rails hold 3–5 tools and cost $12–$20. They’re compact and look a lot more intentional than random hooks. Install one along the back wall or a side wall — wherever you have a vertical run of open space. It turns a tangled pile of handles into a neat lineup.
15. Put a Small Step Stool Inside
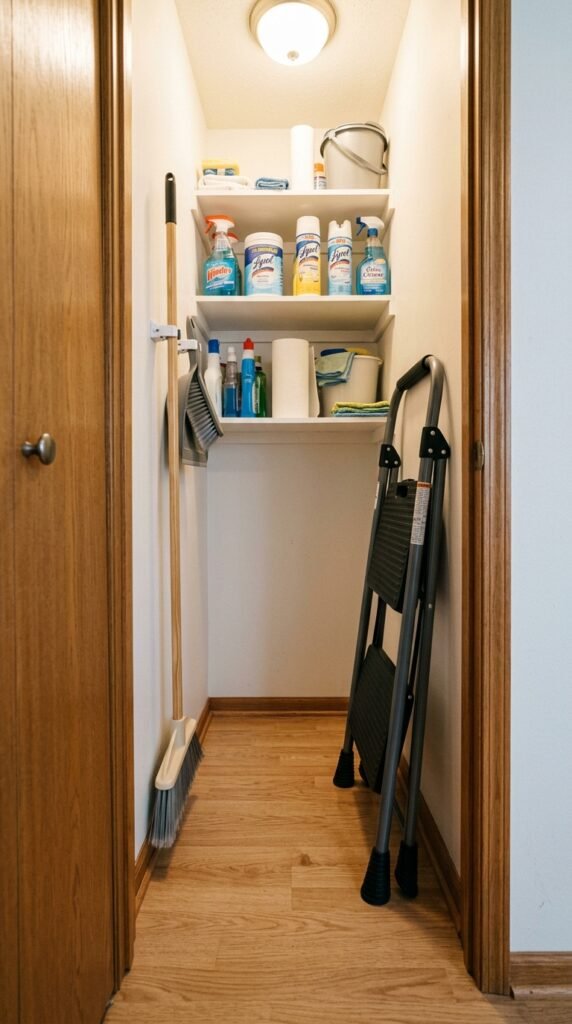
A folding step stool stored inside the closet means it’s always where you need it. Many cleaning tasks require one — reaching high shelves, changing light bulbs, or cleaning ceiling fans. A slim two-step foldable stool takes only 2–3 inches of depth when folded flat against the wall. You can lean it between tools or hook it on a wall clip. They cost $15–$30 and earn their spot every single time you need them.
16. Create a Caddy System
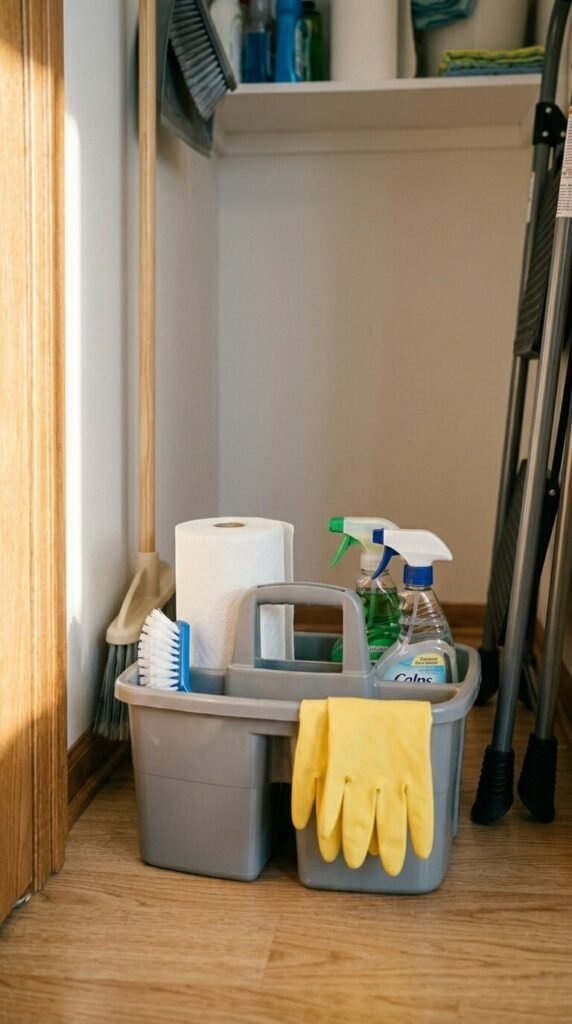
A portable cleaning caddy groups your most-used supplies together. Keep one ready to grab and carry from room to room. Store it on the floor or on a low shelf. Fill it with your go-to cleaners, gloves, and a sponge. When you’re done cleaning, the caddy goes right back in. Everything stays together and you’re never hunting for supplies in another room. Caddies cost $10–$20 and make a real difference in how efficient you feel.
17. Add Drawer Dividers to Any Shelf

Drawer dividers aren’t just for drawers. Use them on a flat shelf to create sections that stop items from sliding around. Adjustable bamboo or plastic dividers expand to fit any shelf width. They cost under $15 for a pack. Use one section for rags, one for gloves, and one for sponges. Items stay where you put them. This trick works especially well on wide shelves where small items tend to topple or mix together.
18. Hook a Dustpan to the Broom Handle
Keep your broom and dustpan together. Many dustpans have a snap hook on the handle designed to clip onto the broom handle. If yours doesn’t, add a small S-hook or cable tie. This combo hangs as one unit on a single wall clip, which frees up space for other tools. It also means you never search for the dustpan when you need it. Small habit, big difference in how organized the closet feels.
19. Install Adjustable Wall Brackets
Adjustable wall bracket systems — like those track-and-bracket shelf systems — let you move shelves up and down as your needs change. Install two vertical tracks on the wall and slide in brackets at whatever height works for your supplies. This is far more flexible than fixed shelves. You can shift everything up to fit a taller mop or add an extra shelf when supplies build up. Starter kits cost around $20–$35.
20. Use Vacuum-Seal Bags for Seasonal Mop Pads
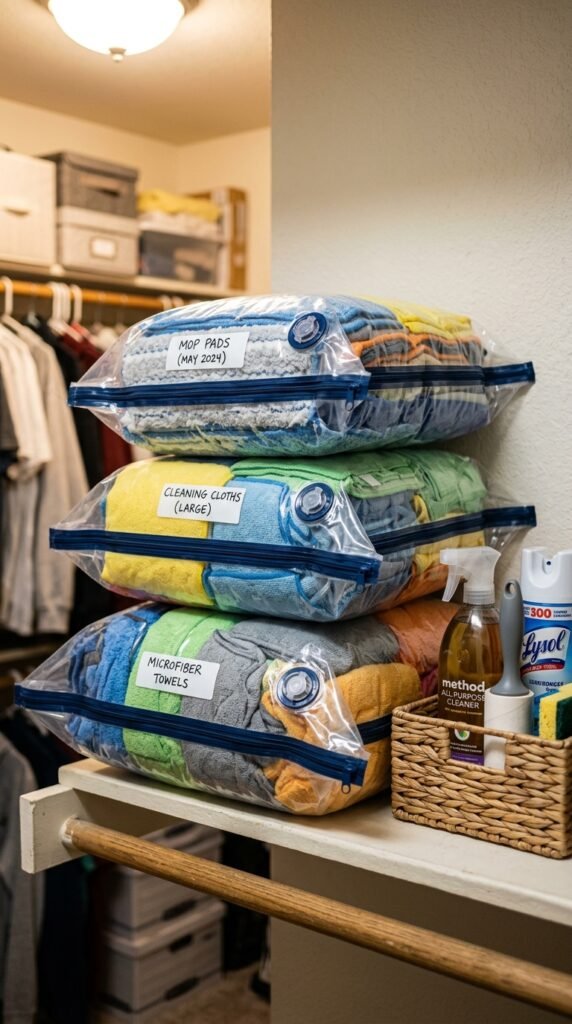
Vacuum-seal bags compress bulky cleaning cloths and extra mop pads down to a fraction of their normal size. Store seasonal or backup items flat on a shelf without them taking up much room. A pack of five bags costs about $10–$15. Use a regular vacuum to suck out the air. This works well for microfiber refills, extra rags, or cleaning pads you don’t use every week. Flat storage means your everyday items get the prime shelf space.
21. Mount a Small Whiteboard or Notepad Holder
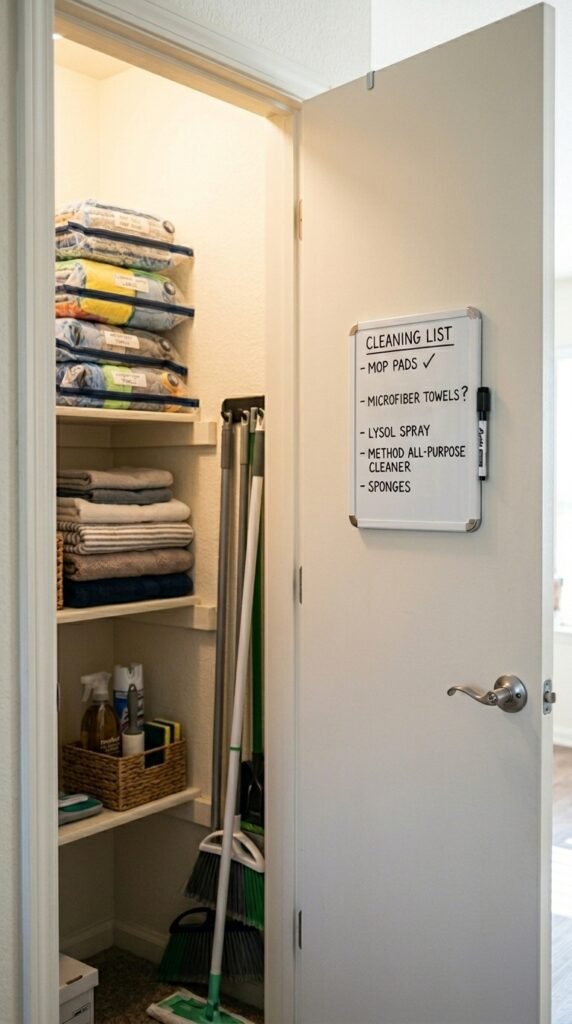
A mini whiteboard on the closet door is surprisingly practical. Use it to track what’s running low — dish soap, trash bags, scrubbing pads. When you pull the last one, write it down immediately. No more realizing mid-clean that you’re out of something. A small dry-erase board costs $5–$8. Stick it inside the door with adhesive strips. It keeps your shopping list current without needing your phone. Simple analog system that actually works.
22. Group Like Items in Clear Bins
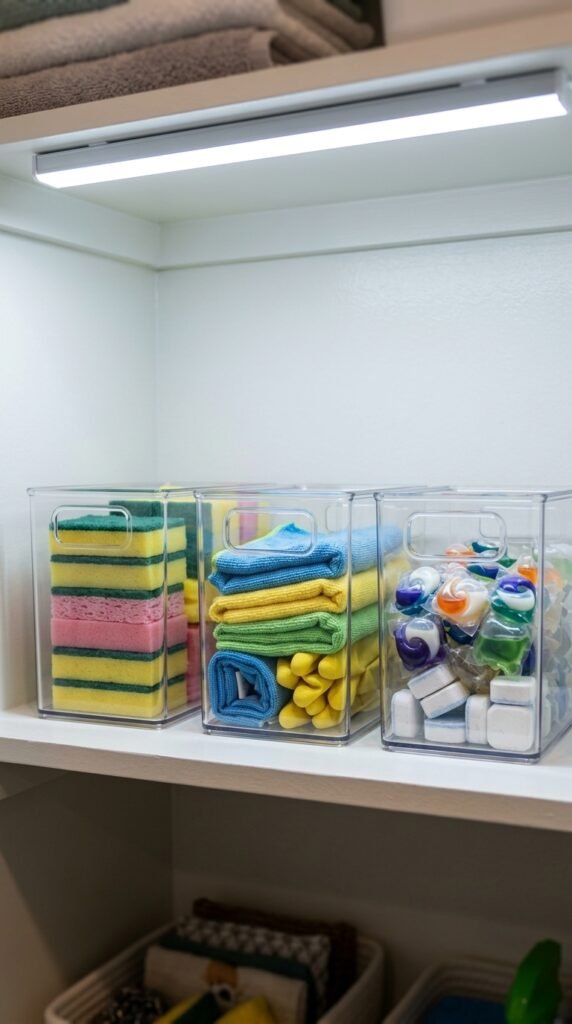
Clear storage bins let you see your inventory without lifting a lid. Group items by category — one bin for sponges, one for gloves, one for pods. When a bin looks low, you know it’s time to restock. Clear bins also help other people in your home find things without asking. A set of three costs $10–$20 depending on size. Use bins with open tops for quick grabs, or lidded ones for items that need to stay dry.
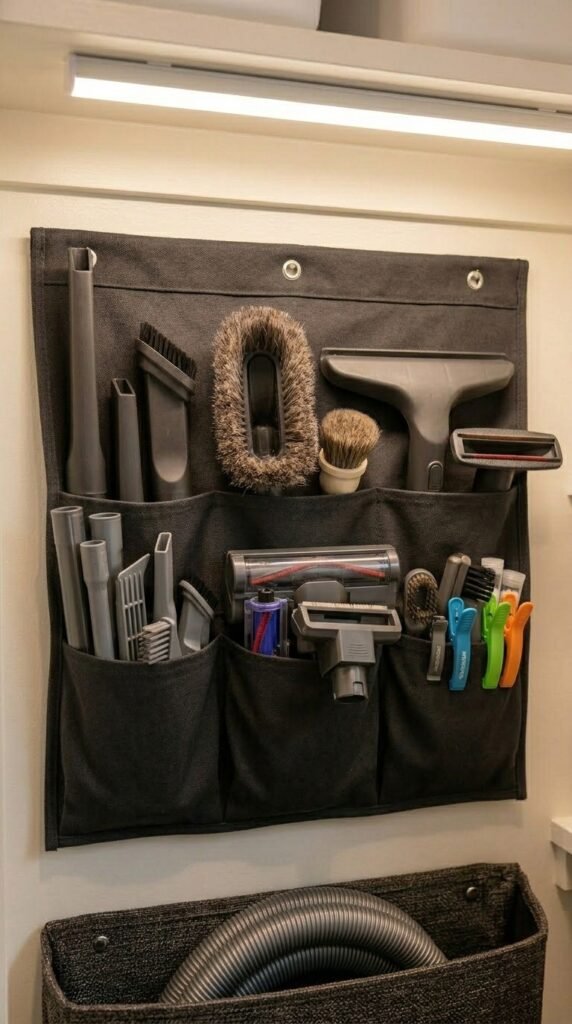
23. Try a Vacuum Attachment Bag on the Wall

Vacuum attachments are awkward to store. They roll around in drawers and fall off shelves. A fabric wall pocket bag mounted inside the closet holds each attachment in its own slot. You can find these for $10–$18. Mount it with two screws and load up each pocket. All your attachments stay visible and ready to grab. No more hunting through a bin trying to find the crevice tool. This is especially helpful if your vacuum lives in the closet too.
24. Use Hooks Behind the Door at Multiple Heights
Most closet doors only get one hook at most. Use multiple adhesive hooks at different heights to create a full vertical storage wall on the door. Hang trash bags at the top, a cleaning spray mid-door, and rubber gloves lower down. Strong adhesive hooks hold a few pounds each and cost about $1–$2 per hook. No holes, no commitment. Space them out so items don’t bump each other when the door closes. Every height has a purpose.
25. Create a Dedicated “Grab and Go” Shelf
Designate the most accessible shelf as your “grab and go” zone. Only the most-used items live here — your everyday spray, paper towels, and your cleaning caddy. When you need to do a quick wipe-down, everything is right there at arm’s reach. This keeps your closet from becoming a free-for-all where everything piles into the most convenient spot. One zone, one purpose. It sounds simple because it is — and that’s exactly why it works.
26. Light It Up with a Battery-Powered LED Strip
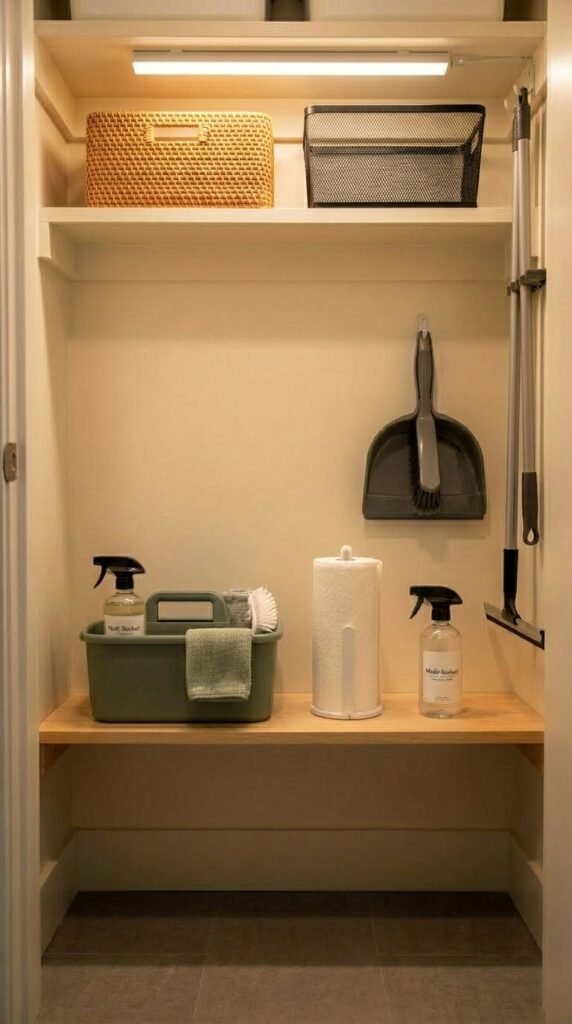
A dark closet hides your organization system. A battery-powered LED strip with adhesive backing changes everything. Mount one under the top shelf and it lights the whole interior when you open the door. Some come with motion sensors that turn on automatically. They cost $10–$20 and install in minutes — no wiring needed. When you can actually see inside, you use the space better. Good lighting is one of the most underrated parts of a well-functioning closet.
Conclusion
A compact broom closet doesn’t have to mean constant clutter and frustration. With smart, affordable tools — wall clips, tension rods, clear bins, and door organizers — you can turn even the tightest space into a system that actually works. Start with just two or three of these ideas this weekend. Pick the ones that solve your biggest pain points first. Once you see how much easier it is to find what you need, you’ll want to tackle the rest. Small spaces reward smart decisions. Your closet is no different.