If your craft room looks more like a storage unit than a creative sanctuary, you are not alone. Most crafters struggle with overflowing supplies, tangled ribbons, and surfaces buried under half-finished projects. The good news is that getting organized does not require a big budget or a professional designer. With a few smart systems and some creativity, you can transform even the smallest space into a room that actually works for you. These 26 craft room organization hacks are practical, affordable, and designed to make your crafting life easier every single day.
1. Use a Pegboard as Your Command Center
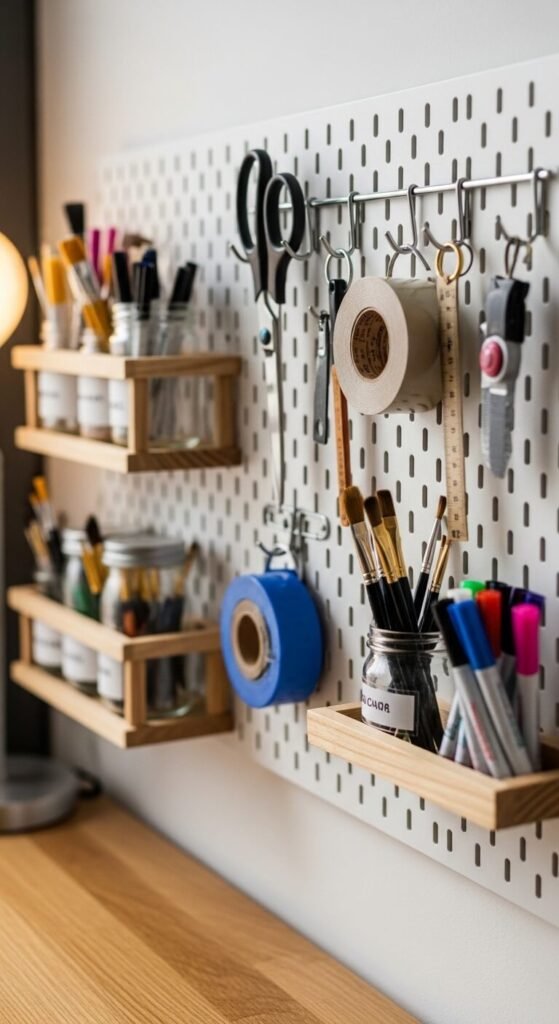
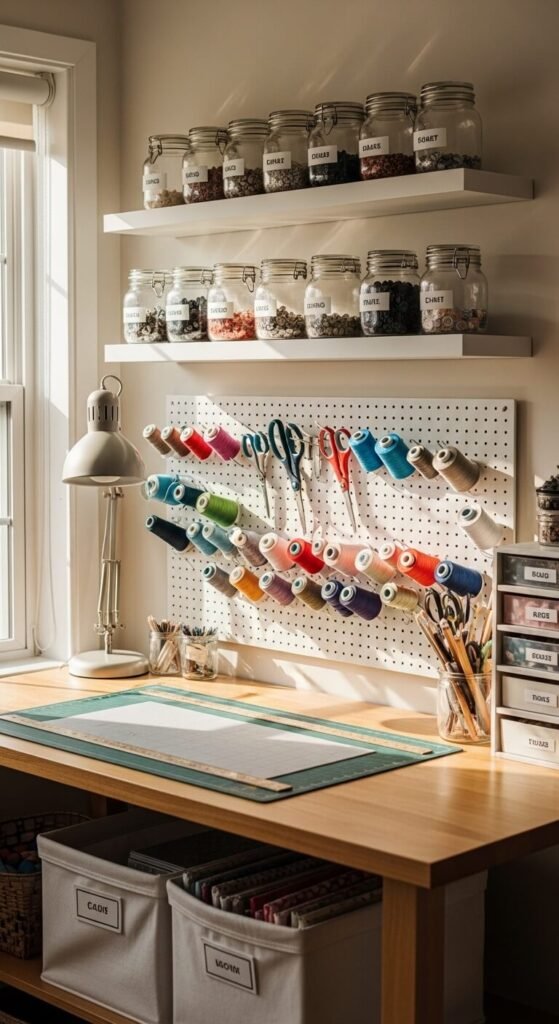
A pegboard is one of the most affordable wall organization tools available. You can find them at any hardware store for under $30. Mount it above your desk and hang everything from scissors to tape dispensers. Hooks are interchangeable, so you can rearrange anytime your workflow changes. Paint it a fun color to match your room. Add small wooden shelves or wire baskets for extra storage depth. It keeps your most-used tools visible and within arm’s reach.
2. Label Everything With a Label Maker
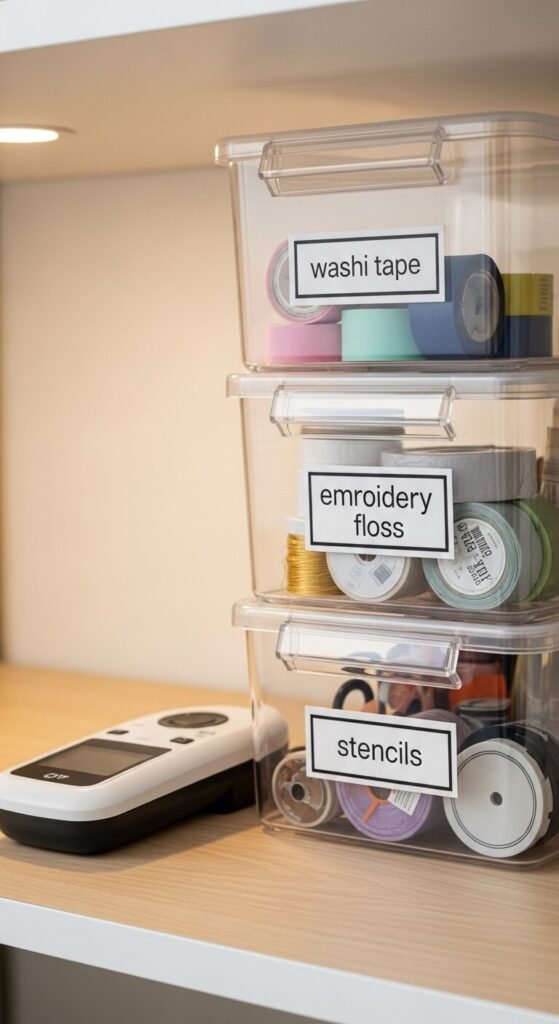
Labels are a game changer. When every bin and drawer is labeled, you stop wasting time searching. A basic label maker costs around $20 and pays for itself quickly. Label the front and top of bins so you can read them from any angle. Use consistent fonts and sizing for a clean look. Even hand-written labels on masking tape work great. The goal is a system where you always know exactly where everything lives.
3. Repurpose a Spice Rack for Small Supplies
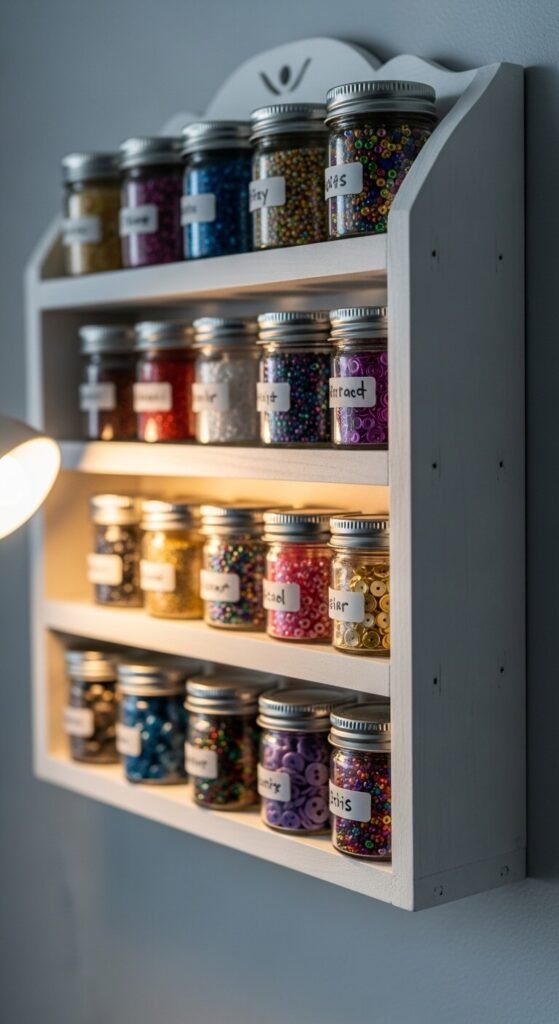
Spice racks are cheap, small, and perfect for tiny craft supplies. Pick one up at a thrift store or dollar store. Mount it on the wall and fill it with small jars of glitter, buttons, beads, or brads. Glass spice jars with lids keep contents fresh and visible. You can see exactly what you have at a glance. This hack works especially well for mixed media artists or scrapbookers who deal with lots of tiny embellishments daily.
4. Store Ribbon on a Towel Rod
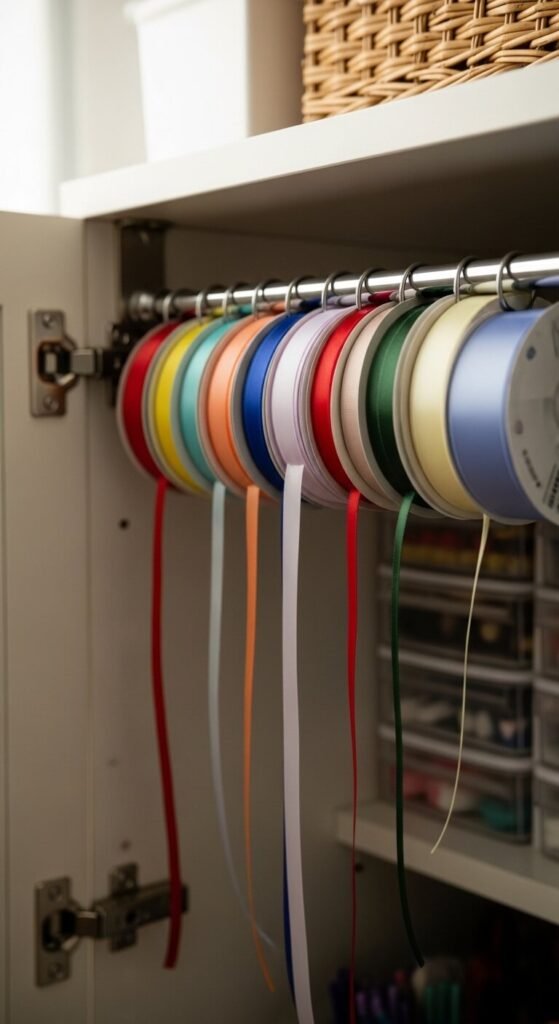
Ribbon storage is a common craft room nightmare. Spools unravel, tangle, and get lost in drawers. A simple towel rod fixes all of that. Mount one inside a cabinet door or on the wall. Thread your ribbon spools directly onto the rod. They spin freely, so you can pull ribbon without unspooling the whole thing. This solution costs almost nothing if you repurpose an old rod. It keeps ribbon tidy, visible, and easy to grab mid-project.
5. Turn a Shoe Organizer Into a Supply Holder
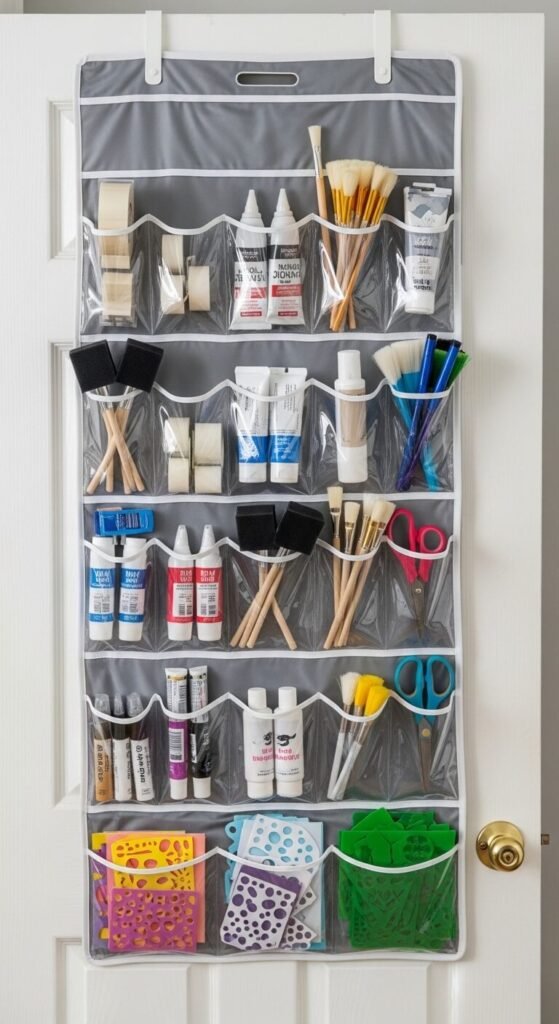
An over-the-door shoe organizer is one of the most underrated organization tools. It holds way more than shoes. Hang it on the back of your craft room door and fill the pockets with supplies. Paint tubes, foam brushes, stencils, and tape rolls all fit perfectly. Each pocket acts like its own mini drawer. A clear organizer lets you see contents without opening anything. You can find them for $10 to $15 at any big box store.
6. Use Tension Rods to Divide Drawers
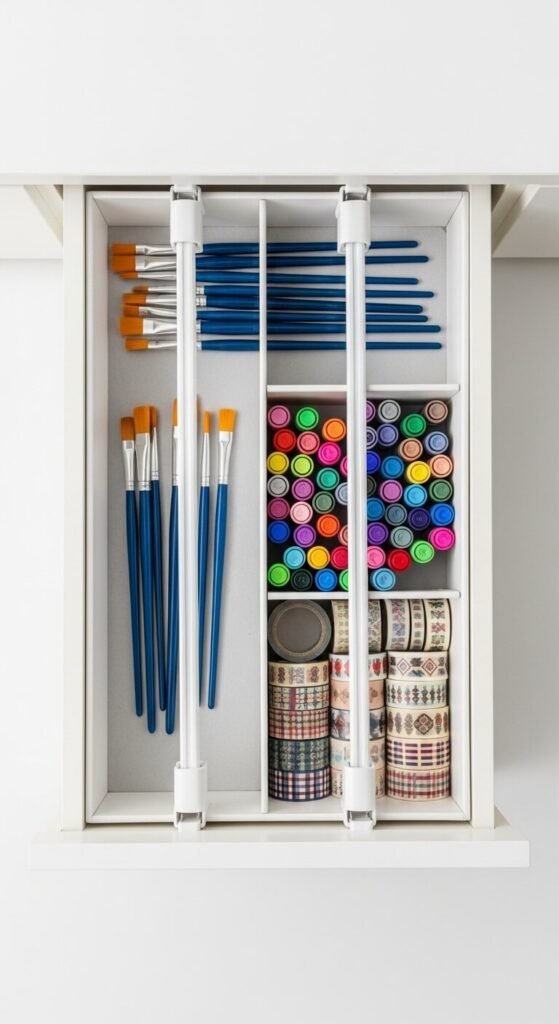
Deep drawers become black holes without dividers. Tension rods are a brilliant, no-drill fix. Drop a few into any drawer to create custom compartments. Adjust them to fit your exact supplies. Use one section for markers, another for brushes, another for rulers. No tools required and no permanent changes to your furniture. You can find tension rods for under $5 each. They work especially well in wide, shallow drawers where everything tends to slide around.
7. Hang a Curtain Rod for Wrapping Paper
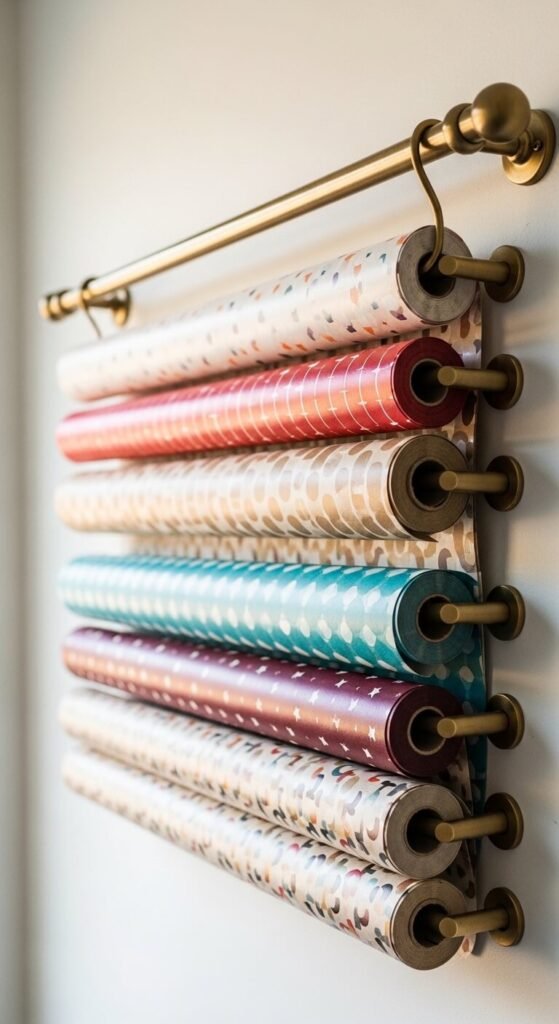
Wrapping paper rolls are awkward to store. They fall over, get crushed, and take up valuable floor space. Mount a curtain rod low on the wall and hang your rolls horizontally. Sort by pattern or color so you can find the right one quickly. This keeps rolls off the floor and out of the way. It costs almost nothing if you already have an extra curtain rod. You can add a second rod above it as your collection grows.
8. Use a Lazy Susan for Supplies on Your Desk
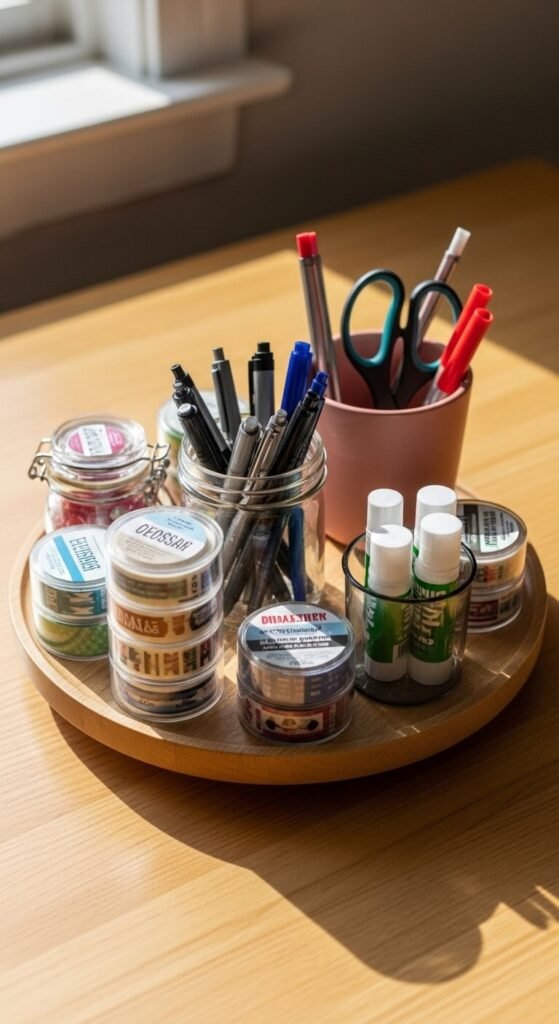
A lazy Susan on your desk means everything spins to you instead of you reaching across your workspace. Group similar supplies together in small cups or jars on the turntable. Scissors in one cup, pens in another, glue sticks in a third. Spin it to grab what you need without knocking other things over. Lazy Susans come in wood, acrylic, or plastic and cost between $8 and $20. They work just as well on shelves inside cabinets.
9. Repurpose a Wine Rack for Yarn Storage

Yarn skeins fit perfectly into wine rack cubbies. If you knit, crochet, or weave, this hack is a must-try. A wooden wine rack from a thrift store costs almost nothing. Roll your yarn into neat balls and stack them by color. It looks beautiful and keeps skeins from tangling. It also doubles as decor. Place it on a shelf, on the floor, or on a countertop. You get storage and a colorful display that makes your space feel intentional.
10. Use Binder Rings to Organize Die Cuts and Templates
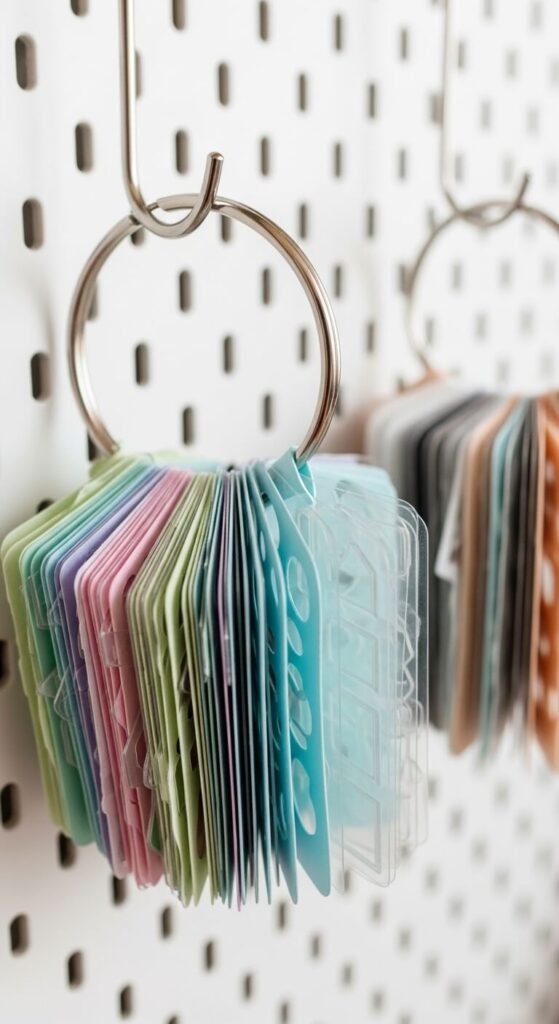
Die cuts and templates pile up fast and are nearly impossible to sort through in a flat stack. Punch a hole in each one and thread them onto a large binder ring. Hang the ring on a pegboard hook or in a binder. Sort by shape type or project category. This method costs almost nothing and makes flipping through your collection fast and easy. You can add or remove pieces anytime. Binder rings come in multipacks for a dollar or two.
11. Install Floating Shelves for Vertical Storage
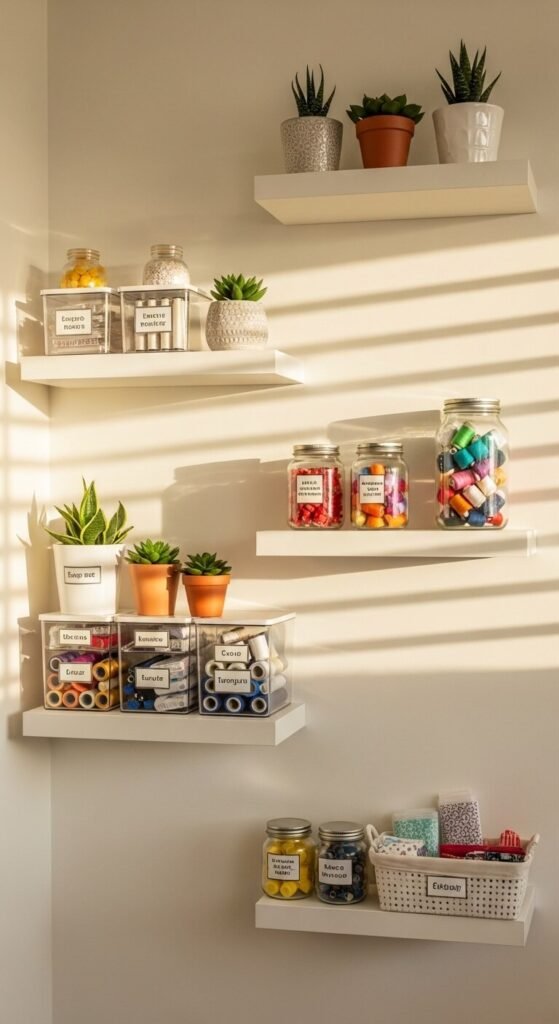
When floor space runs out, go vertical. Floating shelves add significant storage without taking up any floor real estate. Install them at varying heights to accommodate supplies of different sizes. Use the lower shelves for heavy bins and the upper ones for lighter items and decor. White shelves from IKEA cost around $10 to $15 each. Add small baskets or bins to keep things tidy. Floating shelves also make your craft room look clean and intentional rather than cluttered.
12. Store Fabric in a Cube Organizer
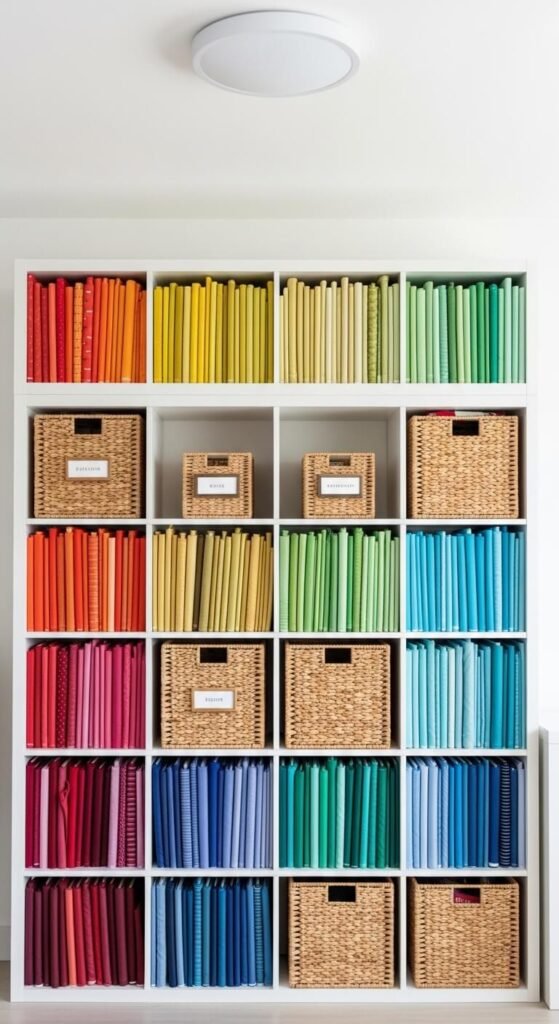
Fabric is one of the hardest supplies to wrangle. A cube organizer solves the problem beautifully. Fold your fabric into uniform squares and store them upright in each cube — like files in a filing cabinet. Organize by color, weight, or project type. You can see every piece without digging. Add small bins in some cubes for notions like thread, buttons, and zippers. A basic 9-cube organizer runs about $40 to $60 and holds a surprising amount of material.
13. Use Ice Cube Trays for Tiny Embellishments

Tiny embellishments are impossible to manage in larger containers. They mix together, get lost, and cause frustration mid-project. Ice cube trays are the perfect solution. Each compartment holds one type of embellishment. Store rhinestones, brads, mini buttons, and charms all in separate cells. Stack the trays in a shallow drawer or on a shelf. A set of clear trays costs almost nothing at the dollar store. You can see exactly what you have without dumping anything out.
14. Create a Mobile Craft Cart
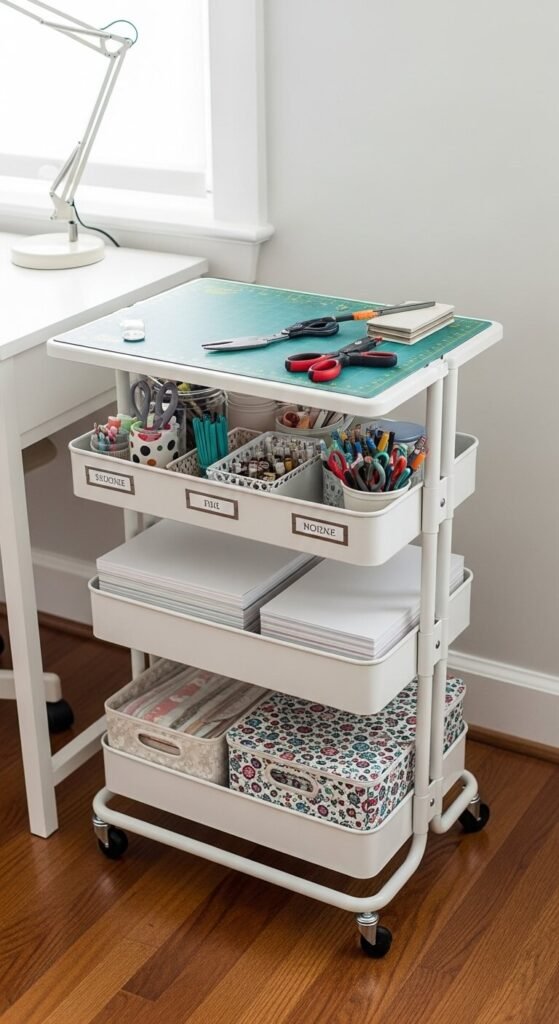
A rolling cart is one of the most flexible organization tools you can own. You can move your supplies to wherever you are working. Use each tier for a different category — one for paper crafts, one for cutting tools, one for adhesives. The ALEX cart from IKEA has become a craft room staple for a reason. It rolls easily, holds a lot, and looks great. When you are done crafting, roll it into a corner and your workspace is clear again.
15. Hang Scissors and Rulers on Magnetic Strips
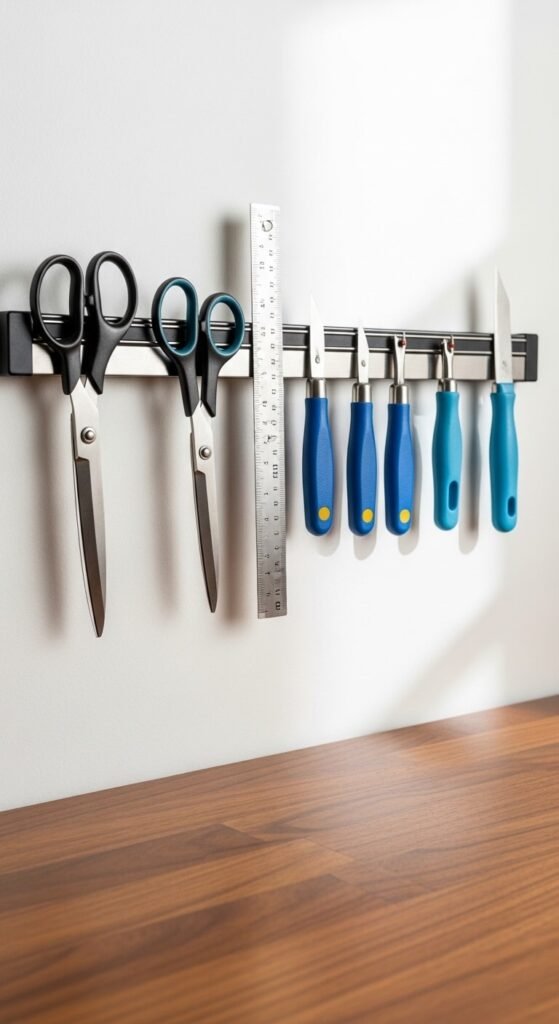
Magnetic knife strips work just as well for craft tools as they do in the kitchen. Mount one on the wall above your desk and attach metal tools directly to the surface. Scissors, rulers, seam rippers, and craft knives all stick firmly. This keeps your most-used cutting tools off the desk and easy to grab. Knife strips cost about $10 to $20 at kitchen stores or online. Your tools are always visible, never buried, and always back in the same place.
16. Use Clear Stackable Boxes for Paper Storage
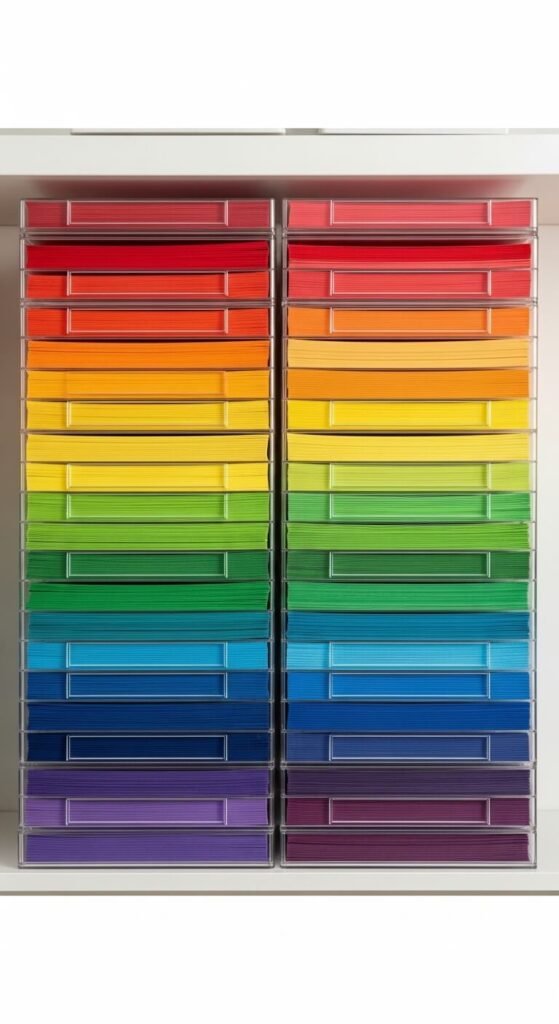
Cardstock and patterned paper are hard to sort through when they are all flat in a stack. Clear stackable boxes let you sort by color and see every sheet immediately. Stand paper sheets upright inside each box for easy flipping. Stack the boxes on a shelf organized by color family. Acrylic options look sleek, but cheaper plastic boxes from IKEA or the dollar store work just as well. This system makes finding the exact paper you need fast and satisfying.
17. Use a Corkboard for Inspiration and Supply Tracking
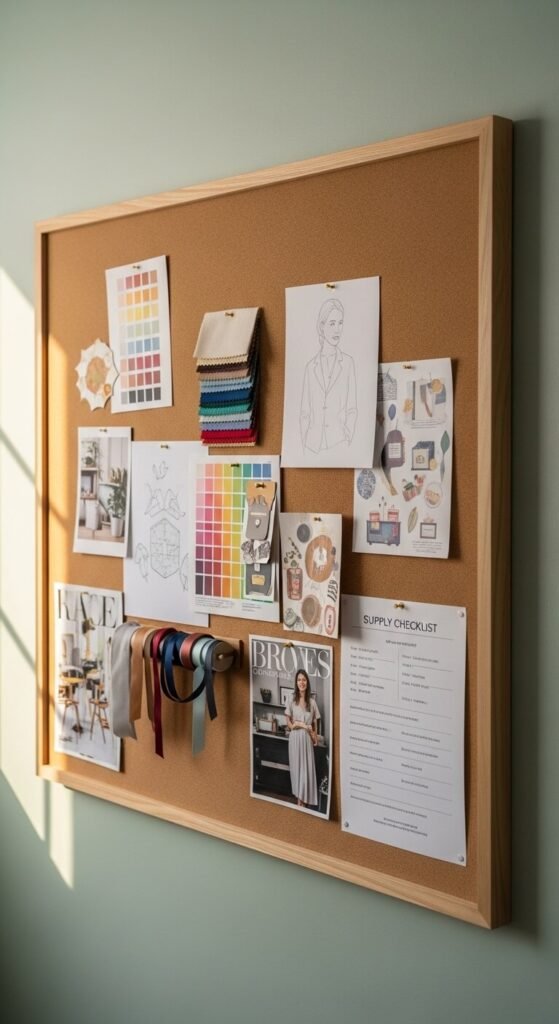
A corkboard is more than a mood board. It is a working tool. Pin current project inspiration alongside supply checklists, fabric swatches, and color palettes. Having your vision in front of you keeps projects moving forward. Use different colored pins for different projects. Add a small envelope or pocket to hold receipts or project notes. Corkboards come in all sizes and frames. A 24×36 inch board costs around $15 to $25. Hang it somewhere you will see it every time you craft.
18. Store Washi Tape on a Paper Towel Holder
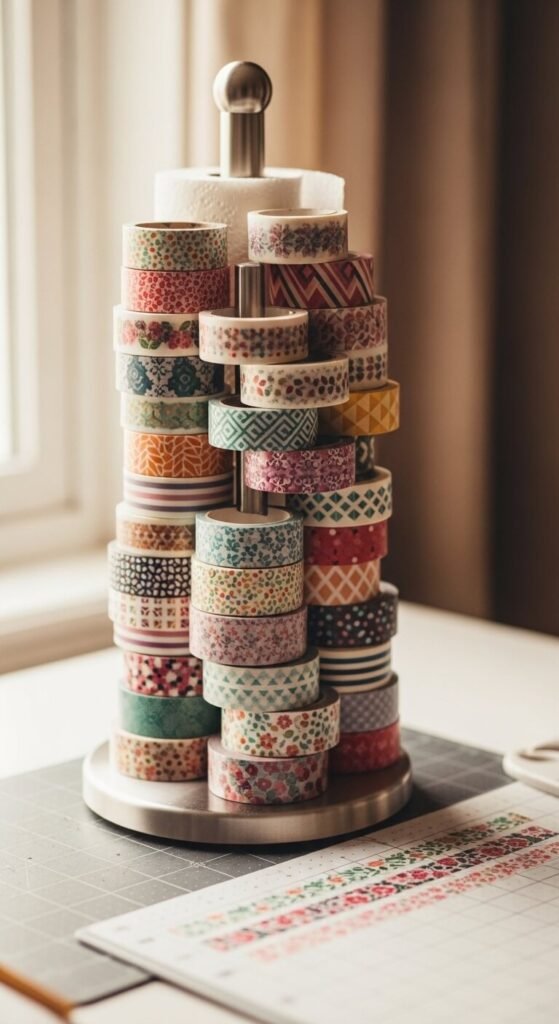
Washi tape is one of those supplies that multiplies fast. Before long you have dozens of rolls and no good way to store them. A vertical paper towel holder is the easiest fix. Stack rolls directly onto the rod. They are all visible, all accessible, and easy to swap out. A countertop holder fits about 20 to 30 rolls depending on their width. This takes up almost zero desk space and costs nothing if you have a spare holder at home.
19. Upcycle Mason Jars for Brush and Pen Storage
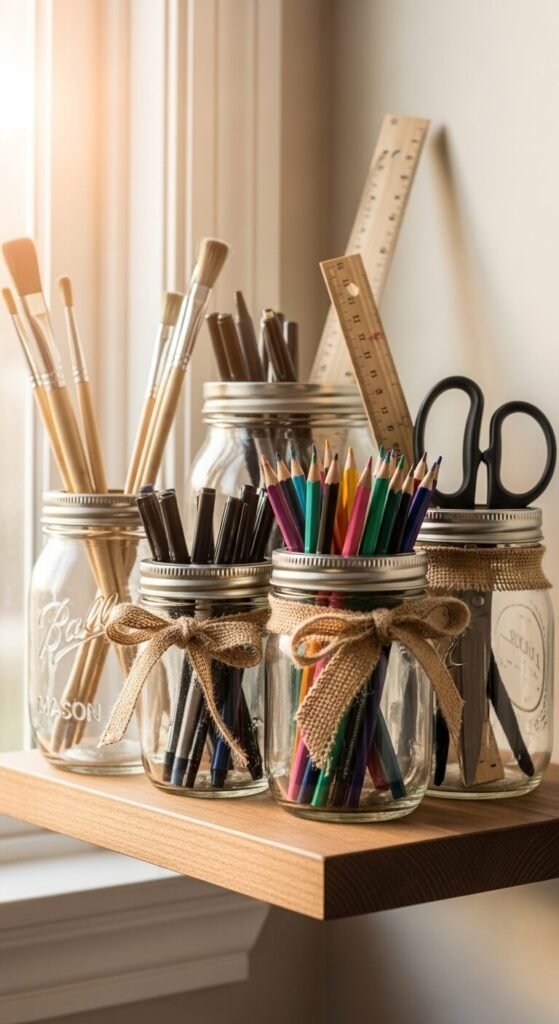
Mason jars are endlessly useful in a craft room. They are free if you save them from the kitchen, or available in bulk for a few dollars. Sort your tools by type — one jar for paintbrushes, one for markers, one for pens. Place them in a cluster on a shelf or your desk. They look charming and keep tools upright and easy to grab. Add a label or decorative ribbon if you want a more polished look. Simple, free, and effective.
20. Use a Fishing Tackle Box for Small Hardware

Fishing tackle boxes were practically designed for craft supplies. The removable trays and adjustable compartments are perfect for small hardware, notions, and mixed media pieces. Use one tray for sewing notions and another for jewelry findings. Most tackle boxes come with multiple trays and a secure latch. You can find decent ones for $10 to $20 at sporting goods stores or online. They stack easily and are portable if you craft in different rooms or take supplies to classes.
21. Create a Dedicated Wrapping Station
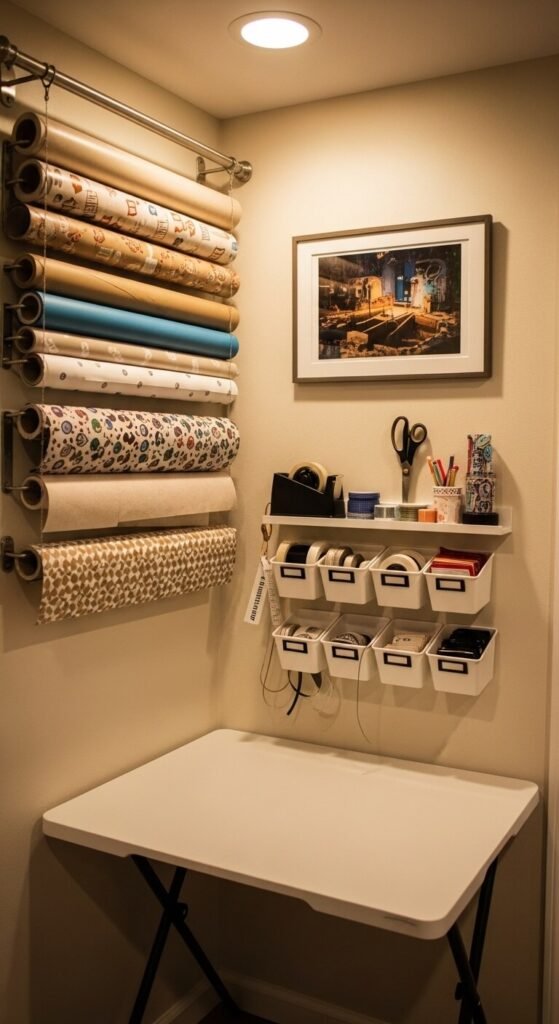
If you wrap gifts and package products regularly, dedicate one small wall or corner to it. Mount a paper rod, add a small shelf for tape and scissors, and hang ribbon on a hook. Having everything in one place means wrapping takes minutes instead of an hour of searching. A built-in wrapping station works in even the smallest rooms. Use the corner of a closet if space is tight. Keep a small trash bin nearby so scraps do not pile up on your work surface.
22. Sort Thread by Color on a Thread Rack
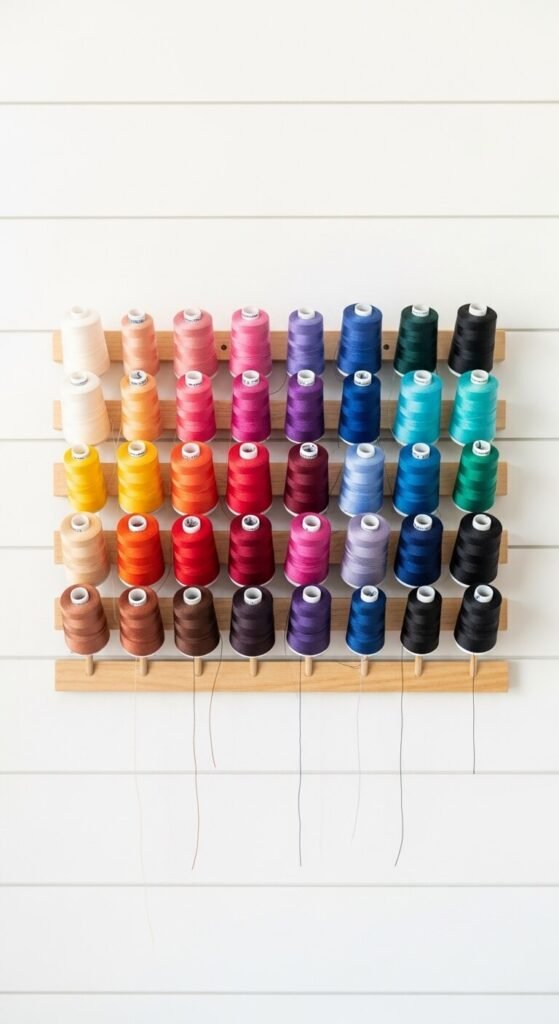
Thread gets tangled fast when stored loose in a drawer. A wall-mounted thread rack solves this completely. Hang spools by color family so finding the right shade is instant. Racks come in wood or acrylic and mount directly to the wall. They range from $15 to $40 depending on spool capacity. This also keeps thread visible so you can see when you are running low on a color. It turns a messy drawer problem into functional, beautiful wall decor.
23. Use a Hanging Jewelry Organizer for Small Tools
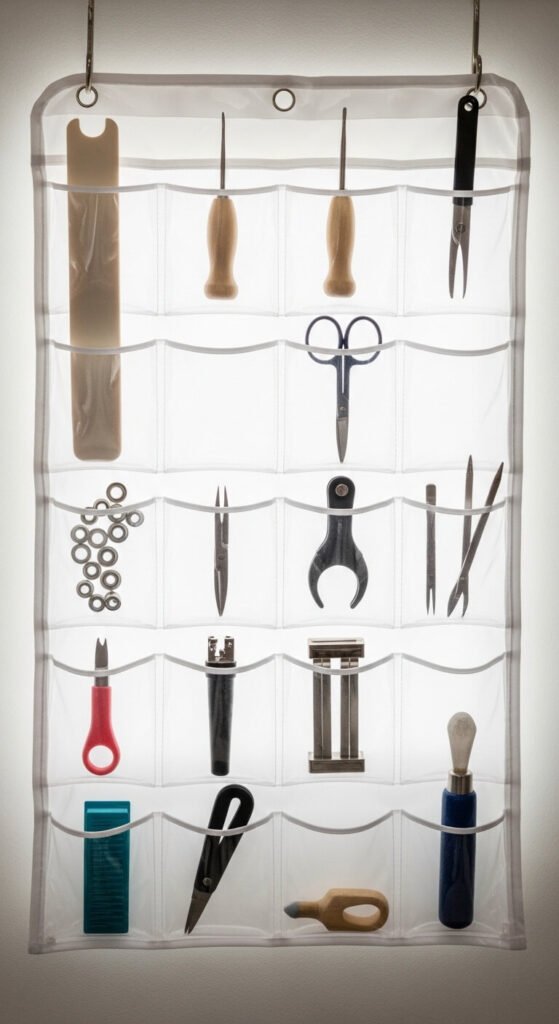
Clear hanging jewelry organizers have small, perfectly sized pockets that work beautifully for craft tools. Hang one on a wall or back of a door. Each pocket holds one type of tool. Bone folders, styluses, awls, heat guns attachments, and small stamps all fit well. Because the pockets are clear, finding what you need takes seconds. You can find these organizers for $10 to $15 at home goods stores. They fold flat for storage if you ever need to reclaim the wall space.
24. Store Paint Bottles Upside Down in a Rack
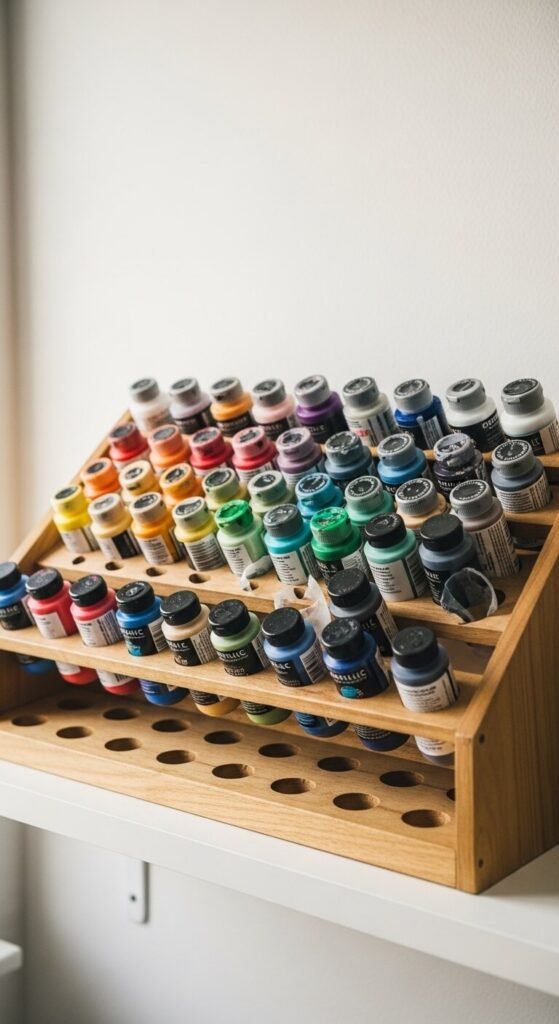
Acrylic paint bottles should be stored upside down so the paint stays at the nozzle and does not dry out near the cap. A tiered paint rack keeps bottles organized by color and makes grabbing the right shade quick. You can buy pre-made wooden racks or make a simple one with scrap wood and some drilling. Labels face outward so you can read them at a glance. This system works for any bottle-style paint including watercolor, fabric, and dimensional paint.
25. Use a Magazine File for Vinyl and Transfer Sheets
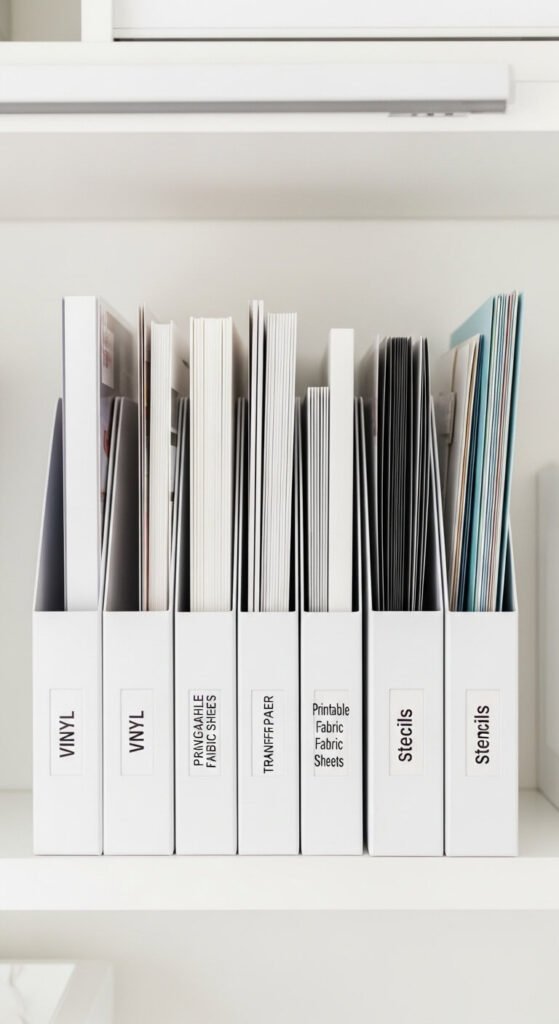
Flat sheets of vinyl, transfer paper, and stencils are notoriously difficult to organize. They slide around, get creased, and resist every bin you try to put them in. Magazine file holders are the answer. Stand sheets upright inside each file, sorted by type or color. Label the spine of each file so you can find what you need from across the room. A set of six white magazine files costs under $15. They sit neatly on a shelf and keep flat materials in perfect condition.
26. Set Up a “Donation Box” to Manage Overflow
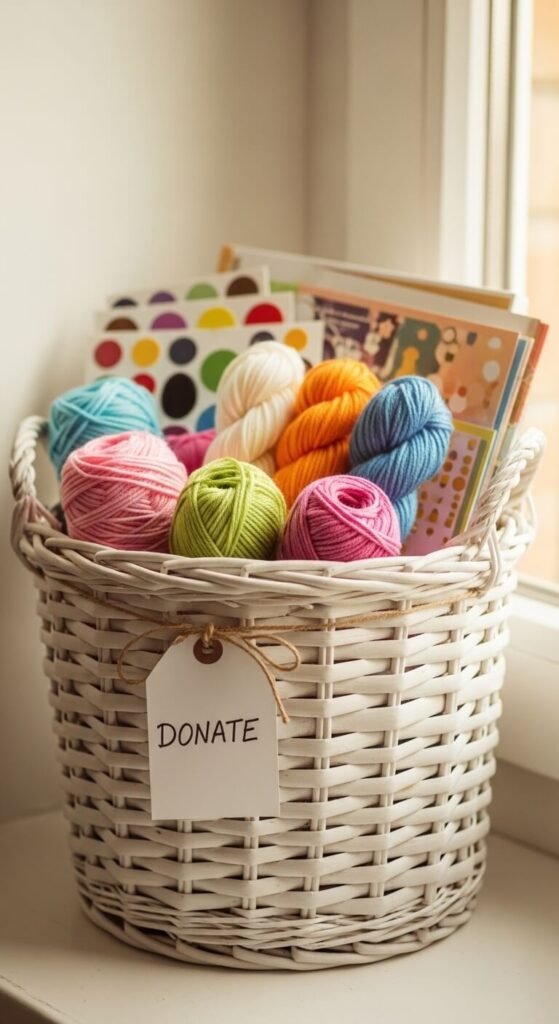
The best organization system falls apart when supplies keep accumulating. Set up a permanent donation box in your craft room for things you no longer use. When it fills up, drop it at a school, community center, or thrift store. This keeps your room from overflowing between deep cleans. Make it a habit to ask yourself when buying new supplies whether something old should leave to make space. A simple basket in the corner is all you need. Edit regularly and your organization system stays working.
Conclusion
Getting your craft room organized is not a one-day project and it does not have to be an expensive one. The hacks in this list prove that a few smart systems — labels, vertical storage, repurposed household items, and dedicated zones — can make a dramatic difference in how your space feels and functions. Start with the areas that frustrate you most, whether that is tangled ribbon, buried paper stacks, or tools you can never find. Pick two or three ideas from this list and put them into action this week. Small changes add up fast, and once your space is working for you instead of against you, you will find yourself crafting more, stressing less, and actually enjoying the room you have built.