
If you’ve ever opened a beautifully organized pantry on Pinterest and felt that mix of admiration and envy, you’re not alone. Label makers have quietly become one of the most satisfying tools in the home organization world. They’re affordable, easy to use, and make almost any space look cleaner, more intentional, and — yes — Instagram-worthy. Whether you’re tackling a cluttered kitchen, a chaotic craft room, or a messy garage, a label maker gives everything a proper home. The projects below cover every room in the house, every budget, and every skill level. Pick a few, grab your label maker, and watch your space transform one sticker at a time.
1. Pantry Jar Labels That Look Like a Pinterest Board
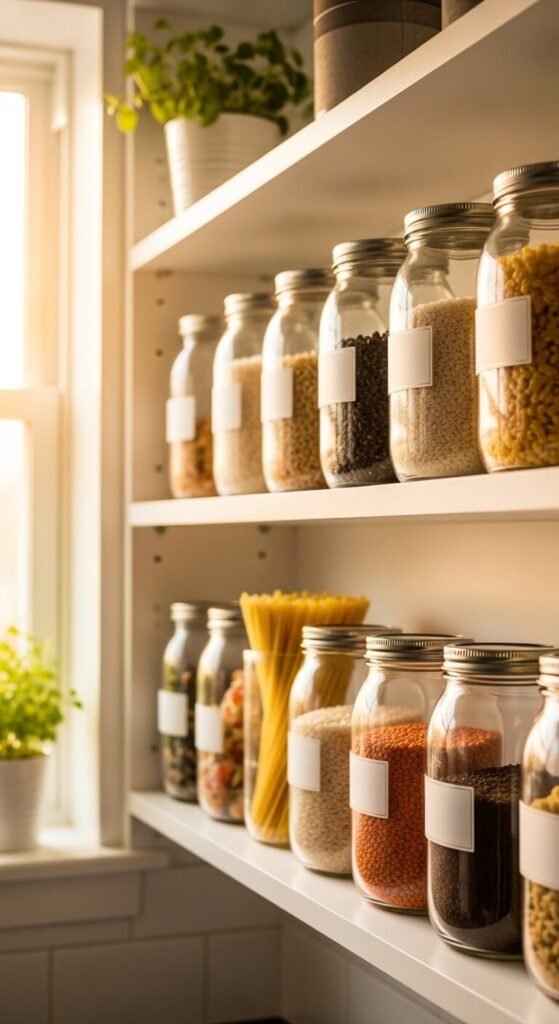
Start with your pantry — it gives you the biggest visual payoff fast. Decant dry goods into matching glass or clear plastic jars, then label each one. Use your label maker to print the ingredient name and, optionally, the expiration date. Uniform containers make your pantry look cohesive even if the jars came from different stores. You can find affordable sets of glass jars at IKEA or Target. The whole project costs under $30 and takes about an hour. Once you’re done, you’ll want to keep it that way.
2. Spice Drawer Organization

A spice drawer is one of those hidden spaces that can look surprisingly satisfying when done right. Label the lids of your spice jars so you can read them at a glance from above. This works especially well if you store spices flat rather than upright. Use a label maker with a smaller font size for a cleaner look on tiny caps. Group spices by category — baking, savory, heat — and label each section with a simple divider tab. Total cost: just your label tape.
3. Kids’ Toy Bin Labels with Picture Icons
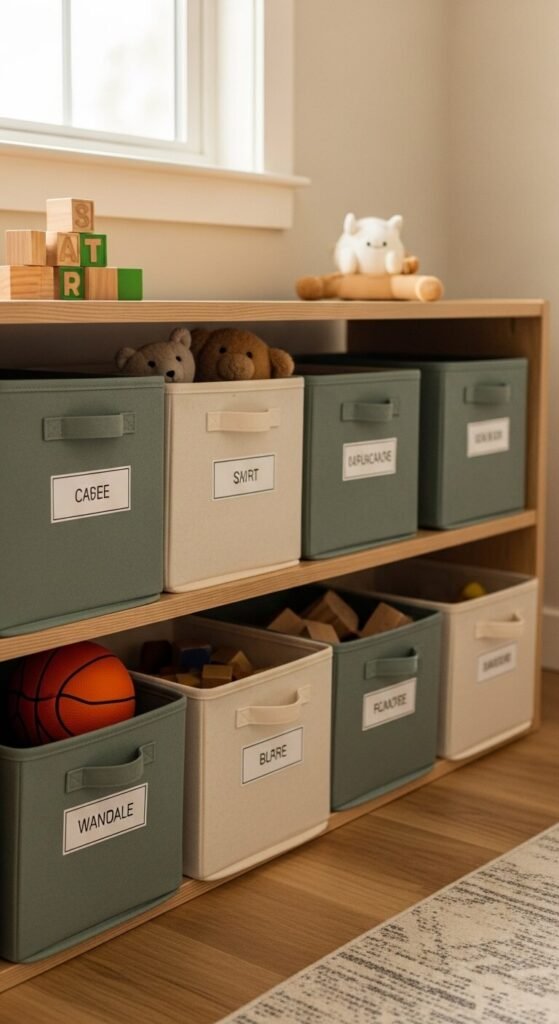
Teaching kids where things go is much easier when the bins are clearly labeled. Add a printed label to each toy bin so even young children know where to return things. You can print the name of the toy category — “Blocks,” “Cars,” “Stuffed Animals” — and stick it right on the front of the bin. Pair it with a hand-drawn or printed icon if your child can’t read yet. This system takes maybe 20 minutes to set up and saves hours of cleanup arguments. It really works.
4. Home Office File Folders and Binders
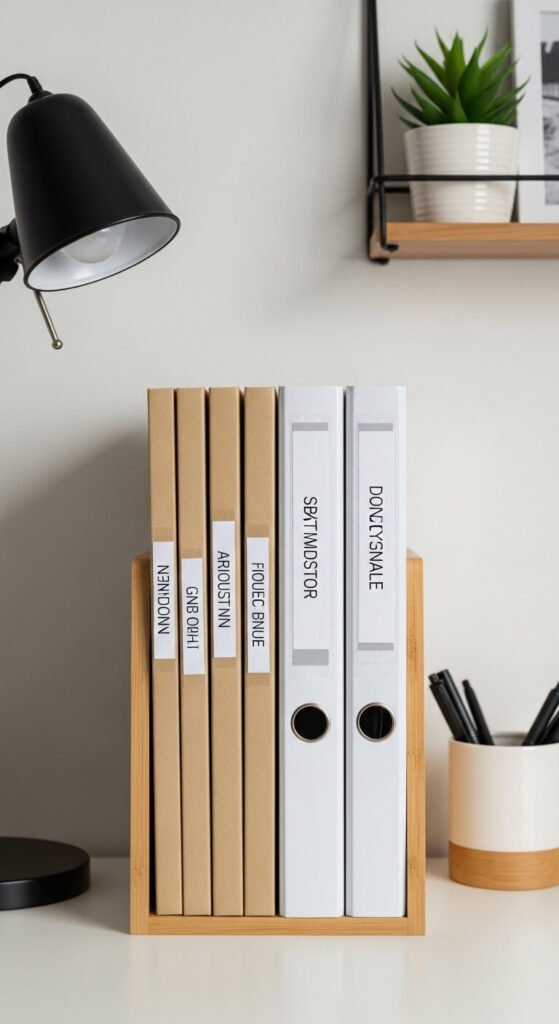
Paper clutter is one of the fastest ways a home office gets out of control. Label every folder, binder, and file box so you can find documents in seconds. Use your label maker to print categories like “Taxes 2024,” “Medical,” or “Car Insurance.” Stick labels on the top edge of folders for easy reading when they’re filed upright. This project costs nothing extra if you already have folders. It takes under 30 minutes and will save you from frantic document searches forever.
5. Bathroom Cabinet and Drawer Labels
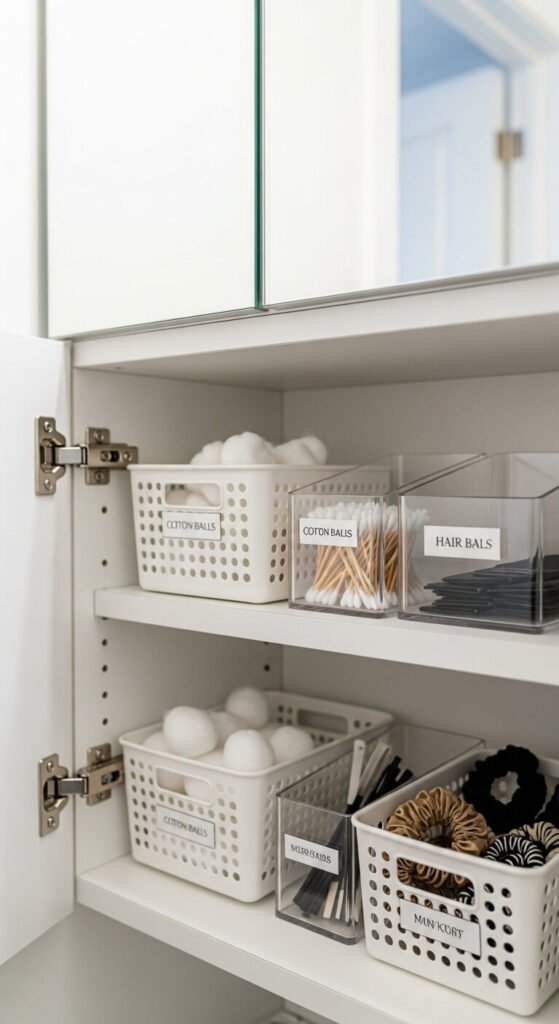
Bathroom cabinets collect clutter faster than almost any other space. Label each basket or bin inside your vanity so everyone in the house knows where things live. Categories like “Hair,” “Skincare,” “First Aid,” and “Extras” work well. Use waterproof label tape if your label maker supports it — bathrooms get humid. Clear acrylic bins from the dollar store or Amazon work great here and let you see the contents. This project takes about 15 minutes and keeps the whole bathroom running smoothly.
6. Laundry Room Supply Bins
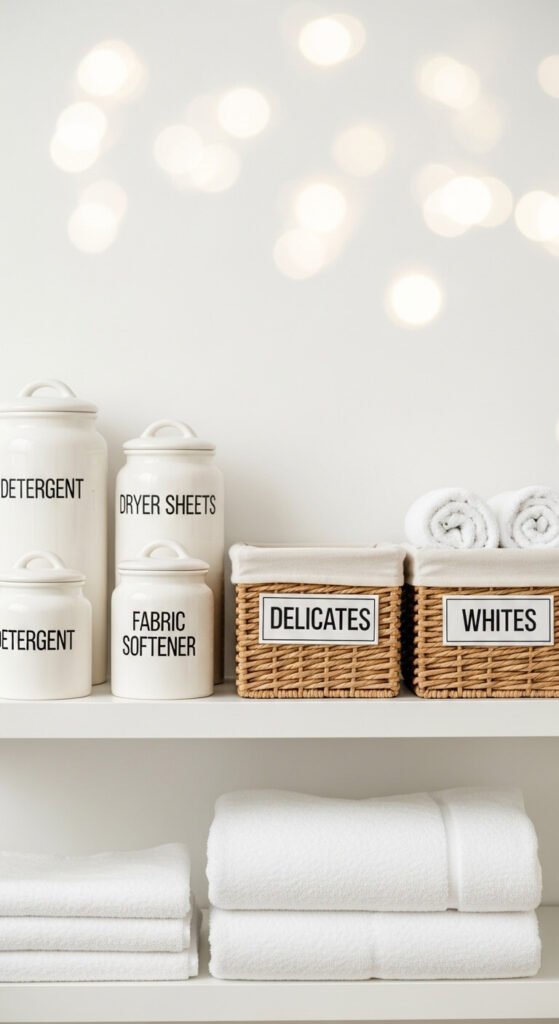
The laundry room is a high-traffic utility space that benefits a lot from clear labeling. Label bins for detergent pods, dryer sheets, stain remover, and lint rollers so everything has a dedicated spot. If you share the laundry space with roommates or family members, labeled bins reduce confusion and keep supplies stocked. Print labels in a slightly larger font for easy reading while your hands are full of laundry. Add a “Low — Reorder” label to a small bin where you move items when you’re running out.
7. Garage Tool and Hardware Organizer
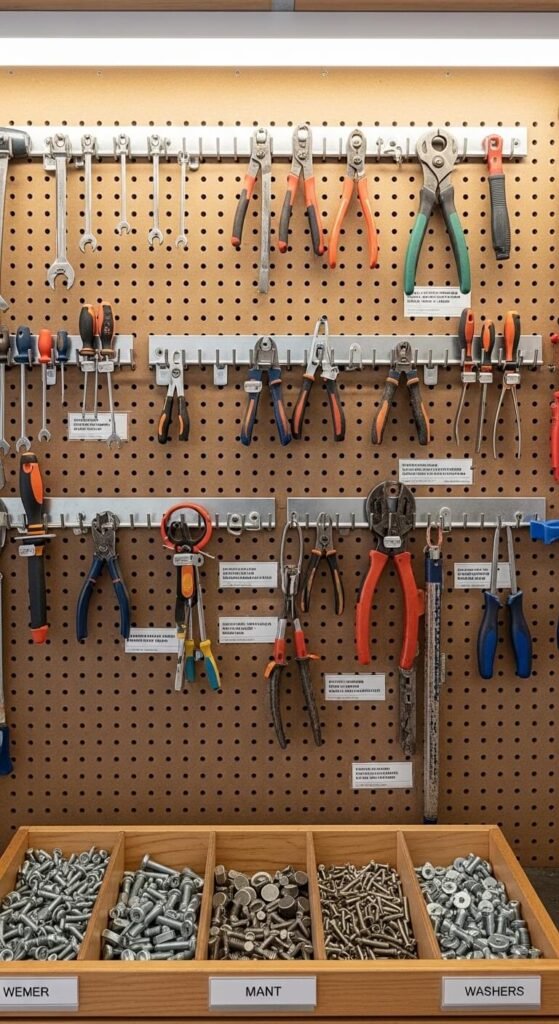
A labeled garage is a genuinely usable garage. Label every drawer, bin, and shelf section in your workspace so you always put tools back in the right place. For small hardware like screws and bolts, use a compartment organizer and label each slot with the size. Print labels for zones like “Power Tools,” “Hand Tools,” “Painting Supplies,” and “Automotive.” This system is especially helpful if multiple people share the space. A few rolls of label tape and an afternoon is all it takes.
8. Craft Room Supply Labels
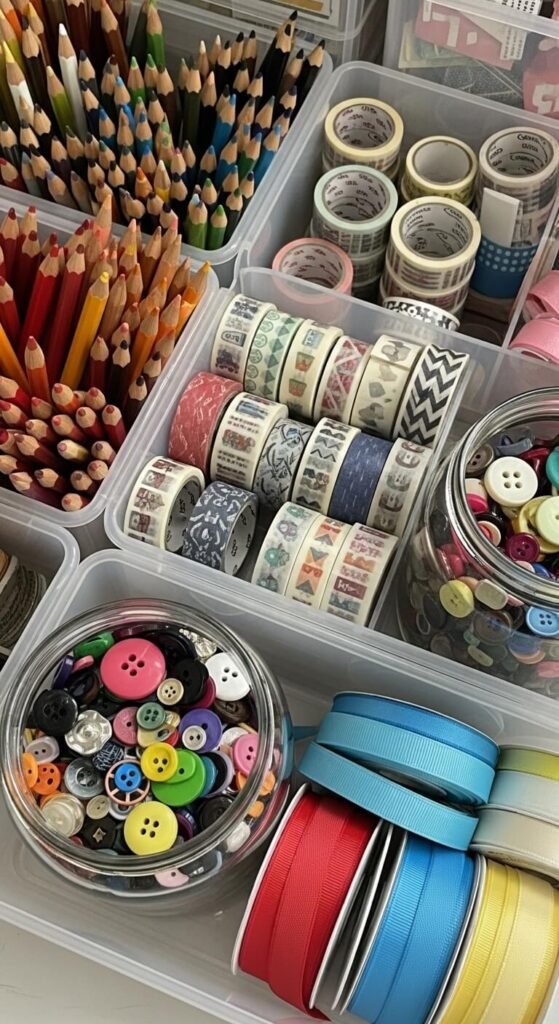
Craft rooms can go from inspiring to overwhelming very quickly. Label every single container — from pencil cups to ribbon rolls to paint jars. Use color-coded label tape to sort by supply type: blue for paper goods, yellow for adhesives, red for tools. This makes it easy to grab what you need mid-project without digging. Clear containers plus clear labels is the winning combo. You can find stackable clear bins at IKEA’s SAMLA range for under $5 each.
9. Refrigerator Shelf and Zone Labels
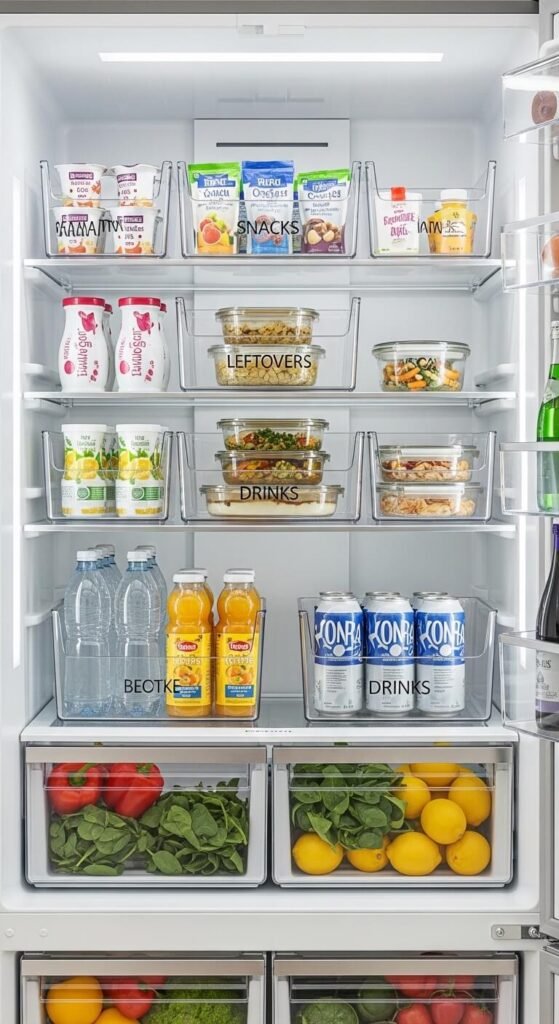
Labeling your fridge sounds simple — and it is — but the results are dramatic. Create zones in your refrigerator using labeled acrylic bins. Dedicate spots for leftovers, grab-and-go snacks, drinks, and meal-prep containers. When everyone in the household knows where things go, food stops getting lost and wasted. Label the front edge of each bin clearly. You can also print small date labels to stick on meal-prep containers so you know exactly when food was made. A great habit, made effortless.
10. Linen Closet Sheet Set Labels
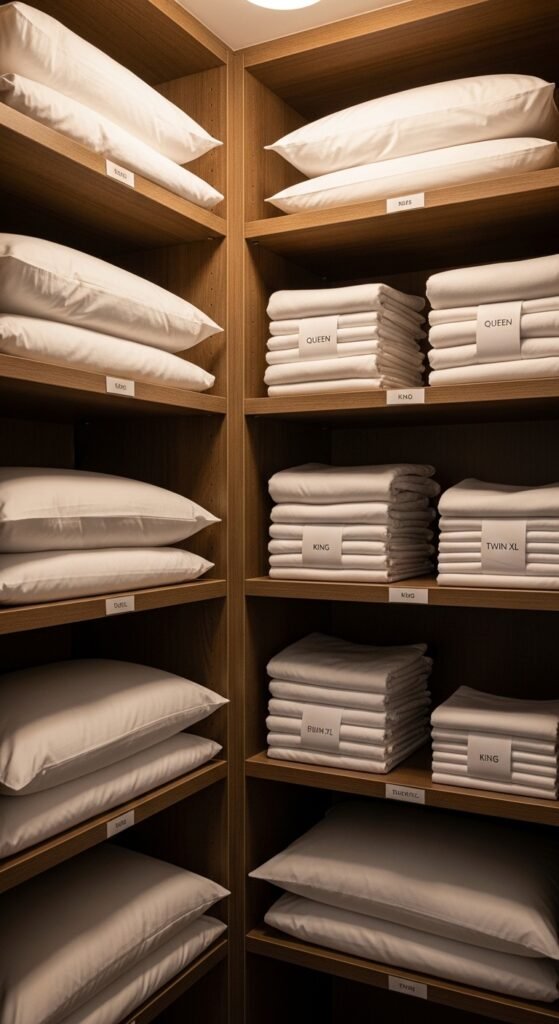
Ever pulled out a sheet set only to find it’s the wrong size? Label each folded sheet set by bed size — Twin, Queen, King, Cal King — so there’s no guessing. Store the flat sheet, fitted sheet, and pillowcases folded together inside one pillowcase, then label the outside. You can also add a label to the shelf edge itself. This project takes minutes and eliminates one of those small daily frustrations. Stack by size, label clearly, and never unfold the wrong set again.
11. Kid’s Clothing Drawer Labels
[Image Prompt: A photograph of a low white dresser in a child’s bedroom with small drawers slightly open, each showing a neat printed label on the drawer front — socks, pajamas, shirts. Soft morning light, pastel-toned children’s items visible inside the drawers, a stuffed bear sits on top of the dresser. Warm and cozy, shot at slight downward angle.]
Getting kids to put away their own clothes starts with making the system obvious. Label each dresser drawer with what belongs inside — “Tops,” “Pants,” “Socks,” “PJs.” Use a large, bold font so even early readers can manage independently. Place the label at the child’s eye level on the drawer front. This builds good habits without nagging. You can also label shelves in shared closets to separate siblings’ belongings. Simple, cheap, and genuinely life-changing for the whole family’s morning routine.
12. Cord and Cable Management Labels
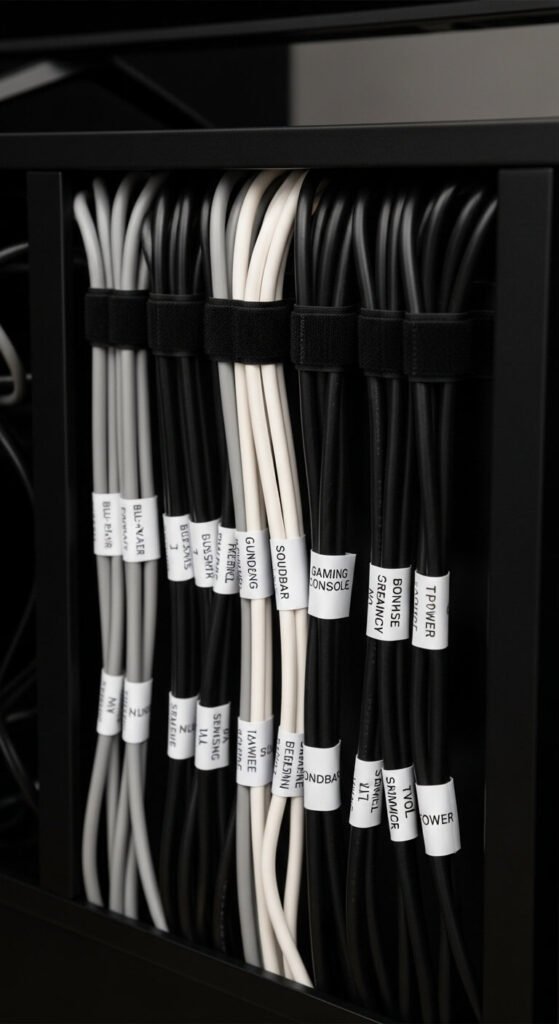
Label every cord behind your TV, desk, or entertainment center. Wrap a small flag label around each cable near the plug so you know exactly what it powers before you unplug anything. Use abbreviations like “TV HDMI 1,” “Gaming,” or “Soundbar.” This is a small project with huge payoff — no more accidentally unplugging the wrong thing. You can also label extension strips at each socket. Spend 20 minutes once and save yourself from cable chaos forever.
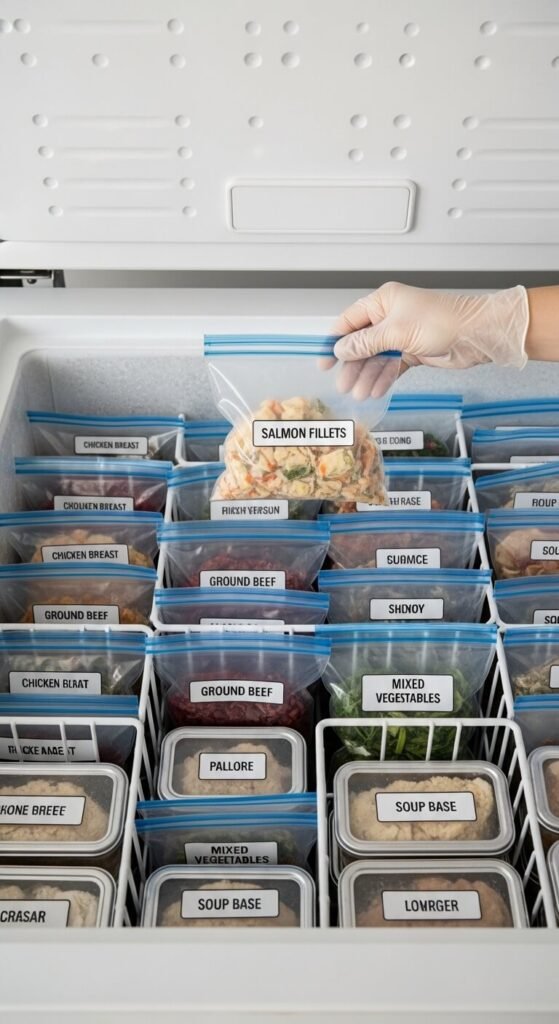
13. Garage Freezer and Chest Freezer Organization

A chest freezer without labels is basically a mystery box. Label every bag and container with the contents and date before freezing. Use freezer-safe label tape or waterproof tape that can handle cold temperatures. Organize by category — meats, vegetables, prepared meals — and label each section with a printed divider card placed in the freezer. Rotate stock by moving older items to the front. This project is free if you already have label tape and will prevent freezer burn waste significantly.
14. Home Medicine Cabinet Labels
A well-labeled medicine cabinet can make a real difference in a stressful moment. Label each bin or section by category: “Pain Relief,” “Cold & Flu,” “Vitamins,” “First Aid,” “Prescriptions.” This keeps things easy to find fast. Check expiration dates while you’re organizing and toss anything outdated. Use a bold font and readable label tape color. If children are in the home, add child safety reminders as needed. This project takes 15 minutes and brings real peace of mind.
15. Pet Supply Station Labels
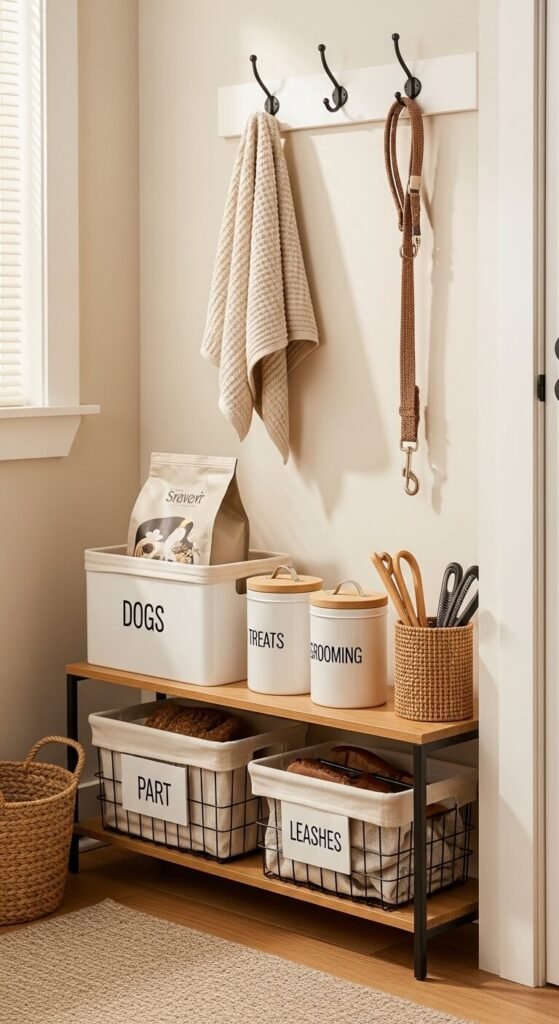
Create a dedicated pet station and label everything in it. Label canisters, baskets, and drawers for food, treats, grooming tools, and medications. If you have multiple pets, label their individual bins clearly. This makes feeding, grooming, and packing for a vet visit much smoother. Store the station near the door or in a utility area. A labeled pet station also helps pet sitters and family members care for your animals correctly when you’re away. Quick, easy, totally worth it.
16. Home Bar and Drink Station Labels
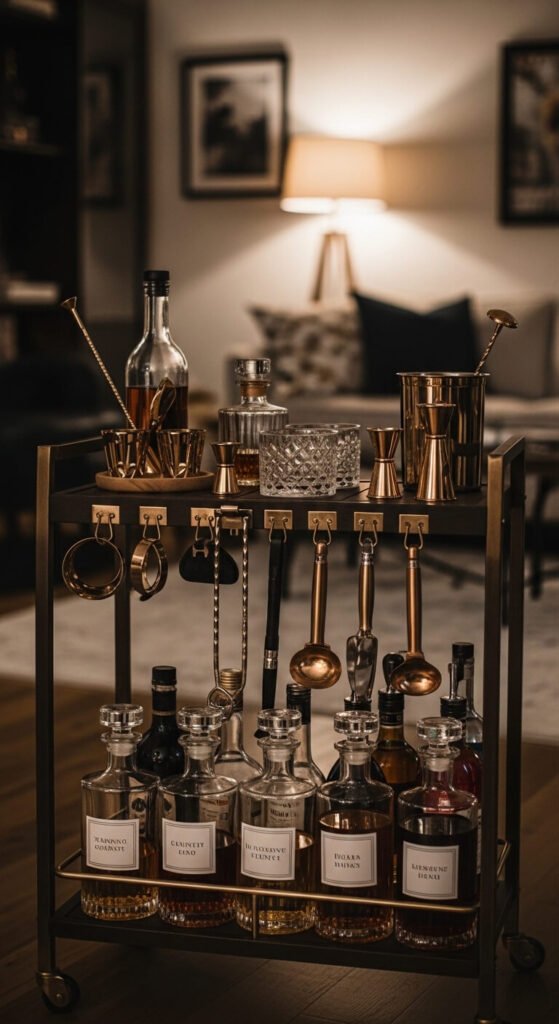
A labeled home bar looks intentional and put together. Print labels for decanters so guests — and you — always know what’s inside. Label drawers for tools like jiggers, muddlers, and corkscrews. Create a small section labeled “Mixers” or “Garnishes” to keep the bar cart tidy. If you use a cart, label each tier. Black or gold label tape on clear decanters looks especially sleek. This project costs nothing if you have the tape and takes about ten minutes.
17. Holiday Decoration Storage Bins
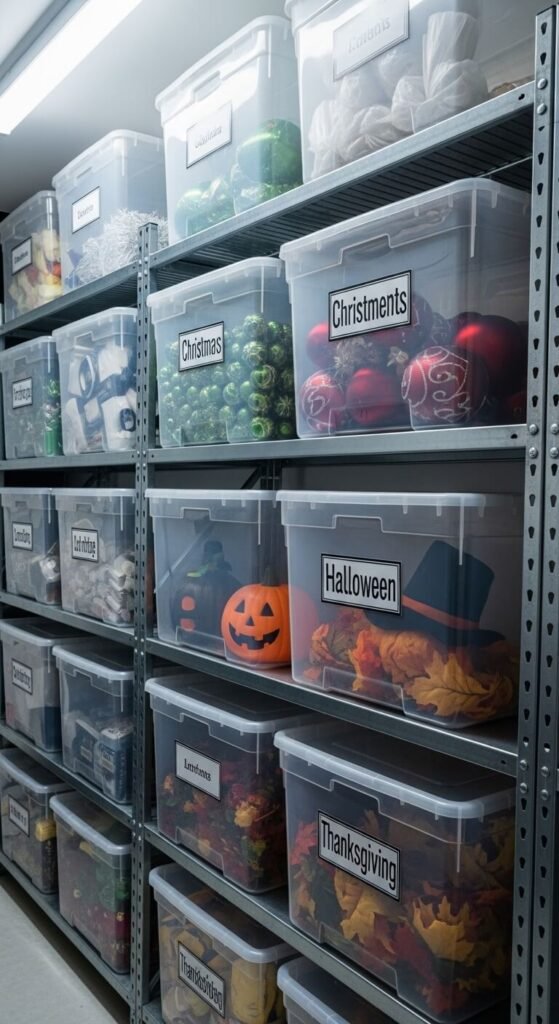
Label every holiday storage bin so you’re not opening six boxes to find the Halloween decorations. Use your label maker to print the holiday name and a brief description of contents — “Christmas — Ornaments,” “Halloween — Costumes & Candy Bowls.” Stick the label on the front and top of each bin for easy reading from any angle. Color-code with different tape colors for each season if your label maker supports it. This small step saves real frustration every time a holiday rolls around.
18. Reading Nook and Bookshelf Genre Labels

Organize your bookshelf by genre and label each section with a printed shelf divider. Cut a piece of cardstock, fold it into an L-shape, and attach your printed label to the front tab. Sections like “Fiction,” “Non-Fiction,” “Reference,” “Cookbooks,” and “Kids” make browsing easy. This is a great weekend project and makes your bookshelf feel like a tiny curated library. It costs almost nothing — just label tape and cardstock you probably already have.
19. Makeup and Skincare Drawer Labels
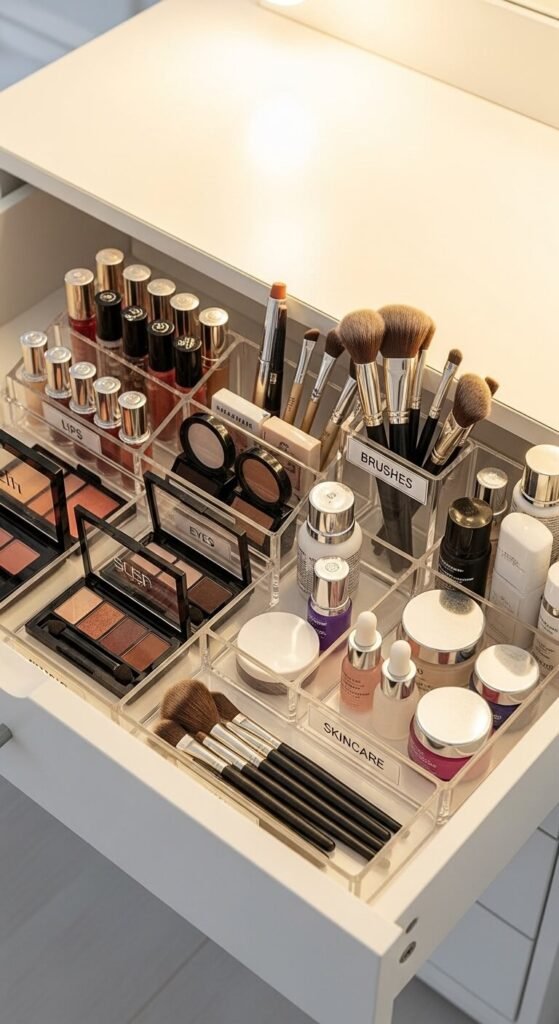
A labeled makeup drawer turns your daily routine from a scramble into something almost enjoyable. Label each compartment in your acrylic organizer — “Lips,” “Eyes,” “Foundation,” “Brushes,” “Skincare.” This removes the morning decision fatigue of digging through products. Clear organizer trays with printed labels look incredibly clean and are easy to photograph for a satisfying before/after. Affordable organizer trays start at around $10. Label, organize, and enjoy the calm of a tidy vanity.
20. Entryway Basket Labels
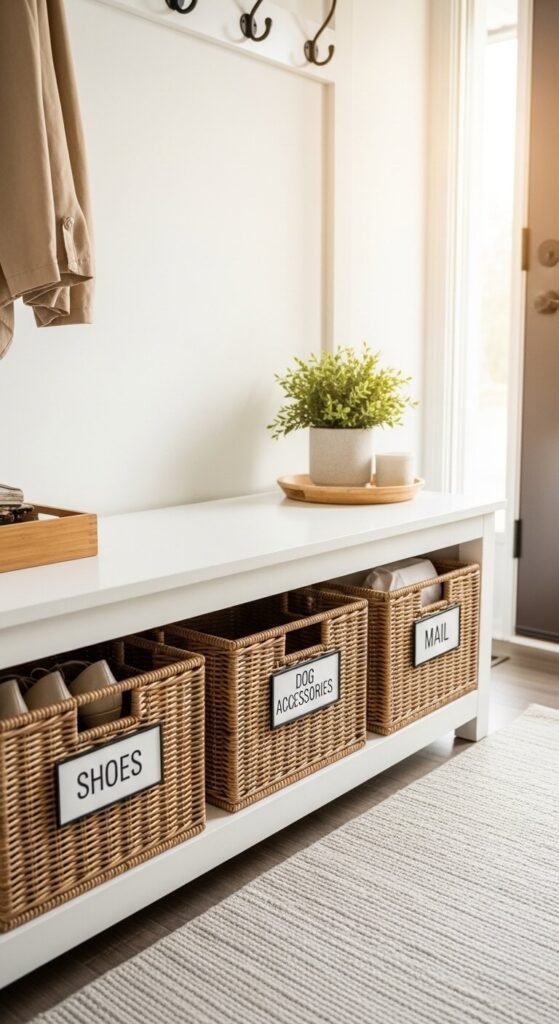
The entryway is the first thing you — and guests — see. Label baskets under your entryway bench for shoes, bags, dog leashes, or mail. This contains the natural clutter that collects near doors. Choose baskets that match your decor and place a simple printed label on the front. Even one labeled basket makes the space look more thought-out. Add a labeled hook rail above for coats, backpacks, and keys. Small effort, big visual impact.
21. Seed and Garden Supply Storage
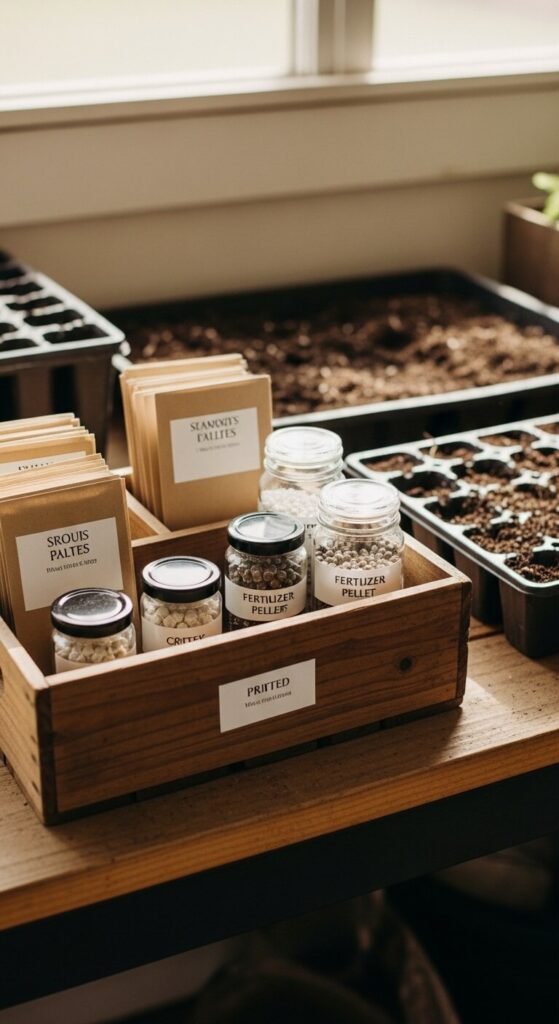
Gardeners know the chaos of unlabeled seed packets and mystery soil bags. Label every seed packet, container, and garden tool in your supply area. Print labels with seed name and planting date, then store packets in a labeled index card box organized by season. Label your fertilizer jars, spray bottles, and tool hooks. A labeled garden station makes every planting session more efficient. This also helps you track what worked and what didn’t season to season.
22. Kids’ Homework and Art Supply Station

A labeled homework station helps kids work independently and clean up after themselves. Label every supply container — crayons, markers, scissors, glue, tape — so kids know exactly where to return things. Use a slightly larger font than usual so the labels are easy to read quickly. Place the station at child height, either on a low shelf or desk. Adding a labeled “In Progress” tray and “Done” tray keeps homework from getting lost. This system works for children of almost any age.
23. Cleaning Supplies Cabinet Labels
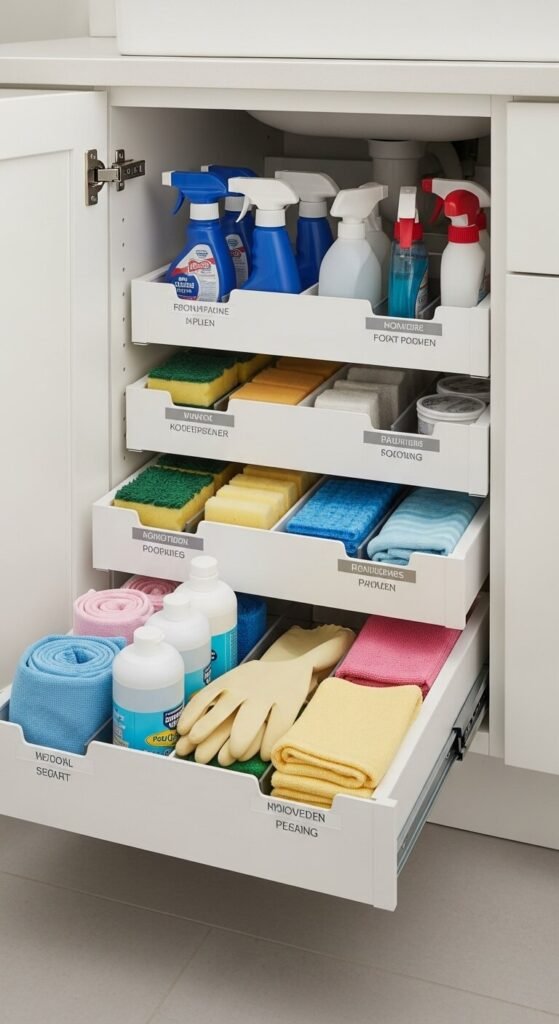
The cabinet under your sink deserves a system. Label bins for each type of cleaning supply — “Bathroom,” “Kitchen,” “Glass,” “Floor,” “Extras.” This way, whoever is cleaning grabs the right product without hesitation. Tuck refill items in a labeled back section. Print a small label for your spray bottles too — especially helpful if you make your own DIY cleaners. This project takes about 20 minutes and makes your cleaning routine faster. Label clearly, stock smartly, and maintain it easily.
Conclusion
Label makers are one of the most underrated tools for home organization. They’re inexpensive, fast, and accessible for anyone — no special skills required. The projects in this list cover every room, every budget, and every lifestyle. Start with one area that frustrates you most. Maybe it’s the pantry, the junk drawer, or the holiday bin pile in your garage. Pick that one spot, label it properly, and watch how quickly the habit spreads to the rest of your home. Organization isn’t about perfection — it’s about making everyday life a little bit easier. A label maker helps you do exactly that.